I spent six years in a tiny IT office listening to people complain about expensive office hardware that sat gathering dust, and if there is one thing I’ve learned, it’s that you don’t need a dedicated scanner to get your life in order. Most “productivity gurus” will try to sell you on a complex ecosystem of hardware and cloud subscriptions just to digitize a few receipts, but honestly, learning how to scan documents with a phone is much simpler than they make it out to be. You don’t need a fancy setup; you just need to know which buttons to press so you don’t end up with a blurry, unreadable mess of a PDF that’s completely useless when you actually need it.
I’m not here to pitch you a premium subscription that locks your files behind a paywall the second you stop paying. Instead, I’m going to walk you through the actual steps for the tools I use, focusing on what is free, what is reliable, and—most importantly—where your files actually go once you hit save. We’ll skip the fluff and get straight to the settings that matter, so you can get back to your day without the digital clutter.
Table of Contents
- The Best Mobile Scanning Apps What They Cost and What They Hide
- Improving Scan Clarity the Settings That Actually Matter
- Five things to do before you hit 'save'
- The three things you should do before you start scanning
- ## The real cost of a "free" scan
- Getting it done and moving on
- Frequently Asked Questions
The Best Mobile Scanning Apps What They Cost and What They Hide
Most people start by looking for the best mobile scanning apps in the App Store, but they usually end up in a subscription trap. Adobe Scan is the industry standard for a reason; it’s reliable and does a decent job of improving scan clarity by cleaning up shadows and edges automatically. However, Adobe wants you in their ecosystem. If you stop paying for their premium tier, you can still access your files, but the seamless integration with their cloud services starts to feel a lot more restricted.
If you want to avoid the subscription headache entirely, you might not even need a new app. If you are scanning documents on iPhone vs Android, the built-in tools are actually quite capable. On an iPhone, the Notes app has a hidden scanner that lets you convert photo to PDF without downloading a single thing. It’s basic, but it works. My rule of thumb: if an app asks for your credit card just to “unlock” the ability to save a file, it’s not a tool, it’s a hostage situation.
Improving Scan Clarity the Settings That Actually Matter
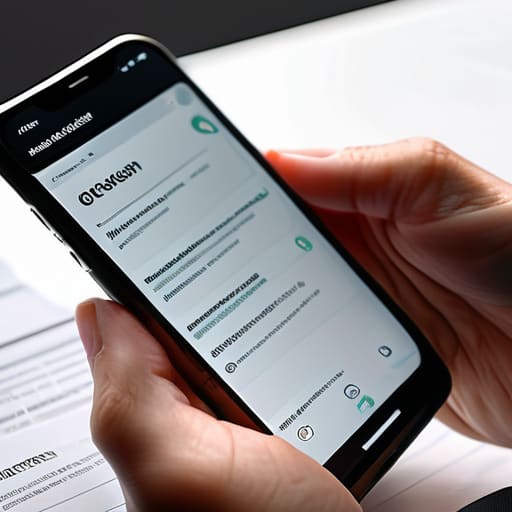
Most people think they need a better camera, but you usually just need to stop fighting the lighting. If your scans look like they were taken in a basement, the first thing to check isn’t your phone model, but your mobile scanner settings. Most apps default to a “magic” auto-enhance mode that tries to be helpful by cranking the contrast, but it often ends up washing out fine text or turning grey backgrounds into a messy, blotchy white. If you’re looking at improving scan clarity, try switching to a “Document” or “B&W” filter manually rather than letting the AI guess. It keeps the edges sharper and prevents that weird, blurry halo effect around letters.
Another thing I learned from years of fixing messy file structures: always check your output format before you hit save. If you want to convert photo to pdf without losing legibility, make sure you aren’t accidentally saving as a low-res JPEG. A PDF is a container; a JPEG is a picture. If you’re managing a serious pile of paperwork, you want those crisp, searchable edges that only a proper PDF scan provides. Also, find a flat surface with side-lighting—never use a flash directly overhead, or you’ll just be fighting glare for the next ten minutes.
Five things to do before you hit 'save'
- Use natural light, but stay away from direct sun. If you’re under a bright desk lamp, you’ll get that annoying glare right in the middle of the text, making it unreadable. A bright room with the curtains open is usually your best bet.
- Clean your lens with your shirt. I know it sounds ridiculous, but most “blurry” scans aren’t caused by bad software; they’re caused by a fingerprint smudge on your camera lens. Give it a quick wipe before you start.
- Watch your shadows. If you’re holding the phone yourself, your hand or the phone itself will likely cast a shadow over the corner of the page. Try to prop the phone up or use a second device to light the area from a different angle.
- Check the file format immediately. If you’re scanning something you need to sign or edit later, make sure you’re saving as a PDF, not a JPEG. A photo of a document is just a picture; a PDF is an actual document.
- Verify the “OCR” actually worked. Most apps claim to have Optical Character Recognition (which turns the image into searchable text), but they often fail on messy handwriting or low light. Try to highlight a sentence in the finished file; if you can’t, the app just gave you a glorified photo.
The three things you should do before you start scanning
Check your storage destination first; if you’re scanning to a cloud service you don’t pay for, those files aren’t actually “yours” once the subscription lapses.
Use natural light but avoid direct sun; shadows are a nightmare to edit out later, and most apps aren’t actually good at “fixing” a bad photo.
Don’t bother with the fancy “AI-enhanced” features unless you’re scanning something illegible; for most receipts and forms, the standard document mode is faster and less prone to weird glitches.
## The real cost of a "free" scan
“A scanning app isn’t really free if it locks your PDFs behind a monthly subscription; the goal is to get the file onto your hard drive, not to become a permanent tenant in someone else’s cloud storage.”
Saoirse Doyle
Getting it done and moving on
At the end of the day, you don’t need a specialized piece of hardware sitting on your desk collecting dust. You just need to pick an app that handles the lighting and edges well, check your settings to ensure the resolution isn’t unnecessarily bloated, and—most importantly—confirm where those files are actually being saved. Whether you go with the built-in Notes app on your iPhone or a dedicated tool like Adobe Scan, the goal is to get the document into a searchable PDF and out of your physical space. Just remember: always read the fine print on those “pro” subscriptions before you hit download, because a digital pile of unorganized scans is just as much of a mess as a drawer full of paper.
I spent years watching people overcomplicate their digital lives because they thought a new tool would magically solve their clutter. It won’t. A scanner is just a way to move information from one place to another; the real work is in what you do once that file exists. Don’t get caught in a loop of searching for the “perfect” workflow or the most feature-rich app on the market. Pick a method that works, finish the task, and get back to your actual life. The best system is always the one that stays out of your way.
Frequently Asked Questions
If I scan something with a free app, will I be able to open that file on my computer later without paying for a subscription?
The short answer is yes, but only if you check the file format before you hit save. Most free apps will let you export as a PDF or JPEG, which any computer can open. The trap is when an app forces you into their proprietary “cloud” format. If you can’t download a standard file to your device, you don’t actually own that scan—you’re just renting it. Always export locally first.
How do I stop my phone from saving every single scan into my personal photo gallery?
It’s a mess, isn’t it? You scan one receipt and suddenly your vacation photos are buried under thirty gray rectangles.
Is there a way to scan multiple pages into one single PDF instead of getting fifty separate image files?
This is the classic “helpdesk headache.” If you just take photos, you’ll end up with a folder of fifty JPEGs that’s impossible to navigate. To avoid this, don’t use your camera app; use a dedicated scanning app like Adobe Scan or the built-in Files app on iPhone. Look for the “Add Page” or “+” icon after your first scan. This bundles everything into one PDF. Just remember: if you use a subscription app to do this, check if they let you export that single PDF for free once your trial ends.
