How to Scan Documents With a Phone and Get a Clean Pdf

I spent six years in a tiny IT office listening to people complain about expensive office hardware that sat gathering dust, and if there is one thing I’ve learned, it’s that you don’t need a dedicated scanner to get your life in order. Most “productivity gurus” will try to sell you on a complex ecosystem of hardware and cloud subscriptions just to digitize a few receipts, but honestly, learning how to scan documents with a phone is much simpler than they make it out to be. You don’t need a fancy setup; you just need to know which buttons to press so you don’t end up with a blurry, unreadable mess of a PDF that’s completely useless when you actually need it.

I’m not here to pitch you a premium subscription that locks your files behind a paywall the second you stop paying. Instead, I’m going to walk you through the actual steps for the tools I use, focusing on what is free, what is reliable, and—most importantly—where your files actually go once you hit save. We’ll skip the fluff and get straight to the settings that matter, so you can get back to your day without the digital clutter.

Table of Contents

The Best Mobile Scanning Apps What They Cost and What They Hide
The Best Mobile Scanning Apps What They Cost and What They Hide

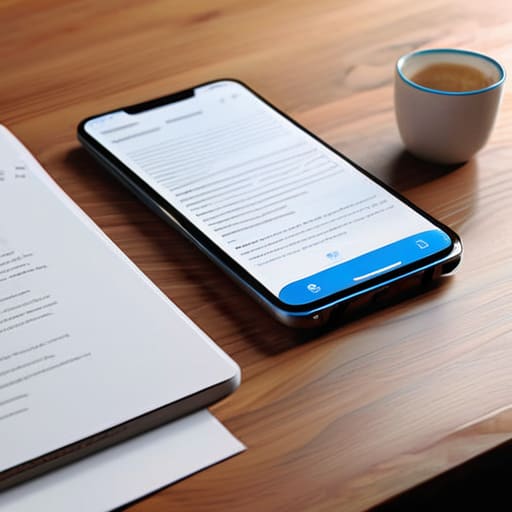
Most people start by looking for the best mobile scanning apps in the App Store, but they usually end up in a subscription trap. Adobe Scan is the industry standard for a reason; it’s reliable and does a decent job of improving scan clarity by cleaning up shadows and edges automatically. However, Adobe wants you in their ecosystem. If you stop paying for their premium tier, you can still access your files, but the seamless integration with their cloud services starts to feel a lot more restricted.

If you want to avoid the subscription headache entirely, you might not even need a new app. If you are scanning documents on iPhone vs Android, the built-in tools are actually quite capable. On an iPhone, the Notes app has a hidden scanner that lets you convert photo to PDF without downloading a single thing. It’s basic, but it works. My rule of thumb: if an app asks for your credit card just to “unlock” the ability to save a file, it’s not a tool, it’s a hostage situation.

Improving Scan Clarity the Settings That Actually Matter
Improving Scan Clarity the Settings That Actually Matter

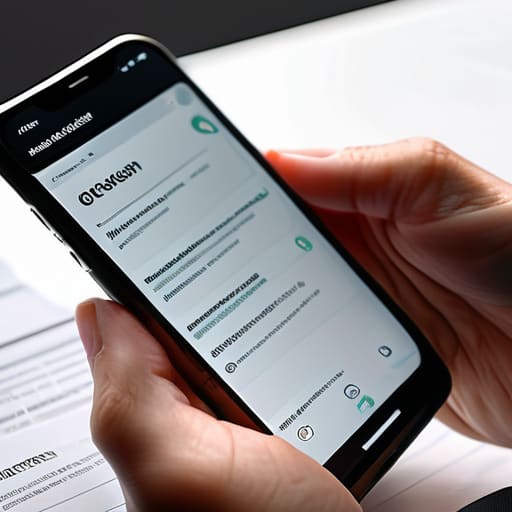
Most people think they need a better camera, but you usually just need to stop fighting the lighting. If your scans look like they were taken in a basement, the first thing to check isn’t your phone model, but your mobile scanner settings. Most apps default to a “magic” auto-enhance mode that tries to be helpful by cranking the contrast, but it often ends up washing out fine text or turning grey backgrounds into a messy, blotchy white. If you’re looking at improving scan clarity, try switching to a “Document” or “B&W” filter manually rather than letting the AI guess. It keeps the edges sharper and prevents that weird, blurry halo effect around letters.

Another thing I learned from years of fixing messy file structures: always check your output format before you hit save. If you want to convert photo to pdf without losing legibility, make sure you aren’t accidentally saving as a low-res JPEG. A PDF is a container; a JPEG is a picture. If you’re managing a serious pile of paperwork, you want those crisp, searchable edges that only a proper PDF scan provides. Also, find a flat surface with side-lighting—never use a flash directly overhead, or you’ll just be fighting glare for the next ten minutes.

Five things to do before you hit 'save'

  • Use natural light, but stay away from direct sun. If you’re under a bright desk lamp, you’ll get that annoying glare right in the middle of the text, making it unreadable. A bright room with the curtains open is usually your best bet.
  • Clean your lens with your shirt. I know it sounds ridiculous, but most “blurry” scans aren’t caused by bad software; they’re caused by a fingerprint smudge on your camera lens. Give it a quick wipe before you start.
  • Watch your shadows. If you’re holding the phone yourself, your hand or the phone itself will likely cast a shadow over the corner of the page. Try to prop the phone up or use a second device to light the area from a different angle.
  • Check the file format immediately. If you’re scanning something you need to sign or edit later, make sure you’re saving as a PDF, not a JPEG. A photo of a document is just a picture; a PDF is an actual document.
  • Verify the “OCR” actually worked. Most apps claim to have Optical Character Recognition (which turns the image into searchable text), but they often fail on messy handwriting or low light. Try to highlight a sentence in the finished file; if you can’t, the app just gave you a glorified photo.

The three things you should do before you start scanning

Check your storage destination first; if you’re scanning to a cloud service you don’t pay for, those files aren’t actually “yours” once the subscription lapses.

Use natural light but avoid direct sun; shadows are a nightmare to edit out later, and most apps aren’t actually good at “fixing” a bad photo.

Don’t bother with the fancy “AI-enhanced” features unless you’re scanning something illegible; for most receipts and forms, the standard document mode is faster and less prone to weird glitches.

## The real cost of a "free" scan

“A scanning app isn’t really free if it locks your PDFs behind a monthly subscription; the goal is to get the file onto your hard drive, not to become a permanent tenant in someone else’s cloud storage.”

Saoirse Doyle

Getting it done and moving on

Getting it done and moving on.

At the end of the day, you don’t need a specialized piece of hardware sitting on your desk collecting dust. You just need to pick an app that handles the lighting and edges well, check your settings to ensure the resolution isn’t unnecessarily bloated, and—most importantly—confirm where those files are actually being saved. Whether you go with the built-in Notes app on your iPhone or a dedicated tool like Adobe Scan, the goal is to get the document into a searchable PDF and out of your physical space. Just remember: always read the fine print on those “pro” subscriptions before you hit download, because a digital pile of unorganized scans is just as much of a mess as a drawer full of paper.

I spent years watching people overcomplicate their digital lives because they thought a new tool would magically solve their clutter. It won’t. A scanner is just a way to move information from one place to another; the real work is in what you do once that file exists. Don’t get caught in a loop of searching for the “perfect” workflow or the most feature-rich app on the market. Pick a method that works, finish the task, and get back to your actual life. The best system is always the one that stays out of your way.

Frequently Asked Questions

If I scan something with a free app, will I be able to open that file on my computer later without paying for a subscription?

The short answer is yes, but only if you check the file format before you hit save. Most free apps will let you export as a PDF or JPEG, which any computer can open. The trap is when an app forces you into their proprietary “cloud” format. If you can’t download a standard file to your device, you don’t actually own that scan—you’re just renting it. Always export locally first.

How do I stop my phone from saving every single scan into my personal photo gallery?

It’s a mess, isn’t it? You scan one receipt and suddenly your vacation photos are buried under thirty gray rectangles.

Is there a way to scan multiple pages into one single PDF instead of getting fifty separate image files?

This is the classic “helpdesk headache.” If you just take photos, you’ll end up with a folder of fifty JPEGs that’s impossible to navigate. To avoid this, don’t use your camera app; use a dedicated scanning app like Adobe Scan or the built-in Files app on iPhone. Look for the “Add Page” or “+” icon after your first scan. This bundles everything into one PDF. Just remember: if you use a subscription app to do this, check if they let you export that single PDF for free once your trial ends.


Stop Looking for a Magic Wand: the Real Impact of Generative Ai on Creative Workflows Is Just More Tools to Break.

I spent six years in IT support watching people buy expensive “solutions” that actually just added three more steps to their morning routine. Right now, the tech world is doing the exact same thing with the hype surrounding the impact of generative ai on creative workflows. You’re being told these tools are going to magically unlock your genius or automate your entire existence, but most of the time, they just feel like another layer of digital clutter you have to manage. I’m not interested in the breathless “game-changer” rhetoric; I want to know if these tools actually shave time off a task or if they just create a new kind of busywork that leaves you staring at a screen wondering where your afternoon went.

If you’re starting to feel like your brain is melting from trying to keep up with every new model release, I suggest stepping back and looking at how you actually manage your time between these tasks. I’ve found that when the digital noise gets too loud, sometimes the best thing you can do is look for ways to simplify your local environment or even find a bit of distraction through a trans escort sunshine coast to help you actually disconnect from the screen for a while. It sounds a bit off-topic, but honestly, preventing burnout is just as much a part of a functional workflow as choosing the right software.

I’m not here to sell you a subscription to a dream. Instead, I’m going to look at how these tools actually slot into a real workday—the parts that are messy, the parts that are fiddly, and the parts that actually work. We’ll talk about where the automation hits a wall, how much these “productivity” suites really cost once the trial ends, and whether adding AI to your process is actually helping you create or just helping you procrastinate.

Transforming Creative Production Cycles Without Breaking Your Process

Transforming Creative Production Cycles Without Breaking Your Process

The idea that we’re all about to be replaced by a prompt is a bit dramatic, but the way we actually spend our Tuesday afternoons is definitely shifting. When I look at how people are transforming creative production cycles, it isn’t about a machine taking the wheel; it’s about offloading the grunt work. If you’re a designer, you probably spend half your life resizing assets or masking backgrounds. Using generative AI tools for designers to handle those repetitive, soul-crushing tasks means you can actually spend time on the concept. It’s less about “magic” and more about reducing the friction between an idea and a finished file.

However, this isn’t a seamless handoff. The real work lies in the messy middle—the human-AI collaboration in art where you have to fight the tool to get it to do exactly what you want. You’ll find that these tools are great at giving you ten mediocre options in seconds, but they are terrible at knowing which one is actually good. You still need the eye to curate, the brain to pivot, and the patience to fix the weird artifacts the AI left behind.

Generative Ai Tools for Designers the Good and the Broken

If you’re looking at the current landscape of generative AI tools for designers, you’ll find a lot of shiny promises and a fair amount of actual friction. On the “good” side, we have AI-driven design automation that handles the soul-crushing grunt work—things like resizing assets for ten different social platforms or removing a distracting background from a product shot. When these tools work, they don’t replace your eye; they just stop you from spending your Tuesday afternoon doing manual labor that feels more like data entry than art.

The “broken” part is usually where the reality of the subscription model hits. Most of these tools are currently in a state of permanent beta, meaning the interface changes every three weeks and the features you rely on might vanish if the company pivots. There’s also the messy reality of the ethical implications of generative AI; using these tools means you’re often operating in a legal gray area regarding training data and copyright. If you start building a workflow around a specific model, you need to be aware that you don’t actually own the underlying logic—you’re just renting a very clever, very expensive way to generate pixels.

Five ways to use these tools without losing your mind (or your data)

  • Don’t let the AI do the thinking; use it for the heavy lifting. If you use it to brainstorm, you’re fine. If you use it to decide the final direction of a project, you’ve stopped being a designer and started being a prompt engineer, which is a much more boring job.
  • Check the “export” rules before you commit. I’ve seen too many people get halfway through a project only to realize the tool’s subscription tier doesn’t allow for high-res vector exports or commercial licensing. If you can’t get your work out of the app, you don’t actually own it.
  • Build a “human audit” step into your workflow. AI is notorious for making things look “almost right” in a way that’s actually quite unsettling. Set a hard rule that every AI-generated element must pass through a manual refinement stage to catch the weird artifacts and logic errors.
  • Watch your file sprawl. Adding an AI layer to your process usually means more iterations and more “version_final_v2_REAL_final.png” files. Keep your AI outputs in a separate folder from your core assets until they are actually vetted, or your project directory will become a graveyard of half-baked ideas.
  • Treat the subscription like a utility, not an investment. These tools change every three months. Don’t get emotionally attached to a specific AI plugin; if a better, cheaper, or more stable one comes along, move your workflow. Just make sure you have a way to download your history before you hit cancel.

The bottom line on AI in your workflow

At the end of the day, these tools aren’t going to magically fix a broken creative process or make a bad idea look good. They are just more software, and like any software, they come with a learning curve, a monthly bill, and the constant risk of output fatigue. We’ve looked at how they can speed up your production cycles and which design tools actually hold their weight versus those that are just shiny distractions. My advice remains the same as it was when I was running that helpdesk: don’t let the tech become the work. Use the AI to handle the repetitive, soul-crushing bits, but keep a very close eye on what happens to your data and your creative agency once you stop paying the subscription fee.

It is easy to feel like you are constantly sprinting just to keep up with the next big update, but you don’t have to adopt everything to be successful. The goal isn’t to become an “AI-powered creator”; the goal is to get your work done so you can actually go live your life. If a tool makes your day smoother, use it. If it just adds another layer of complexity and another $30 a month to your overhead, walk away. Build a workflow that serves you, rather than one that requires you to serve it.

Dns: the Address Book That Quietly Runs Your Internet

I once spent four hours on a Tuesday afternoon troubleshooting a “broken” router, only to realize the company’s default settings were pointing to a dead end. It’s a specific kind of madness: your hardware is fine, your cables are plugged in, and your internet provider says everything is up, yet you can’t load a single page. Most tech blogs will try to explain what is a dns server by throwing a wall of academic jargon at you, making it sound like some mystical, high-level networking ritual. In reality, it’s just the internet’s contact list, and when it fails, it’s usually because someone decided to make a simple process unnecessarily complicated.

I’m not here to sell you a premium subscription to a “smart” DNS service that promises to speed up your life by 0.002 seconds. I’m going to tell you exactly how these servers work, why yours might be acting up, and—most importantly—what to look for before you start paying for “optimized” settings. We’ll stick to the facts: what to click, what actually changes, and how to make sure you aren’t throwing money away on a digital middleman you don’t actually need.

Table of Contents

How Dns Works Without Breaking Your Workflow

How Dns Works Without Breaking Your Workflow

When people ask me how DNS works, they usually expect a lecture on packet switching. They don’t. In reality, you only care about the dns resolution process when it fails and suddenly your browser feels like it’s hitting a brick wall. Under normal circumstances, your computer is performing a tiny, invisible bit of bookkeeping every time you click a link. It asks a server, “Hey, where is google.com actually located?” and the server replies with a string of numbers. This ip address translation happens in milliseconds, so you never notice the heavy lifting being done in the background.

The trick to keeping this from breaking your workflow is understanding where that request actually goes. Most of us rely on the default settings provided by our Internet Service Providers (ISPs). These are fine until they aren’t—usually when they get sluggish or start redirecting your searches to weird ad pages. If you find your connection feeling “stuttery” even when your speed tests look good, it might be time to look at public DNS providers like Cloudflare or Google. They are generally faster and more reliable than the standard setup your ISP hands you, provided you don’t mind them knowing which sites you visit.

Ip Address Translation the Math You Dont Need to Care About

Ip Address Translation the Math You Dont Need to Care About

Look, you don’t need to sit down with a calculator to understand how your computer finds a website. When we talk about ip address translation, we aren’t talking about complex calculus; we’re talking about a simple lookup. Every device on the internet has a specific numerical address, but humans are terrible at remembering strings like `192.0.2.1`. The DNS resolution process is essentially just a high-speed game of “telephone” where your computer asks a series of servers, “Hey, where did this name actually go?” until it gets a number back.

The heavy lifting happens behind the scenes within the domain name system architecture. There are different types of records—like A records for IPv4 or AAAA for IPv6—that act as the specific entries in that digital phonebook. You don’t need to know the math used to route these packets; you just need to know that the system is designed to translate a human-friendly URL into a machine-friendly coordinate in a fraction of a second. If it works, you never notice it. If it fails, you’re staring at a “Server Not Found” error and wondering if you’ve accidentally unplugged your router.

Five ways to stop your DNS from being a headache

  • Don’t just settle for your ISP’s default settings. Most internet providers use DNS servers that are slow, prone to outages, and occasionally track your browsing habits to sell to advertisers. Switching to a third-party provider like Cloudflare (1.1.1.1) or Google (8.8.8.8) is usually just a five-minute configuration change that makes your web browsing feel snappier.
  • If you start seeing “Site cannot be reached” errors but your Wi-Fi is clearly working, try flushing your DNS cache. It sounds technical, but it’s basically just telling your computer to forget its old, potentially broken address book and go get a fresh one. On Windows, you just type `ipconfig /flushdns` into the command prompt and hit enter.
  • Be wary of “free” VPNs that claim to optimize your connection. Often, they are just hijacking your DNS requests to see which websites you visit. If you want privacy, use a reputable service, but understand that you are trading a bit of speed for that layer of protection.
  • If you use a smart home setup, keep your DNS stable. Many cheap smart plugs and bulbs rely on a quick handshake with a server to work. If your DNS is finicky, your “smart” lights might suddenly decide they don’t want to turn on when you walk into the room.
  • Always check the “exit strategy” if you use a paid DNS-based security service. Some companies offer “family-friendly” DNS filtering that blocks adult content at the network level. If you stop paying the subscription, make sure they don’t just leave your connection in a broken state where half your websites stop loading entirely.

The TL;DR on DNS

DNS is just a digital phonebook that turns human-friendly names like google.com into the numbers computers actually use to talk to each other.

When your internet “isn’t working” but your router is fine, it’s often just a DNS hiccup—the translation layer is stuck, not the connection itself.

You don’t need to master the math behind it, but knowing that you can swap your provider (like moving from your ISP to something like Cloudflare) can sometimes fix speed and reliability issues.

The invisible layer

“A DNS server is essentially the internet’s contact list; it’s the quiet, boring piece of infrastructure that translates human names into machine numbers, and you only ever truly notice it the moment it stops working and ruins your entire morning.”

Saoirse Doyle

The bottom line on DNS

The bottom line on DNS explained.

At the end of the day, you don’t need to be a network engineer to understand that DNS is just the middleman doing the heavy lifting so you don’t have to. It translates those messy, numerical IP addresses into the names we actually remember, acting as the invisible glue holding your browsing experience together. Whether you are using your ISP’s default settings or switching to something like Cloudflare or Google to shave a few milliseconds off your load times, the goal remains the same: making sure the connection happens without you having to think about it. Just remember that if your internet feels “down” but your router lights are green, the problem might just be a clogged or misconfigured DNS server rather than a total service outage.

My advice is to let the technology run in the background and stop worrying about the plumbing unless the water stops flowing. We spend so much time hunting for the next “perfect” setup or the fastest piece of hardware, but most of the time, a stable and boring configuration is exactly what you actually need to get your work done. Once you’ve set your DNS and verified it works, close the tab, go make a cup of tea, and get back to whatever it was you were actually trying to accomplish. The internet is complicated enough; your setup shouldn’t be.

Frequently Asked Questions

If my DNS settings are wrong, will my internet actually stop working, or is it just going to be slow?

It’s usually both, but in different ways. If your DNS settings are completely broken, your internet isn’t “down,” but your browser will act like it is. You’ll type in a URL, nothing will happen, and you’ll get a “Server Not Found” error. It’s like having a phone with a working signal but a deleted contact list; you can’t call anyone if you don’t know their numbers. If the settings are just sluggish, everything feels heavy and laggy.

Can I use a different DNS provider (like Google or Cloudflare) on my home router, or do I have to change it on every single device?

You can change it on your router, and honestly, you should. If you update the DNS settings in your router’s admin panel, every device that connects to your Wi-Fi—from your phone to your smart fridge—will automatically use that new provider. It saves you from the headache of configuring every single gadget manually. Just a heads-up: if you ever reset your router to factory settings, you’ll have to re-enter those numbers.

What happens to my connection if the DNS server I'm using goes down for a few minutes?

If your DNS server goes down, your internet isn’t actually “broken,” but it will feel like it is. You can still ping an IP address directly, but the moment you type “google.com,” your browser will throw a “Server Not Found” error because it can’t translate the name into a destination. It’s like having a phone with a working signal but a deleted contact list; you know people are out there, you just can’t call them.

How to Set Up a Smart Speaker and Limit What It Hears

I spent three years at a helpdesk listening to people complain that their “smart” home was actually just a collection of expensive paperweights that refused to talk to the Wi-Fi. The truth is, most people think learning how to set up a smart speaker requires a degree in computer science, but it’s usually just a matter of navigating a poorly designed app and ignoring the unnecessary prompts to join a dozen different marketing lists. I remember sitting on my kitchen floor at 11 PM, staring at a blinking red light on a device that was supposed to make my life easier but was instead making me question my basic intelligence.

In this guide, I’m going to show you the actual, unvarnished way to get things running without the marketing fluff. I’ll walk you through exactly what to click, how to handle the inevitable connection hiccups, and—most importantly—what happens to your data and your privacy once that microphone is live. We aren’t going to talk about how “magical” these devices are; instead, we’ll focus on the boring, practical steps to make sure the tech actually works for you, rather than you working for the tech.

Table of Contents

Guide Overview

Total Time: 15-30 minutes
Estimated Cost: $30-300
Difficulty: Beginner

Tools & Supplies

  • Smartphone or Tablet with camera and Bluetooth enabled
  • Wi-Fi Router with active internet connection
  • Smart speaker device 1 unit
  • Power adapter and cable 1 set

Step-by-Step Instructions

  • 1. First, get the hardware out of the box and find a spot that isn’t right next to your microwave or a thick concrete wall. You want it in a central area where it can actually hear you, but not so close to a window that it’s constantly picking up street noise. Plug it in, wait for the light to pulse or the chime to go off, and then find a power outlet that isn’t already being hogged by a tangle of other cables.
  • 2. Download the specific app for your device—whether it’s Alexa, Google Home, or something else—before you even try to connect the speaker. Don’t bother trying to use a web browser for this; the setup process is almost always designed to live on your phone. Once the app is installed, make sure your phone’s Bluetooth is turned on, because that’s how the app is going to “shake hands” with the speaker for the first time.
  • 3. Open the app and look for a plus sign or a “Set up device” button. The app should automatically scan and find your new speaker. If it doesn’t, don’t panic; it usually just means you need to toggle your Bluetooth off and on again. When it finds the device, it will ask you to connect it to your Wi-Fi. This is the part where most people get stuck, so double-check your password—it’s usually a capital letter or a symbol that you’ve forgotten you added.
  • 4. Once the connection is established, the app will likely start a “software update.” This can take anywhere from two minutes to twenty, depending on how much the manufacturer decided to cram into the initial download. Do not unplug the device while this is happening. If you kill the power during a firmware update, you’re looking at a very expensive, very silent paperweight.
  • 5. Now comes the part where they try to sell you on the ecosystem. The app will ask if you want to enable certain features, link your music accounts, or buy a premium subscription. My advice? Say no to everything that isn’t strictly necessary for the speaker to function. You can always turn these features on later, but it’s much harder to un-clutter your digital life once you’ve given every app permission to track your every move.
  • 6. Test the voice recognition by asking something incredibly simple, like “What time is it?” or “Play some jazz.” If it ignores you, you probably need to adjust the sensitivity in the app settings. While you’re in there, look for the privacy settings and disable the “help improve our service” option—that’s usually just code for “we want to record your snippets to train our AI.
  • 7. Finally, check the subscription status. Most smart speakers work fine with free versions of Spotify or YouTube, but the app will constantly nag you to upgrade to a paid tier. If you decide to pay for a service, remember that your music library isn’t actually yours; if you stop paying the monthly fee, your speaker becomes a very fancy, very quiet clock.

Connecting Smart Speaker to Wifi and the Inevitable Permission Trap

Connecting Smart Speaker to Wifi and the Inevitable Permission Trap

When you get to the part about connecting smart speaker to wifi, prepare for a bit of a dance. Most of these devices use your phone’s Bluetooth to “handshake” with the speaker before passing over your network credentials. If it fails, don’t panic and don’t immediately buy a new one; usually, it just means your phone is on a 5GHz band while the speaker is desperately looking for a 2.4GHz signal. If you get stuck, troubleshooting smart speaker connection issues almost always starts with toggling your phone’s Bluetooth off and on again or moving closer to the router for that initial handshake.

Once you’re online, the app will start asking for permissions like it’s applying for a mortgage. It’ll want your location, your contacts, and access to your microphone. While some of this is necessary for voice assistant configuration—like knowing your zip code for weather updates—it often feels excessive. I always recommend denying access to your contacts unless you specifically want your speaker reading your address book aloud. You can always turn them back on later if a specific feature breaks, but it’s easier to start with a “no” and work your way up.

Voice Assistant Configuration What to Click and What to Disable

Voice Assistant Configuration What to Click and What to Disable

Once you’ve finished the initial setup, the app will likely try to walk you through a “personalized experience.” In plain English, this is a polite way of asking for permission to listen to everything, even when you aren’t talking to it. During your voice assistant configuration, you’ll see a long list of toggles for things like “Personal Results” or “Voice Match.” If you want the device to tell you your calendar events or read your texts, you have to turn these on, but know that it means your data is being processed to build that profile. If you just want to play music and set timers, turn everything else off.

I also suggest going into the privacy settings immediately to look for “Activity History.” Most companies default to saving every snippet of audio they capture. You can usually set this to auto-delete every three or eighteen months, which is a good middle ground. While you’re in there, check the managing smart speaker permissions section to see which third-party apps have access to your microphone. It’s a bit of a chore to click through the menus, but it stops your living room from feeling like a data collection hub.

Five things to do before you stop listening to it

  • Put the thing in a central spot, but not right next to the microwave. I spent three weeks troubleshooting “connection errors” only to realize the kitchen appliances were basically shouting over the speaker every time someone made toast.
  • Check the “Voice History” settings immediately. Most of these devices default to saving every snippet of audio they catch—including the accidental ones—to the cloud. Go into the app settings and turn off “Help improve products” unless you actually want a stranger in a data center hearing your midnight snack debates.
  • Set a “Do Not Disturb” schedule. There is nothing quite as jarring as a smart speaker deciding 3:00 AM is the perfect time to announce a weather update or a random notification. Most apps let you schedule silence; use it.
  • Map out your subscription dependencies. If you’re buying a device that requires a monthly fee to actually use the “smart” features, write down exactly what happens to that hardware if you cancel. Some of these become very expensive, very quiet paperweights the moment the credit card expires.
  • Create a guest network for your smart home stuff. If you’re tech-savvy enough to care, put your speakers on a separate Wi-Fi band. It keeps your main computer and your private files tucked away on a different lane, so a cheap, poorly secured smart plug isn’t a doorway into your personal life.

The bottom line

Don’t let the setup process trick you into a subscription you don’t need; if the app asks for a monthly fee just to use basic voice commands, walk away.

Your privacy settings are not “set and forget”—go back into the app once a month to make sure a software update hasn’t toggled your microphone or location sharing back on.

A smart speaker is only as good as your Wi-Fi; if it spends half its time “thinking,” it’s usually a signal strength issue in that room, not a fault with the device itself.

The real setup process

Setting up a smart speaker isn’t actually about the hardware; it’s about deciding exactly how much of your personal data you’re willing to trade for the convenience of not having to flip a light switch.

Saoirse Doyle

Before you walk away

Check settings before you walk away.

So, you’ve plugged it in, navigated the permission minefield, and hopefully turned off the settings that make you feel like you’re being watched. To recap: keep your Wi-Fi credentials handy, be prepared to say “no” to half the data-sharing prompts during setup, and most importantly, check the subscription fine print before you get too comfortable. If you decide in six months that you’re tired of the device eavesdropping or just don’t want to pay the monthly fee for premium features, make sure you know exactly how to export your history or wipe the device. It’s much easier to manage the exit strategy now than it is when you’re staring at a bricked device and a recurring charge on your bank statement.

At the end of the day, these gadgets are supposed to be tools that make your life slightly more convenient, not additional chores on your to-do list. If your smart speaker ends up just being an expensive paperweight because the setup was too fiddly or the privacy trade-off felt too high, that’s perfectly fine. Technology should serve you, not the other way around. Once you’ve got the basics running and the unnecessary nonsense toggled off, you can finally stop tinkering and get back to your actual life. Whether that’s listening to a podcast or just enjoying the silence, the goal was always to make the tech disappear into the background.

Frequently Asked Questions

What happens to my recorded voice clips if I decide to cancel the subscription or stop using the device?

Here’s the thing about your voice data: if you stop paying for a premium tier, you usually don’t lose the clips themselves, but you do lose the “smart” features that make them useful. If you ditch the device entirely, most companies keep your history on their servers indefinitely unless you manually go into the privacy settings and hit “delete all.” Don’t assume walking away means they’ve forgotten you. Go in and wipe the slate clean first.

Can I set this up without giving the app access to my entire contact list and location?

Short answer: Yes, but the app will act like it’s having a minor crisis.

If my Wi-Fi goes down, does the speaker become a very expensive paperweight, or can I still use it for basic things?

The short answer is: yes, it becomes a very expensive paperweight. Most smart speakers are essentially just glorified microphones that send your voice to a server to figure out what you’ve said. If that server can’t talk to your router, the speaker has nothing to do. You can’t even ask it for the time. If you want something that works offline, you’re looking at much more expensive, local-processing hardware.

Stop Buying Gadgets You Don’t Need: a Blunt Look at How Smart Home Devices Improve Daily Efficiency Without Breaking Your Workflow.

I spent six years on a helpdesk listening to people explain why they needed a $300 smart fridge that tells them when they’re low on milk, and frankly, it’s exhausting. Most “productivity gurus” will try to sell you a vision of a frictionless life where your house anticipates your every move, but they rarely mention that you’ll spend your Saturday morning resetting a hub because of a firmware update. We need to stop pretending that every gadget is a solution; instead, we should be looking at how smart home devices improve daily efficiency without turning your living room into a troubleshooting manual.

If you’re starting to build out this kind of setup, my biggest piece of advice is to check the local connectivity before you buy anything. There is nothing more frustrating than setting up a beautiful automation sequence only to realize your router can’t handle the extra traffic, or worse, that the device requires a constant cloud connection to do even the simplest tasks. I usually tell people to look for devices that support Matter or Zigbee so they aren’t completely beholden to a single manufacturer’s ecosystem. It’s also worth doing a quick bit of research on local service availability or even looking into ts escort norwich if you find you need specific local help or connections to get your home life sorted while you’re busy tinkering with your new tech.

I’m not here to show you a polished showroom or tell you which expensive ecosystem to join. My goal is to give you the unvarnished truth about what actually saves time and what just creates more digital clutter. I’ll walk you through the setup, the inevitable points of failure, and—most importantly—what happens to your “automated” life the moment you decide to cancel that monthly subscription. This is about making your home work for you, rather than you working for your home.

Automating Household Routines What Actually Saves Time

Automating Household Routines What Actually Saves Time

Most people think automating household routines means having a robot vacuum that dances around the rug, but the real wins are much more boring. For me, it’s about the things you stop thinking about entirely. I set my smart plugs to kill the power to my coffee machine and my desk lamp at exactly 11:00 PM every night. It’s not about “innovation”; it’s about optimizing home workflow with technology so I don’t have to do a mental sweep of the house before bed. If you can offload even three small, repetitive tasks to a timer, you’ve reclaimed a tiny bit of mental bandwidth.

The catch, as always, is the setup. You’ll see a lot of hype around voice assistant productivity hacks, but if your Wi-Fi is patchy, you’ll spend more time shouting “Alexa, turn on the kitchen light” than you would have spent just walking ten feet. I only rely on devices that work locally or have a physical override. If your entire morning routine depends on a cloud server being online, you haven’t built a system; you’ve built a single point of failure.

Iot Devices for Time Saving the Stuff That Works

If you want to talk about IoT devices for time saving, we need to move past the novelty of changing light colors with your phone. The real wins come from the things you eventually forget are even there. For me, that’s the smart plug on the coffee maker or the sensor that tells the vacuum to start once the last person has left the house. When you focus on optimizing home workflow with technology, you aren’t looking for gadgets; you’re looking for ways to eliminate the “micro-tasks” that clutter your brain.

However, there is a catch. Most of these wins depend entirely on your smart home ecosystem integration. If your lightbulbs talk to one app and your motion sensors talk to another, you haven’t saved any time; you’ve just added a digital layer of chores. I’ve spent too many afternoons troubleshooting why a “smart” routine failed because a firmware update decided to break a bridge. If you’re going to do this, pick one ecosystem and stick to it. It’s better to have three devices that actually work together than ten that require a manual reset every Tuesday.

Five things to check before you automate your life

  • Buy for local control, not the cloud. If your internet goes down or the manufacturer decides to stop supporting your smart plug, you don’t want your entire morning routine to die with it. Look for devices that work with Matter or Zigbee so they can keep functioning even if the company’s servers do.
  • Audit the subscription creep. Before you buy a smart camera or a security system, check if the “smart” features—like person detection or cloud storage—are locked behind a monthly fee. If you stop paying, make sure the hardware doesn’t just become an expensive, non-functional paperweight.
  • Start with the “high-friction” tasks. Don’t bother automating your bookshelf or your toaster. Focus on the things you do every single day that feel like a chore, like turning off every light in the house before bed or adjusting the thermostat when you leave. If it doesn’t solve a repetitive annoyance, it’s just a gadget.
  • Beware of “App Fatigue.” If a device requires its own standalone app to do anything, it’s going to clutter your phone and your brain. Try to stick to devices that integrate into one single ecosystem (like Apple Home, Google Home, or Alexa) so you aren’t hunting through five different menus just to dim the lights.
  • Plan for the “manual fallback.” Every automation you set up should have a physical backup. If your smart lock fails or your voice assistant doesn’t understand your accent, you still need to be able to get into your house or turn on the lights without needing a degree in computer science.

The Bottom Line

At the end of the day, smart home tech isn’t about living in a sci-fi movie; it’s about removing the tiny, repetitive frictions that drain your mental energy. We’ve looked at how automated lighting and smart scheduling can actually buy you back a few minutes of peace, provided you choose devices that don’t require a monthly fee just to turn a bulb on. Stick to the basics—the things that automate a task you hate doing every single morning—and avoid the shiny gadgets that promise “intelligence” but really just offer more notifications. If a device adds more troubleshooting to your weekend than it saves in your daily routine, it isn’t a tool, it’s a chore.

My advice is to build your setup slowly and with a healthy dose of skepticism. You don’t need a fully integrated ecosystem by next Tuesday to see a benefit. Start with one thing that actually solves a problem in your house, see how it holds up when the Wi-Fi hiccups, and only then move to the next. The goal isn’t to have the most sophisticated home on the block; it’s to have a home that stays out of your way so you can focus on the things that actually matter, like finally getting that sourdough starter to behave.

Nfc: What Those Tap-to Features Actually Do

I spent six years on a helpdesk listening to people explain technology back to me like they were reading from a glossy brochure, and if I hear one more person describe Near Field Communication as a “revolutionary wireless ecosystem,” I might actually lose my mind. It’s not a revolution; it’s just a way for two things to talk when they’re practically touching. Most tech blogs will leave you spinning with jargon, but when you’re actually standing at a busy coffee shop terminal trying to figure out what is nfc and why your phone isn’t responding, you don’t need a lecture on radio frequencies. You just need to know where to tap and why it occasionally fails you when you’re in a rush.

I’m not here to sell you on a lifestyle or convince you that you need a smart-home setup that requires a monthly subscription just to unlock your front door. My goal is to give you the unvarnished truth about how this tech actually works in your pocket. I’ll walk you through what it does, what it costs (usually nothing, unless you’re buying fancy tags), and most importantly, what happens when the connection drops. No hype, just the steps.

Table of Contents

How Nfc Technology Works Without the Marketing Fluff

How Nfc Technology Works Without the Marketing Fluff

If you strip away the glossy brochures, how nfc technology works is actually quite simple and, frankly, a bit primitive. Unlike Bluetooth, which is designed to find your headphones across a room, NFC is built for when things are practically touching. It uses electromagnetic fields to trigger a tiny exchange of data between two points. Think of it like a very polite, very short conversation that only happens if you’re standing close enough to whisper in someone’s ear.

Inside your phone, there is a tiny nfc chip that acts as the gatekeeper. When you tap your device against a payment terminal or a smart tag, that chip creates a tiny loop of power that allows the data to jump across the gap. This is why it’s such a specific type of short range wireless communication; it’s physically impossible for it to work from across the house.

This lack of range is actually its biggest selling point for near field communication security. Because the signal dies out almost immediately, a stranger can’t just sit in a cafe and intercept your payment data from three tables away. It’s not “high-tech” in the way a mesh network is, but it’s reliable because it requires your physical intent to work.

The Nfc Chip in Smartphone What It Actually Does

The Nfc Chip in Smartphone What It Actually Does

Inside your phone, the NFC chip isn’t some massive, power-hungry processor. It’s a tiny, specialized component designed for one specific job: managing very brief, very close-range handshakes. When you tap your phone against a payment terminal or a smart tag, that chip wakes up, establishes a connection, and shuts back down almost instantly. This is why it feels different from nfc vs bluetooth technology; while Bluetooth is designed to maintain a steady stream of data across a room, NFC is built for intentional, physical proximity. It doesn’t want to find your headphones in your backpack; it only wants to talk when you tell it to.

Because this is a form of short range wireless communication, the physical distance acts as a built-in layer of protection. You aren’t accidentally paying for someone else’s groceries from across the aisle. The chip handles the heavy lifting of encrypting that tiny burst of data, ensuring that even though the connection is fast, it isn’t sloppy. It’s essentially a digital “tap and go” mechanism that turns your hardware into a secure key, provided you’re actually touching the right thing.

Five things to keep in mind before you start tapping everything

  • Check your phone case first. I’ve spent far too many afternoons tapping a payment terminal like I was performing a ritual, only to realize a thick leather wallet case was blocking the signal. If it doesn’t work immediately, the case is usually the culprit.
  • Don’t expect it to work through a crowd. NFC is designed for very close range—usually less than four centimeters. If you’re trying to tap a reader in a busy subway station, you need to be intentional about where you’re aiming, or you’ll just be hitting random people’s pockets.
  • Know the difference between “tap to pay” and “tap to pair.” Most people use NFC for Apple or Google Pay, which is great, but some older Bluetooth headphones use it to pair. If your device isn’t connecting, check if you’re supposed to be tapping the phone to the specific sensor on the headset.
  • Watch out for the “subscription trap” in NFC-enabled smart home gear. Some companies sell you a fancy NFC tag or a smart lock that works beautifully, but then they lock the “smart” features behind a monthly fee. If the tag stops working because you cancelled a subscription, you’ve basically just bought a very expensive sticker.
  • Security is decent, but it’s not magic. While it’s much harder to “sniff” an NFC signal from across the room than it is to hack a weak Wi-Fi password, you should still be careful about tapping random, unverified stickers in public places. If a sticker looks like it was slapped on a pole by someone in a hurry, don’t tap it with your banking app open.

The short version

NFC is just a way for two devices to talk when they are practically touching, which is why it’s great for quick tasks like paying for coffee but useless for sending large files.

Your phone uses it mostly for digital wallets and quick pairing, but it’s a hardware feature that stays with you even if you stop paying for specific apps.

It is incredibly convenient for small, secure interactions, but don’t expect it to replace Bluetooth or Wi-Fi for anything that requires actual distance or speed.

## The reality of the "magic" tap

“NFC isn’t some futuristic breakthrough; it’s just a very short-range conversation between two pieces of hardware that happens so fast you don’t have time to realize it’s actually working.”

Saoirse Doyle

The bottom line on NFC

The bottom line on NFC explained.

At the end of the day, NFC isn’t some futuristic magic trick; it is just a very short-range, very specific way for two pieces of hardware to shake hands. We’ve looked at how it powers your contactless payments, how it manages the tiny chip in your phone, and why it only works when things are practically touching. It is a tool designed for convenience, not for massive data transfers. If you try to send a high-res photo via NFC, you are going to have a bad time. But for tapping a transit card or pairing a headset without digging through a menu, it is arguably one of the most reliable bits of tech we have. Just remember that security relies on that physical proximity—if you aren’t touching it, it isn’t happening.

My advice is to stop worrying about whether you are “using” NFC enough and just let it exist in the background. You don’t need to master the protocol to benefit from it; you just need to know that when you tap your phone against that reader, a very specific, very boring set of instructions is being followed perfectly. Technology is at its best when it stops asking for your attention and just does the job it was built for. Use it to shave five seconds off your morning commute, and then get on with your actual life.

Frequently Asked Questions

Does my phone need to be unlocked for NFC to work when I'm paying for something?

The short answer is yes, usually. For security reasons, most payment apps (like Apple Pay or Google Wallet) require you to unlock your phone or authenticate with a fingerprint/face scan before they’ll trigger the NFC chip. It’s a safety feature so someone can’t just walk past you in a queue and tap your pocket to buy a sandwich. If you’re just tapping a transit card or a sticker, it might work while locked, but for money? You’ll need to unlock it.

Is it actually safe to tap my phone against a reader in a crowded place?

The short answer is yes, but don’t let the tech blogs scare you with “digital pickpocket” stories. For someone to steal your data, they’d practically have to be hugging you while holding a specialized reader right against your hip. Most modern phones also require you to authenticate—a fingerprint or face scan—before the NFC chip even wakes up to talk to a terminal. If you aren’t actively trying to pay, the chip is basically sleeping.

Can I use NFC to send files between two phones, or is it just for payments?

The short answer is: mostly no. While the tech allows it, it’s painfully slow for actual files. Think of NFC like a tiny, narrow pipe; it’s great for a quick “handshake” to say hello, but if you try to shove a photo through it, you’ll be waiting forever. Usually, your phone uses that NFC tap just to trigger a much faster connection, like Bluetooth or Wi-Fi, to do the heavy lifting.

How to Fix Slow Wifi, in Order of Likelihood

Please don’t let a tech YouTuber convince you that you need a $400 mesh system to solve your connectivity issues. I spent six years on a helpdesk watching people throw money at hardware upgrades when the actual problem was just a router tucked behind a metal filing cabinet or a microwave interfering with the signal. Most of the “solutions” you see online are just ways to sell you more plastic; they don’t actually teach you how to fix slow wifi by understanding how the signal actually moves through your specific walls. You don’t need a smarter house; you just need your current setup to stop fighting you.

I’m not going to give you a list of “life-changing” apps that charge a monthly subscription just to tell you your signal is weak. Instead, I’m going to walk you through the boring, practical steps that actually work: where to move your gear, which settings to toggle, and when it is genuinely worth the spend. We’ll focus on what to click and what to ignore so you can get back to your life without the constant buffering wheel of death.

Table of Contents

Reducing Wireless Congestion by Picking the Right Router Frequency Bands

Reducing Wireless Congestion by Picking the Right Router Frequency Bands

Most modern routers are “dual-band,” which is just a fancy way of saying they broadcast two different signals: 2.4GHz and 5GHz. Think of the 2.4GHz band like a crowded, slow-moving country road. It travels through walls easily, but it’s incredibly prone to interference from your neighbor’s router, your microwave, or even a Bluetooth speaker. If your devices are constantly dropping connection, you’re likely stuck in that digital traffic jam. Reducing wireless congestion usually starts with moving your high-demand devices—like your laptop or gaming console—over to the 5GHz band. It’s much faster and has more “lanes,” though it doesn’t like traveling through thick brick walls as well.

If you find that your signal disappears the moment you walk into the kitchen, you might be dealing with a coverage issue rather than a speed issue. This is where optimizing network speed becomes a game of placement. I always tell people to check if their devices are accidentally clinging to the slower 2.4GHz band just because the signal looks “stronger.” A full bar of slow, congested signal is often worse than two bars of a clean, fast 5GHz connection.

Optimizing Network Speed by Actually Using Your Hardware Right

Optimizing Network Speed by Actually Using Your Hardware Right

Before you go out and buy a mesh system or a shiny new router, let’s talk about where your current one is actually sitting. Most people tuck their router behind a TV, inside a cabinet, or in a corner near the floor because they don’t want the blinking lights ruining the aesthetic. This is a mistake. A router is essentially a radio, and radio waves don’t like traveling through solid wood, metal, or concrete. For a genuine wifi signal strength improvement, you need to get that device up high and out in the open. If it’s buried under a pile of mail or tucked behind a heavy sofa, you’re basically asking your signal to fight a war through a brick wall.

While you’re moving things around, check your settings for a firmware update. I know, it sounds like one of those annoying “your computer needs to restart” prompts we all ignore, but the firmware update benefits are real. Manufacturers often release patches that specifically address stability issues or bugs that cause your connection to drop when too many devices are active. It’s a five-minute task that can sometimes fix more problems than a hundred-dollar hardware upgrade. Just make sure you don’t pull the plug while it’s halfway through, or you’ll be dealing with a very expensive paperweight.

Five things to try before you go out and buy a new router

  • Check your cables. It sounds stupid, but I spent three years at the helpdesk watching people troubleshoot software when their Ethernet cable was half-unplugged or frayed. If the physical link is dodgy, no amount of settings changes will save you.
  • Stop the “hidden” bandwidth hogs. Check which devices are currently running massive updates or syncing huge cloud backups in the background. If your laptop is trying to upload 50GB of photos to a server while you’re trying to join a video call, your WiFi isn’t broken; it’s just busy.
  • Update your firmware. Most people treat their router like a toaster—you plug it in and forget it exists. But manufacturers release patches that fix stability issues. Log into your router’s admin panel and see if there’s an update waiting. Just make sure you don’t pull the plug while it’s mid-update, or you’ll have a very expensive paperweight.
  • Test with a wire. If you want to know if the problem is your internet provider or just your WiFi signal, plug a laptop directly into the router with an Ethernet cable. If the speed is still terrible, stop blaming the wireless signal and start calling your ISP to complain.
  • Audit your connected devices. If you have old smart bulbs, three tablets, and a guest’s phone all clinging to your network, they are eating up “airtime.” If you don’t use a device, kick it off the network. It’s better to have five devices working perfectly than twenty devices struggling to stay connected.

The short version

Stop blaming your ISP for every hiccup; most “slow internet” is actually just your router being stuck behind a bookshelf or fighting for space with your microwave.

Use the 5GHz band for your heavy lifting like streaming or gaming, but don’t expect it to reach through three walls—that’s what the 2.4GHz band is for.

Before you drop a few hundred quid on a shiny new mesh system, try moving your current hardware to a central, open spot and see if that actually fixes the dead zones.

The truth about your signal

Most people think a slow connection is a sign they need to spend three hundred euros on a shiny new mesh system, but usually, it’s just that your router is hiding behind a sofa or fighting for space with your neighbor’s microwave. Before you start chasing the latest hardware, try moving the thing you already own to a better spot; it’s free, and it actually works.

Saoirse Doyle

The bottom line

The bottom line: optimize WiFi placement.

If you’ve gone through the list, you’ve likely realized that fixing your WiFi isn’t about buying a shiny new mesh system with blinking lights. It’s usually just about managing what you already own a little more effectively. We’ve covered the basics: switching your low-power devices to the 2.4GHz band, moving the router out from behind the TV or inside a cabinet, and making sure your hardware isn’t fighting for space with your microwave. If you do those things and the speed is still bottoming out, then—and only then—should you start looking at your ISP or upgrading your cables. Most of the time, the bottleneck isn’t your internet connection; it’s just bad placement and messy frequencies.

I know it’s tempting to fall down the rabbit hole of “smart home” upgrades every time a page takes three seconds too long to load, but please don’t. Most of those “optimized” gadgets are just more things to manage and more subscriptions to track. My advice is to get your current setup stable, get your devices in their proper lanes, and then stop thinking about it. You don’t need a high-tech command center; you just need a connection that stays out of your way so you can actually get things done.

Frequently Asked Questions

If I change my frequency band, will my older devices (like my smart plugs or old printer) stop connecting entirely?

The short answer is yes, they probably will. Most smart plugs and older printers only speak 2.4GHz. If you force your router to only broadcast 5GHz, those devices will just sit there looking confused.

Is it actually worth paying for a mesh system, or am I just buying a more expensive way to solve a placement problem?

Most of the time, you’re just buying a more expensive way to solve a placement problem. If your router is tucked behind a metal filing cabinet or inside a wooden sideboard, a mesh system will just be a series of expensive, slightly less frustrated nodes. Move the router to a central, open spot first. If you’ve done that and still have dead zones in the far corners of the house, then—and only then—is a mesh system worth the money.

How do I know if the bottleneck is my actual internet plan or if it's just my hardware struggling to keep up?

The easiest way to tell is a simple bypass test. Plug a laptop directly into your router (or even your modem) using an Ethernet cable and run a speed test. If you get the speeds you’re actually paying for on the wire, your internet plan is fine; your WiFi is just struggling. If the speeds are still rubbish while plugged in, it’s time to call your ISP and complain.

Dual Sim: Keeping Work and Personal Numbers on One Phone

I spent six years at a helpdesk watching people pay an extra £40 a month for “premium business connectivity” packages that were really just a glorified way of saying they needed two phone numbers. Most tech reviewers will try to sell you on the “seamless lifestyle integration” of having multiple lines, but let’s be honest: usually, you just want to stop giving your personal number to every plumber and delivery driver in the city. If you’re sitting there wondering what is a dual sim phone and whether it’s actually worth the extra hassle of managing two different data plans, you’re likely looking for a way to set it and forget it, not a new way to complicate your life.

I’m not going to give you a lecture on telecommunications theory. Instead, I’ll tell you exactly how these things work in the real world—whether you’re swapping physical nano-SIMs like it’s 2015 or using an eSIM, which can be a bit of a headache to set up. I’ll cover what it actually costs to run two lines, which phones make the switch easy, and what happens to your settings when you try to toggle between them. No hype, just the practicalities of making the tech stop getting in your way.

Table of Contents

Dual Sim vs Esim Technology the Actual Way It Works

Dual Sim vs Esim Technology the Actual Way It Works

Most people think “dual SIM” just means you can use two numbers, which is true, but the how matters if you don’t want your battery draining by lunch. Traditionally, this meant shoving two physical plastic cards into a tray. Nowadays, most of the best smartphones with dual SIM support use a hybrid approach: one physical slot and one eSIM (an electronic SIM embedded directly into the phone’s hardware).

When you’re managing two phone numbers on one device, you need to know about the difference between dual SIM standby vs dual SIM active. Most phones on the market are “standby,” meaning both numbers are ready to receive a call, but they can’t both be actively using data at the exact same second. If you’re on a call on line one, line two goes straight to voicemail.

For me, the real magic is in the eSIM. It makes the dual SIM benefits for travelers much less of a headache; instead of hunting for a kiosk in a busy airport to find a local plastic card, you just download a digital profile. It’s cleaner, but remember: if you switch phones, you can’t just pop the chip out. You’ll have to go through the digital transfer process, which can be a bit fiddly.

Managing Two Phone Numbers on One Device Without Losing Your Mind

Managing Two Phone Numbers on One Device Without Losing Your Mind

Once you actually get the hardware working, the real headache is the software interface. Most people assume that having two numbers means you’ll get double the notifications, but it’s usually more about how you label things so you don’t accidentally send a spicy text to your boss. When you’re managing two phone numbers on one device, your phone will start asking you which SIM to use for every single action: “Use SIM 1 for data?” “Use SIM 2 for this WhatsApp call?” It’s a lot of clicking.

If you’re looking at the dual sim vs esim technology split, the management gets slightly easier with eSIMs because you can toggle them on and off in your settings menu without fumbling with a paperclip and a tiny tray. My advice? Label them immediately. Don’t leave them as “Primary” and “Secondary.” Rename them to “Work” and “Personal” right away. It takes ten seconds, but it saves you from that momentary, sinking feeling when you realize you’ve used the wrong line for a call.

Five things to check before you commit to a dual SIM setup

  • Check your carrier compatibility first. Just because your phone has two slots doesn’t mean your provider won’t throw a tantrum; some carriers are notoriously picky about which SIMs they’ll allow to share a device, especially if you’re trying to mix a local provider with an international travel eSIM.
  • Watch out for the “Standby” trap. Most dual SIM phones aren’t actually running two cellular connections at full speed at the same time; usually, one is active for data while the other sits in a low-power standby mode. If you need high-speed data on both lines simultaneously for something like a hotspot, you might find the phone gets very hot and the battery drains faster than a leaking bucket.
  • Do a quick math check on the “hidden” costs. Adding a second line often means a second monthly bill, but it also means you need to ensure your data plan is robust enough to handle two different sets of usage patterns. Don’t assume your primary data bucket will automatically cover the second line’s needs.
  • Verify your physical slot situation. Some budget-friendly dual SIM phones use a “hybrid” slot, which means you can have two SIM cards OR one SIM card and one microSD card for extra storage, but never both. If you’re someone who relies on an SD card for photos, you might find yourself stuck choosing between an extra phone number and extra storage.
  • Plan for the “What happens if I cancel?” scenario. If you’re using an eSIM for your second line, remember that it isn’t just a piece of plastic you can pop in a drawer. If you cancel that subscription, that digital profile stays on your phone until you manually delete it, and if you lose your phone, you can’t just “swap” an eSIM to a new device as easily as a physical card without going through your carrier’s activation process again.

The quick version

You don’t need two phones to have two numbers; a dual SIM setup lets you keep your work and personal lines on one device, provided you’re okay with the extra bit of menu-diving to manage them.

Physical SIMs are reliable but clunky, while eSIMs are much easier to swap between carriers remotely, though you’ll be stuck entirely within your phone’s software settings if something goes wrong.

Before you switch, check your carrier’s fine print—some “dual SIM” features are actually just data-only options, and you want to make sure you can actually receive texts on both lines without a headache.

The reality of the second number

A dual SIM phone isn’t some magic portal to a more organized life; it’s just a way to stop carrying two separate bricks in your pockets. It works well enough until you realize you now have twice as many settings to check and double the chances of a carrier billing error, but if you need to keep your work life from bleeding into your dinner hour, it’s a tool worth the slight headache.

Saoirse Doyle

The Bottom Line

The Bottom Line on dual SIM phones.

At the end of the day, a dual SIM phone isn’t some magical productivity hack; it’s just a way to stop carrying two physical handsets or juggling multiple devices. Whether you go the traditional route with two physical nano-SIM cards or use the newer eSIM method to keep your work line separate from your personal one, the goal is the same: convenience without the clutter. Just remember that while the hardware makes it easy to switch between networks, you are still responsible for managing two separate billing cycles. Before you commit, check if your carrier supports eSIM and make sure you know exactly how to deactivate the secondary line if you decide you’ve had enough of the extra notifications.

Don’t feel like you need to jump into this just because a new flagship phone makes it look seamless. If your current setup of one phone and a tablet—or even just one single, quiet number—works for your life, stick with it. Technology should serve your schedule, not give you a new set of digital chores to manage. A dual SIM setup is a useful tool when you need to separate your professional and private worlds, but it’s only worth the extra bit of admin if it actually reduces your daily friction instead of adding to it. Use the tech, but don’t let the tech use you.

Frequently Asked Questions

Can I actually use data from both SIMs at the same time, or do I have to keep switching settings?

The short answer is no. You can’t pull data from both simultaneously to, say, double your download speed. Your phone has to pick one “data lane” to drive in.

What happens to my phone number if I lose the physical SIM card or my eSIM profile gets corrupted?

If you lose a physical SIM, your number isn’t gone, but your access is. You’ll need to contact your carrier to get a replacement SIM sent out or visit a store to activate a new one with that same number. If an eSIM profile gets corrupted or fails, it’s usually a software glitch. You can typically just go into your phone’s settings and re-download the profile from your carrier, provided you have Wi-Fi.

If I move my dual SIM phone to a different country, do I have to buy a whole new device to use a local SIM?

No, you don’t need a new phone. That’s the whole point of having a dual SIM setup. When you land in a new country, you just pop in a local SIM card into the physical slot, or—if your phone supports it—you download a local eSIM. You’ll keep your home number active on one line (for those important texts) and use the local one for cheap data. Just double-check your phone is “unlocked” first.

Stop Looking for a Magic Button: the Real Impact of Generative Ai on Creative Workflows Is Just More Friction You Didn’t Ask For.

I spent six years in a helpdesk cubicle listening to people explain why their “revolutionary new software” was actually just a more expensive way to do the same three tasks. Now, seeing the frantic scramble around the impact of generative ai on creative workflows, I’m getting that same familiar itch. Everyone is selling this idea that you can just plug in a prompt and suddenly become a creative director, but let’s be honest: most of these tools are just high-speed ways to produce more mediocre junk. They aren’t replacing the need for a good process; they’re just adding a layer of technical debt to your already messy one.

I’m not here to tell you that AI is magic or that it’s going to steal your soul. I’m here to look at the actual mechanics of it. Over the next few sections, I’ll break down what these tools actually automate, where they tend to break your existing habits, and—most importantly—what happens to your work if you stop paying that monthly subscription. We’re going to skip the hype and focus on the boring, practical reality of integrating these tools without losing control of your files or your sanity.

Ai Driven Design Automation Saving Time or Just Adding Noise

Ai Driven Design Automation Saving Time or Just Adding Noise

If you’re starting to feel like your creative output is becoming a bit too reliant on these automated loops, it’s worth taking a step back to find some actual inspiration that isn’t just a prompt. Sometimes the best way to break out of a digital rut is to look toward more human-centric sources or niche communities where people are actually doing the work manually. I’ve found that when I’m stuck in a cycle of regenerating the same mediocre AI assets, looking for something specific and local, like checking out sex wien, can actually provide a weirdly effective way to reset your perspective and find those unpredictable textures that an algorithm usually misses.

I’ve spent enough time in IT to know that “automation” is often just a polite word for “more things to troubleshoot later.” When we look at AI-driven design automation, the promise is always the same: you’ll skip the tedious grunt work and jump straight to the good stuff. But in practice, it usually feels like you’re spending more time fighting the software to make it do something specific than you would have spent just doing it yourself. You aren’t really designing anymore; you’re just negotiating with a black box until it spits out something that doesn’t look like a fever dream.

The reality of human-AI collaboration in creativity is much messier than the marketing videos suggest. These AI tools for graphic designers are great at generating infinite variations of a concept, but they lack the ability to understand why a specific layout works for a specific person. You end up with a mountain of digital options that all feel equally hollow. If you aren’t careful, you’ll find yourself stuck in a loop of tweaking prompts rather than actually building a cohesive brand. It’s not about saving time; it’s about managing the sheer volume of noise the machine creates.

Transforming Digital Content Creation the Tools That Wont Break Your Files

When we talk about transforming digital content creation, the conversation usually skips over the most annoying part: file compatibility. I’ve spent enough time in helpdesk tickets to know that a “revolutionary” tool is useless if it exports a proprietary format that no one else can open. If you’re looking at AI tools for graphic designers, don’t just look at how pretty the output is. Look at the export settings. If the tool locks your work behind a subscription wall and won’t let you download a standard, high-res SVG or PSD when you cancel, it isn’t a tool; it’s a hostage situation.

The real sweet spot is where human-AI collaboration in creativity actually feels like work instead of just clicking “generate” and hoping for the best. I prefer tools that act like a very fast, very literal intern—things that handle the tedious masking or the repetitive resizing, but leave the actual decision-making to you. The goal is to find software that integrates into your existing stack rather than forcing you to build a whole new ecosystem just to make a single social media graphic. Keep your files platform-agnostic, or you’ll be spending your weekends migrating data instead of actually creating.

Five ways to use AI without losing your mind (or your files)

  • Audit your actual workflow before you subscribe. Most people jump into a generative tool because it looks flashy, but if you aren’t spending at least five hours a week on that specific task, you’re just paying for a very expensive digital paperweight.
  • Check the “export” reality. A tool might generate a beautiful image or a perfect piece of copy, but if it doesn’t let you export in a standard, non-proprietary format, you don’t actually own that work—you’re just renting it. If the subscription lapses, make sure you aren’t locked out of your own archives.
  • Treat AI outputs like a junior intern on their first day. They are fast, they are eager, and they are frequently, confidently wrong. Never skip the manual review phase; if you automate the review process too, you’re just accelerating the rate at which you produce mistakes.
  • Watch the “subscription creep.” It starts with one $20-a-month creative suite and ends with five different specialized AI tools that all do roughly the same thing. Keep a spreadsheet of what these tools actually replace in your budget, not just what they add.
  • Maintain a “source of truth” outside the AI ecosystem. Never let an AI-driven platform be the only place your project files live. Always keep a local or cloud-based backup of your raw assets in a format that doesn’t require an active API connection to open.

The bottom line on the AI hype

At the end of the day, generative AI is just another layer in your tech stack, not a replacement for the person actually doing the work. We’ve looked at how it can automate the tedious parts of design and speed up content production, but we also saw the risks—the potential for file rot, the subscription traps, and the way it can quickly turn a streamlined workflow into a cluttered mess of unusable assets. My advice remains the same as it was when I was sitting in the helpdesk chair: don’t adopt a tool just because it’s loud. If an AI tool doesn’t have a clear export path or a predictable cost structure, it isn’t a productivity win; it’s just technical debt waiting to happen.

If you do decide to integrate these tools, do it with your eyes wide open. Use them to clear the brush so you can actually get to the meaningful parts of your craft, rather than letting the software dictate your creative direction. The goal isn’t to work faster just so you can produce more junk; it’s to use the time you save to do better work. Technology should serve your process, not the other way around. Get your setup right, keep your files portable, and don’t let the shiny new features distract you from the fact that you’re the one in charge.

How to Choose a Work Laptop Without Overbuying

I spent six years in a cramped IT office listening to people complain about “slow” machines that were actually just cluttered with useless bloatware and bad habits. Most tech reviewers will try to sell you on the latest processor speed or a screen that makes colors pop like a neon sign, but they’re usually just trying to justify a higher price tag. When you’re figuring out how to choose a laptop for work, you don’t need a supercomputer; you need a tool that doesn’t make you want to throw it against a wall by 3:00 PM. Stop obsessing over the flashy specs that look good on a spreadsheet and start looking for the machine that actually stays out of your way.

I’m not here to give you a lecture on gigahertz or thermal throttling. Instead, I’m going to walk you through the boring, practical stuff: what actually matters for your specific workflow, where manufacturers hide the planned obsolescence, and which “premium” features are just expensive distractions. I’ll tell you exactly what to click, what to look for in a build, and most importantly, what happens to your setup when you realize that expensive software subscription was a mistake.

Table of Contents

The Real Ram Requirements for Professional Use

The Real Ram Requirements for Professional Use

When you look at spec sheets, they love to throw big numbers at you to justify a higher price tag. But after years of watching people struggle with machines that stutter the moment they open more than three Chrome tabs, I’ve learned that there is a massive difference between “enough” and “optimal.” For most people, the RAM requirements for professional use start at 16GB. If you try to squeeze a modern workflow into 8GB, you aren’t actually working; you’re just watching a spinning loading icon while your computer tries to decide which background process to kill first.

If your day involves heavy data sets, constant video calls, or having fifty browser tabs open as a way of life, don’t be afraid to jump to 32GB. This is the real secret to finding the best laptop for multitasking—it’s about creating a buffer so the machine doesn’t choke when you switch from a spreadsheet to a Zoom call. Just a warning: check if the RAM is soldered to the motherboard before you buy. Many thin, light laptops won’t let you upgrade later, meaning you’re stuck with whatever you paid for the day you unboxed it.

Choosing a Laptop Processor for Productivity Without the Bloat

Choosing a Laptop Processor for Productivity Without the Bloat

When you start looking at spec sheets, the marketing departments will try to sell you on “ultra-performance” chips that are essentially overkill for 90% of what we actually do. You don’t need a workstation-grade beast just to run twenty Chrome tabs, a heavy spreadsheet, and a Zoom call simultaneously. For most of us, the goal isn’t raw speed; it’s finding a laptop processor for productivity that stays cool and quiet. If the chip is constantly ramping up its fans just to handle a basic video call, it’s going to be a distraction, not a tool.

I usually suggest aiming for the middle tier—think Intel Core i5 or AMD Ryzen 5 at a minimum, or the base M-series chips if you’re going the Apple route. These are the sweet spots for finding the best laptop for multitasking without paying the “premium enthusiast” tax. Avoid the ultra-low-power chips marketed for “extreme portability” if you plan on doing anything more complex than checking email; they tend to stutter exactly when you need them most. Just get something that has enough headroom to breathe so you aren’t staring at a spinning loading icon every time you switch windows.

Five things that actually matter when you're staring at a spec sheet

  • Stop obsessing over the storage capacity and look at the port selection. There is nothing more frustrating than being halfway through a project and realizing you need a dongle just to plug in a thumb drive or a second monitor. If the laptop doesn’t have the physical holes you need, you’ll end up spending another fifty quid on adapters that you’ll inevitably lose.
  • Check the screen brightness, not just the resolution. A “4K display” sounds lovely until you’re sitting near a window and can’t see a single thing because of the glare. Look for at least 300 nits of brightness; anything less and you’ll be squinting your way through your spreadsheets.
  • Prioritize the keyboard over the aesthetics. You can fix a slow hard drive later, but you can’t fix a mushy, shallow keyboard. If you’re typing for six hours a day, you need something with actual travel. If you’re in a shop, type on the demo unit for five minutes before you commit.
  • Figure out your “exit strategy” for the battery. Every manufacturer claims eighteen hours of life, but they usually mean “eighteen hours of doing nothing while the screen is dimmed to 10%.” Realistically, look for something that can handle a heavy browser load for five or six hours, or just accept that you’ll be hunting for a power outlet by lunch.
  • Beware of the “proprietary” trap. Some manufacturers make it incredibly easy to buy the machine, but nearly impossible to repair or upgrade it. If a single faulty component means the whole laptop is e-waste because you can’t swap out the battery or the SSD, think twice. I prefer things that stay out of the way, and that includes things that don’t force you into a repair cycle every two years.

The quick version if you're in a rush

Don’t get tricked by “gaming” specs; focus on getting enough RAM (at least 16GB) and a processor that won’t choke when you have twenty Chrome tabs and a spreadsheet open at the same time.

Prioritize build quality and a decent keyboard over a flashy screen or a slim chassis, because you’re going to be touching those things for eight hours a day.

Check the port situation before you buy; there is nothing more frustrating than having a perfectly good laptop that requires three different dongles just to plug in a mouse or an external drive.

## The trap of the spec sheet

“Marketing departments want you to buy the fastest, most expensive engine on the market, but most of us just need a reliable car that starts every morning without a fight. Stop paying for extra horsepower you’ll never use and start looking for the machine that simply stays out of your way.”

Saoirse Doyle

Stop overthinking the spec sheet

Stop overthinking the spec sheet for laptops.

At the end of the day, choosing a laptop isn’t about finding the most powerful machine on the market; it’s about finding the one that doesn’t make you want to throw it out a window mid-afternoon. We’ve covered why you shouldn’t skimp on RAM, why you don’t need a top-tier processor just to run a spreadsheet, and how to avoid the marketing trap of “extra” features that just eat up your battery life. Just remember: buy for the work you actually do, not the work you think you might do in three years. Check the port selection, make sure the keyboard feels decent, and for heaven’s sake, read the fine print on the warranty and the subscription-locked software that usually comes pre-installed.

I spent six years watching people spend three months’ rent on a “dream machine” only to realize they mostly used it for email and a few browser tabs. A laptop is just a tool, no different from a reliable kettle or a decent pair of scissors. If it opens quickly, stays quiet, and keeps your files where you left them, it has done its job. Don’t let the tech industry convince you that you’re one upgrade away from being a genius. Get the machine that stays out of your way, and then go actually do the work you bought it for.

Frequently Asked Questions

Do I actually need a dedicated graphics card if I'm just doing spreadsheets and video calls?

Short answer: No. If your day consists of Excel, Zoom, and maybe forty Chrome tabs, a dedicated graphics card is just a way to spend an extra few hundred euros for something you’ll never use. Integrated graphics are perfectly fine for that. Just be aware that a dedicated GPU eats battery life for breakfast; if you want to actually work from a coffee shop without hunting for a plug every hour, skip it.

How much does a bigger screen really matter for productivity versus just being a heavy thing to carry around?

Don’t fall for the “bigger is better” trap. A 16-inch screen is lovely until you’re commuting on a crowded train or trying to balance it on a tiny cafe table. If you’re mostly doing spreadsheets or multitasking, that extra real estate helps, but I’d rather you buy a light 13-inch laptop and a decent external monitor for your desk. You get the portability when you need it and the workspace when you don’t.

Is it worth paying the premium for a "Pro" model, or can I just upgrade the storage myself later?

Here’s the short answer: it depends entirely on whether you’re buying a Mac or a PC. If you’re looking at a MacBook, you’re stuck. You cannot upgrade the storage later; what you buy on day one is what you have until the machine dies. In that case, pay the premium now or you’ll be living off external drives forever. If it’s a Windows laptop, check if the SSD is “soldered.” If it isn’t, save your money and upgrade it yourself.