
I once spent three hours on a Tuesday afternoon staring at a blank screen, listening to the rhythmic thump-thump of my sourdough starter bubbling in the kitchen, while my stomach did slow rolls. I had just accidentally emptied the trash bin on a folder containing three years of client project logs. In that moment, the internet didn’t offer me a calm solution; it offered me a dozen predatory pop-ups promising “miracle” software that cost fifty quid a month. Most people think learning how to recover deleted files requires a degree in computer science or a massive subscription to a tool that promises the moon. In reality, most of those “one-click” fixes are just expensive ways to exploit your panic.
I’m not going to sell you a miracle, but I can tell you what actually works. I’ve spent enough time in the trenches of IT support to know the difference between a genuine fix and a money pit. In this guide, I’ll walk you through the specific steps to check your backups, the exact settings to toggle, and which recovery tools are actually worth your time. I’ll also tell you exactly what happens to your data if you stop paying for those fancy recovery services, so you aren’t left in the dark later.
Table of Contents
Undelete Files Windows or Mac What Actually Works

When you realize something is missing, your first instinct is probably to start clicking everything in sight. Don’t. Every second you spend browsing the web or downloading new software onto that same drive is a second you’re potentially overwriting the very data you’re trying to save. If you’re looking to undelete files Windows or Mac style, the process starts with a hard stop. If the files were on an external drive, unplug it immediately. If they were on your main internal drive, stop using the computer entirely and move to a different device to do your research.
The actual methods for getting things back depend on how much luck you’re having with the OS. For Windows, you’re looking at checking the Recycle Bin first (obvious, I know), then moving to File History if you actually bothered to set it up. On a Mac, Time Machine is your best friend, provided you haven’t let the backup drive run out of space. If those fail, you’re looking at more aggressive hard drive data recovery methods like specialized software. Just a heads-up: most of these tools will let you scan for free, but they’ll hit you with a subscription fee the moment you actually try to save the files.
Hard Drive Data Recovery Methods That Wont Waste Your Time
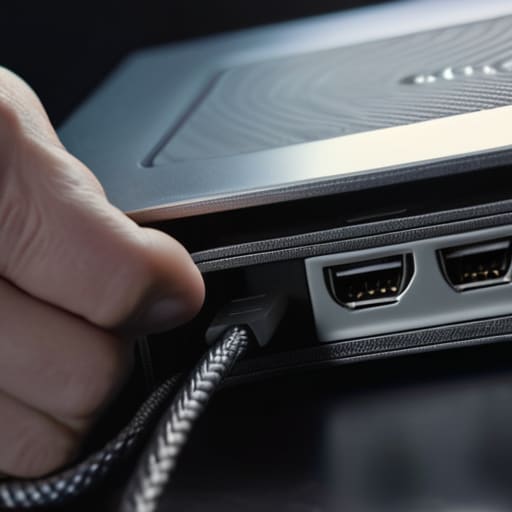
If you’re looking at a list of “miracle” recovery tools, stop. Most of them are just fancy wrappers for the same basic scanning logic, and many will charge you a monthly subscription just to tell you that your files are indeed gone. If you are restoring files from an external drive, your first move should always be checking the physical connection. It sounds patronizing, I know, but I spent three years of my life at a helpdesk watching people panic about “lost” data that was actually just a loose USB-C cable or a faulty port.
When the hardware is fine but the files aren’t showing up, you’re likely dealing with file system corruption recovery. This is where things get fiddly. If the drive is clicking or making a rhythmic tapping sound, stop everything immediately. That is mechanical failure, not a software problem, and running a recovery scan on a dying drive is the fastest way to ensure the data is gone for good. At that point, you aren’t looking for an app; you’re looking for a professional lab. If it’s just a logical error, you can try command-line tools like CHKDSK, but be prepared for the fact that they can sometimes make the corruption worse if you aren’t careful.
Five things to do (and not do) before you lose your data for good
- Stop writing to the drive immediately. If you just deleted a file on your laptop, don’t download a massive software update or start a heavy file transfer. Every new bit of data you save is like a layer of fresh paint over a hidden drawing; eventually, you’ll paint right over the thing you’re trying to find.
- Check the “hidden” cloud backups first. Most people forget that OneDrive, iCloud, or Google Drive often keep their own version of a “Trash” bin that operates independently of your computer’s Recycle Bin. It’s worth the thirty seconds to log in via a web browser before you start panicking.
- Don’t trust “Free” recovery software blindly. A lot of these tools will let you scan your drive for free—which looks great—but then they’ll ask for $50 to actually save the files once you’ve found them. If you’re going to pay, make sure the trial actually shows you a preview of the file content so you know it’s worth the money.
- Know the “SSD vs. HDD” reality. If you have an older mechanical hard drive, your chances of recovery are decent. If you have a modern SSD (which most laptops do now), a feature called TRIM often wipes deleted data almost instantly to keep the drive fast. If the data isn’t in the trash, it might truly be gone.
- Test your backups before the crisis hits. I spent three years at the helpdesk watching people realize their “automatic backup” hadn’t actually run since 2022. Once a month, try to pull a random file from your backup to ensure it actually works. It’s a boring task, but it beats the alternative.
The quick version
Stop using the device immediately. Every second you keep browsing or downloading, you’re potentially writing new data right over the “deleted” files you’re trying to save.
Check your cloud and backups before you pay for anything. Most people forget they have a OneDrive, iCloud, or Time Machine backup running in the background that already solved the problem.
If you go the software route, read the fine print on the “subscription trap.” Many tools let you scan for free to see what’s recoverable, but they’ll hit you with a monthly fee the moment you actually want to hit ‘restore.’
## The Golden Rule of Data Recovery
Stop looking for a magic app and start looking at your habits. If you’ve already kept using that drive, the files are likely overwritten, and no amount of subscription-based “miracle software” is going to bring them back from the dead.
Saoirse Doyle
The reality check

If you’ve followed this far, you probably already know that there is no magic button to undo a mistake. Whether you’re digging through the Recycle Bin, checking your cloud provider’s “deleted items” folder, or trying to run a recovery tool on a failing drive, the goal is the same: stop writing new data immediately. If you are using a mechanical hard drive, you have a fighting chance; if you’re on a modern SSD with TRIM enabled, you need to act within minutes or accept that the data is likely overwritten and gone. Don’t waste money on “miracle” software that promises 100% recovery rates unless you’ve already exhausted the free, manual methods I’ve outlined here.
At the end of the day, the best way to deal with file recovery is to make sure you never have to do it again. I know, it’s the boring answer, but a simple, automated backup—whether it’s a physical drive plugged into your desk or a reliable cloud service—is the only thing that actually removes the panic when things go wrong. Technology is inherently finicky and prone to breaking, but your digital life shouldn’t be at the mercy of a single accidental click. Build a system that forgives your mistakes, and you’ll spend a lot less time staring at a progress bar and a lot more time doing things that actually matter.
Frequently Asked Questions
If I've already emptied my trash bin or recycling bin, is the data actually gone for good?
The short answer is no, it isn’t gone yet, but you need to stop using that device immediately. When you empty the bin, the computer doesn’t actually scrub the data; it just marks that space as “available” for new stuff. As long as you haven’t saved a massive new movie file or a system update over that exact spot, the original data is still sitting there, waiting to be found.
Does using a recovery tool on the same drive where the files were lost actually make things worse?
Yes, it absolutely can. This is the part they don’t tell you in the flashy software ads: when you “delete” a file, the computer just marks that space as “available.” If you download and install a recovery tool onto that same drive, the computer might decide that the space where your lost photos were living is the perfect place to put the new software. You’re essentially writing over your own evidence. Always install recovery tools on a different drive or a USB stick.
Is it worth paying for professional data recovery services, or is that just a way to get fleeced?
It depends entirely on whether your data is worth more than a few hundred pounds. If you lost a folder of tax returns, do it yourself with a recovery tool. If you lost the only copy of your wedding photos because your drive is making a clicking sound, stop everything and call a professional. DIY software can actually kill a physically failing drive. Professional labs are expensive, but they’re the only ones who can fix hardware.
