I spent three years at a helpdesk listening to people panic because their “seamless” cloud storage suddenly hit a subscription ceiling or, worse, vanished during a server outage. The big myth is that you need a degree in network engineering or a server rack in your basement to secure your data; the reality is that most people just want a reliable place to dump their photos without paying a monthly “convenience tax” forever. If you’re tired of wondering where your files actually live, learning how to set up a nas is less about high-level architecture and more about buying the right box and plugging it in correctly.
In this guide, I’m skipping the marketing fluff about “unparalleled data synergy” and getting straight to the hardware. I’ll walk you through exactly what to click during the initial configuration, which drive types won’t die on you in six months, and—most importantly—what happens to your data if you decide to stop paying for a specific manufacturer’s premium software suite. We’re going to focus on a boring, stable setup that stays out of your way so you can get back to your actual life.
Table of Contents
- Step-by-Step Instructions
- The Nas Hardware Requirements What You Actually Need to Buy
- A Nas Drive Installation Guide for People Who Hate Manuals
- Five things I wish someone had told me before I hit 'format'
- The TL;DR version
- The truth about your data
- Don't let it sit in the box
- Frequently Asked Questions
Guide Overview
Tools & Supplies
- Screwdriver (Phillips head for case assembly)
- Ethernet cable (To connect to your router)
- USB flash drive (8GB+ for OS installation)
- Computer (To access the web management interface)
- NAS enclosure or old PC (1 unit)
- Hard drives or SSDs (2+ units for RAID redundancy)
- RAM (If upgrading existing hardware)
- Network switch (Optional, for high-speed local connectivity)
Step-by-Step Instructions
- 1. First, you need to pick your hardware, and please don’t overcomplicate this. You have two real choices: buying a pre-built unit from a company like Synology or QNAP, or building your own using an old PC and some software like TrueNAS. If you want to actually use your weekend for something other than troubleshooting kernel panics, buy the pre-built box. It’s more expensive upfront, but it means you aren’t playing IT support for your own living room.
- 2. Once the box arrives, you need to buy the hard drives. This is where people usually trip up and waste money. Do not just grab whatever is on sale at the big-box retailer. You need NAS-specific drives (like Western Digital Red or Seagate IronWolf). These are designed to vibrate less and run 24/7 without dying of heat exhaustion. Also, buy one more drive than you think you need; you’ll thank me when you’re setting up redundancy.
- 3. Physically, the setup is pretty mindless. Slide the drives into the bays until they click, plug the NAS into your router using an Ethernet cable—do not try to do this over Wi-Fi—and plug in the power. If you try to configure a NAS over a wireless connection, the initial handshake often fails, and you’ll end up staring at a blinking orange light wondering if you’ve just bought a very expensive paperweight.
- 4. Now you have to find the device on your network. Most manufacturers have a web address you can type into your browser (something like `find.synology.com`) to locate the unit. Once you’re in, it will walk you through installing the operating system. This part takes a while because it’s downloading several gigabytes of data. Just let it finish; don’t pull the plug or refresh the page halfway through, or you’ll be starting this whole process from scratch.
- 5. Next comes the “Storage Pool” and “Volume” setup. This is the part that sounds intimidating but is really just telling the computer how to use the disks. You’ll want to select RAID configuration (usually SHR or RAID 5 for beginners). This is the magic that ensures if one of your hard drives inevitably dies in three years, your photos and documents stay safe on the remaining ones. It’s not a replacement for a backup, but it keeps you from panicking when a drive makes a clicking sound.
- 6. Create your user accounts and shared folders. I highly recommend creating a separate “admin” account with a very long password and then making a standard user account for your daily life. If you use the admin account for everything, a single piece of malware or a stray click can have much easier access to your entire digital life. Set up a folder for “Photos,” one for “Documents,” and maybe one for “Backups.
- 7. Finally, map the drives to your computer so they show up like a normal hard drive. On Windows, this is “Map Network Drive”; on a Mac, it’s “Connect to Server.” Once this is done, you can drag and drop files just like you would to a USB stick. Just remember: a NAS is a place to store things, not a place to keep them. If you have truly irreplaceable files, make sure they are also backed up to a separate physical location or a cloud service.
The Nas Hardware Requirements What You Actually Need to Buy
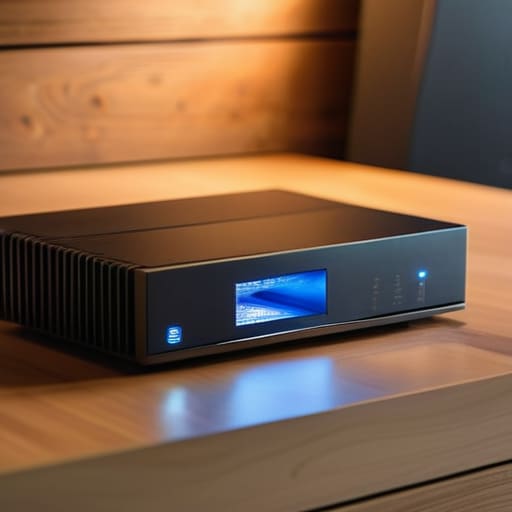
Before you start clicking through setup wizards, we need to talk about the actual physical stuff. Most people make the mistake of buying a massive, high-end unit thinking it’ll make their life easier, but for a home setup, you mostly just need something that won’t overheat in a cupboard. When looking at nas hardware requirements, don’t get distracted by shiny marketing specs for “AI acceleration” or anything else that sounds like jargon. You need a reliable processor, enough RAM to handle your file transfers, and—most importantly—a chassis that feels sturdy.
The real money, and the real headache, is in the drives. Do not, under any circumstances, use standard desktop hard drives; they aren’t built to run 24/7 and they will fail you. You need NAS-specific drives designed for constant spinning. Once you have the drives, you’ll be configuring raid arrays, which is basically just the way the box uses multiple disks to protect you if one dies. If you buy a four-bay unit, aim for at least two drives to start with. It’s better to have an empty slot for an upgrade later than to realize you’ve run out of room three months in.
A Nas Drive Installation Guide for People Who Hate Manuals
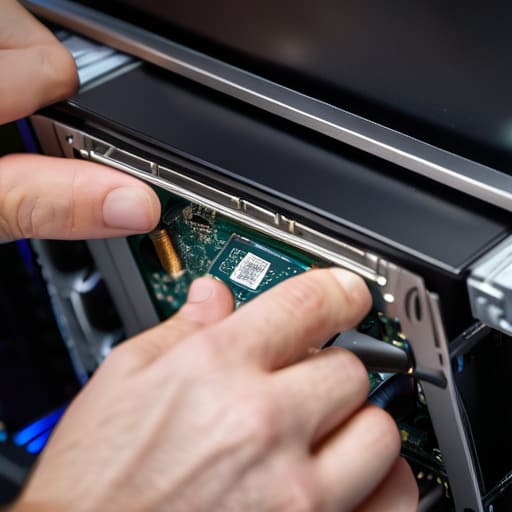
Once you’ve got your drives and your box, you’re going to be staring at a set of plastic trays and a handful of screws. Most manuals make this sound like a delicate surgical procedure, but it’s mostly just sliding things into slots. My one rule for this nas drive installation guide is this: check your drive orientation before you push. If you force a drive in crooked, you aren’t just being “efficient,” you’re risking a bent connector that will make your entire setup a headache. If your enclosure uses tool-less trays, just make sure the drive is seated firmly against the backplane; if it feels wiggly, it isn’t in right.
After the physical part is done, you’ll hit the screen where the real work begins. This is where you’ll be configuring raid arrays, and this is the moment where most people make a mistake they regret six months later. Don’t just pick the fastest option because a forum told you to; pick the one that actually protects your data if a single drive decides to die. It’s better to lose a bit of total capacity now than to lose every single photo of your last five years because you tried to save a few gigabytes.
Five things I wish someone had told me before I hit 'format'
- Don’t skimp on the drives, but don’t buy “enterprise” ones just because the salesperson used a big word; look for NAS-rated drives like Western Digital Reds or Seagate IronWolfs, because they’re actually designed to vibrate in a box full of other spinning disks without dying.
- Set up your RAID configuration for redundancy, not for extra space; remember that RAID isn’t a backup, it’s just a way to keep the system running when one drive inevitably decides to quit.
- Disable the “easy” remote access features if you can; most manufacturers have a one-click way to access your files from anywhere, but it often opens a digital back door that’s about as secure as a screen door in a thunderstorm.
- Map your network drives immediately after setup so you actually use the thing; if you leave your files sitting in a web browser interface, you’ll eventually get frustrated and go back to saving everything to your desktop like it’s 2005.
- Check your subscription-free status; if you’re using a brand that requires a monthly fee just to access your own hardware’s advanced features, walk away—your data belongs to you, not to their quarterly earnings report.
The TL;DR version
Don’t overspend on a shiny new setup; buy enough storage to hold your current mess plus about 30% more for when you inevitably download more things.
Redundancy isn’t a magic shield; a NAS protects you from a single drive dying, but it won’t save you if you accidentally delete a folder or if your house floods.
Check the “exit strategy” for any software you install on the box—if the manufacturer goes bust or hides your files behind a new subscription, you’re stuck.
The truth about your data
A NAS isn’t a magic vault that makes your digital life organized; it’s just a box of spinning disks that you’ve given a brain. If you don’t understand exactly how it’s storing your files and what happens to them when a drive inevitably dies, you haven’t built a backup system—you’ve just built a very expensive way to lose everything at once.
Saoirse Doyle
Don't let it sit in the box
So, there you have it. You’ve picked your hardware, slotted in the drives without losing a finger, and hopefully didn’t spend more time than necessary staring at a blinking LED that looks like it’s judging you. Just remember the golden rule of everything I’ve ever written: a NAS is only as good as your backup strategy. If you set this up and then treat it as your only copy of your wedding photos or tax returns, you haven’t actually solved a problem; you’ve just moved your data to a more expensive single point of failure. Make sure you have an off-site copy or at least a secondary drive that isn’t plugged into the same power strip, because hardware eventually fails, and it usually does so at the most inconvenient moment possible.
It feels like a lot of friction right now, I know. It’s much easier to just pay the monthly fee to a big tech company and let them worry about the servers. But there is a quiet, massive relief in knowing that your digital life is sitting on a physical box in your living room, governed by your rules and not a subscription algorithm. Once you get past the initial fiddly bits of the setup, the system should just… stay out of your way. You didn’t build this to become a sysadmin; you built it so you could stop worrying about storage and get back to actually using your devices. Now, go check on your bread starter; I think I heard the timer go off.
Frequently Asked Questions
If one of the drives fails, am I actually going to lose all my photos, or is the redundancy thing real?
The short answer is: yes, the redundancy is real, but it isn’t magic. If you’ve set up your drives in a RAID configuration (like RAID 1 or RAID 5), the system uses the extra data to rebuild what was lost on the failed drive. You won’t lose your photos immediately. However, “redundancy” is not a “backup.” If the whole box gets hit by a power surge or a coffee spill, those photos are gone.
Do I really need to plug this into my router with a cable, or can I just use the Wi-Fi like everything else?
You can, technically, but please don’t. If you try to run a NAS over Wi-Fi, you’re basically trying to drink a milkshake through a cocktail straw. It’ll work for a tiny file here and there, but the moment you try to back up a laptop or stream a movie, it’ll stutter and die. Plug it into the router with an Ethernet cable. It’s one more wire to hide, but it’s the only way to keep it reliable.
What happens if I decide I don't want to pay for the extra storage space next year—can I just move my files back to my laptop?
The short answer is yes, but it’s a bit of a chore. Your files aren’t held hostage; they’re just sitting on a physical drive in your house. If you cancel a cloud-sync subscription or stop using a managed service, you just plug the drives into your computer and drag the folders back over. It’s not a “one-click” experience, and it’ll take as long as your Wi-Fi or USB cable allows, but your data stays yours.
