I once spent a Tuesday afternoon in a cramped server room, surrounded by tangled cables and the smell of ozone, explaining to a frantic manager why his “high-speed” connection was actually crawling at a snail’s pace. He had spent three hundred euros on a router that promised the moon, only to realize he’d tucked it inside a metal cabinet behind a stack of old binders. Most people think that learning how to set up a home wifi network requires a degree in electrical engineering or a massive budget for “smart” mesh systems that promise the world and deliver nothing. The truth is usually much more boring: it’s about placement, frequency, and not falling for the marketing fluff that tells you more hardware equals more speed.
In this guide, I’m skipping the jargon and the sales pitches. I’ll show you exactly what to plug in, where to actually put that router so it doesn’t die in your hallway, and how to secure it so your neighbors aren’t using your bandwidth for their Netflix binges. We’ll also talk about those monthly “security subscription” nonsense fees—because if you stop paying them, you should still be able to browse the web. This is just the practical, no-nonsense version of getting your signal to actually work.
Table of Contents
- Step-by-Step Instructions
- The Modem and Router Connection What Actually Matters
- Optimizing Wifi Signal Strength Without Buying Useless Plastic
- Five things to do before you settle in and call it finished
- The short version
- ## The truth about "better" hardware
- Getting it over the finish line
- Frequently Asked Questions
Guide Overview
Tools & Supplies
- Smartphone or Computer for configuration
- Ethernet cable for initial setup
- Modem 1 unit
- Wi-Fi Router 1 unit
- Power cables 2 units
Step-by-Step Instructions
- 1. First, find your modem and your router. If your ISP gave you one single box that does both, you’re already halfway there, but if they are separate, make sure you have a high-quality Ethernet cable (it should be labeled Cat5e or Cat6) to connect the two. Plug the modem into the wall jack, then run that cable from the modem’s “WAN” or “Internet” port into the matching port on your router.
- 2. Once the lights on the modem stop blinking like a frantic disco, plug in your router and wait about five minutes. You’re looking for a solid power light and usually a symbol that looks like a little globe. If the lights are still flashing orange or red after ten minutes, unplug the power from both, wait thirty seconds, and plug the modem in first, then the router. It’s the oldest trick in the book, but it actually works.
- 3. Now you need to actually talk to the router. Look at the sticker on the bottom or back of the device; it will have a default Wi-Fi name (SSID) and a password. Connect your laptop or phone to that specific network. If you’re using a laptop, it’s often easier because you won’t be fighting with mobile browser quirks while trying to navigate the settings.
- 4. Open a web browser and type in the router’s IP address. This is usually something like `192.168.1.1` or `192.168.0.1`, which should also be on that same sticker. This takes you to the admin dashboard. If it asks for a username and password, try `admin` for both, but if that fails, check the sticker again. This is the most important part: change the admin password immediately. If you leave it as the factory default, anyone sitting in a car outside your house can get into your settings.
- 5. Find the Wireless or Wi-Fi settings tab and give your network a name you’ll actually recognize. I suggest avoiding “The Smith Family Wi-Fi” and just going with something boring. While you’re in there, set your security type to WPA3 or WPA2-AES. If you see an option for “WPA” without a number, ignore it; that’s old, insecure, and about as useful as a screen door on a submarine.
- 6. Set a strong password for the Wi-Fi itself. Don’t use your phone number or your dog’s name. Once you hit “Save” or “Apply,” your current connection will drop. This is normal. You’ll need to go back into your device’s Wi-Fi settings, find your newly named network, and sign in with the new password you just created.
- 7. Finally, do a quick “dead zone” check. Walk into your kitchen, your bedroom, and your bathroom with your phone and try to load a video. If the signal drops to nothing in the hallway, you might need to move the router to a central, elevated location. Don’t hide it inside a wooden cabinet or behind the TV; metal and thick wood are basically Wi-Fi killers.
The Modem and Router Connection What Actually Matters
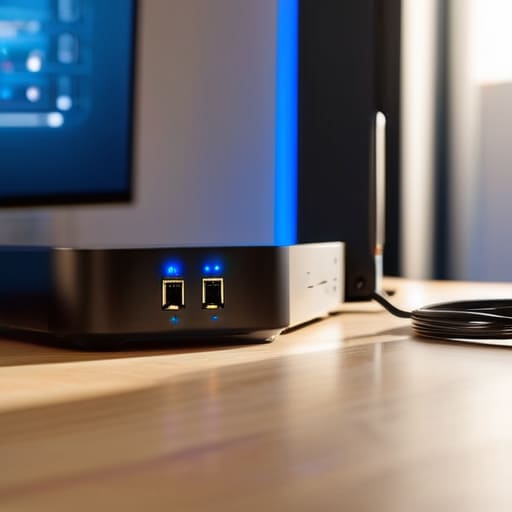
When you’re looking at the back of your hardware, it’s easy to get overwhelmed by the tangle of cables. The most important thing to remember regarding your modem and router connection is that the order of operations actually matters. Plug your modem in first, give it a few minutes to fully shake hands with your ISP, and only then connect the router. If you try to do both at once, you’ll likely spend twenty minutes staring at a blinking orange light wondering why the internet isn’t working, when in reality, the devices just haven’t introduced themselves yet.
Once the lights are steady, don’t just leave the router in a corner behind the TV or inside a metal cabinet. I see this all the time—people trying to hide their tech, only to end up fighting dead zones in every other room. If you want to spend less time troubleshooting, place the device in a central, open area. If you find your signal is still struggling in the bedroom, you’ll eventually have to decide between a cheap wifi extender vs mesh system; just be aware that extenders often cut your speed in half, whereas a mesh system is a much more reliable (though pricier) way to cover a house.
Optimizing Wifi Signal Strength Without Buying Useless Plastic

Before you go out and buy those expensive “signal boosters” that look like little white mushrooms, let’s talk about physics. Most of the time, your connection issues aren’t because your router is weak, but because you’ve hidden it in a cabinet or tucked it behind a heavy sofa. WiFi signals are essentially radio waves, and they hate obstacles. If you want to start optimizing wifi signal strength without spending a dime, move the router to a central, elevated location. Getting it out from under a desk and into the open air is often more effective than any piece of hardware you can buy on Amazon.
If you do find yourself in a dead zone, you’ll likely see ads pushing a wifi extender vs mesh system debate. Here is the honest truth: extenders are often a headache; they create a second network name that your phone might struggle to switch between, leading to those annoying “connected but no internet” moments. If your house is actually large or has thick brick walls, a mesh system is a legitimate fix, but for most people, just tweaking your wireless router configuration to use the 5GHz band for nearby devices and the 2.4GHz band for things further away is enough to stop the lag.
Five things to do before you settle in and call it finished
- Rename your SSID (the network name) to something that doesn’t include your name or house number. It’s not about being a spy; it’s just about not making it easy for someone walking past your window to know exactly which apartment belongs to the person with the terrible security settings.
- Pick a strong password, but don’t make it something you’ll forget and have to reset via a tiny button on the back of the router. If you can’t remember it, use a password manager. If you lose access to the manager, you’re stuck, so make sure you have a physical backup of your master key in a drawer somewhere.
- Separate your 2.4GHz and 5GHz bands if your router lets you. Most modern “smart” lightbulbs and cheap kitchen gadgets are incredibly dim-witted and can only see the 2.4GHz band. If you lump them together, they’ll constantly fight your laptop for the “faster” connection and end up making everything feel sluggish.
- Check your firmware updates immediately. Most routers come with outdated software right out of the box. Log into the admin panel—usually by typing a specific IP address like 192.168.1.1 into your browser—and hit update. It’s a five-minute task that fixes a dozen security holes you didn’t know you had.
- Disable WPS (Wi-Fi Protected Setup) if you aren’t using it. It’s that little button that lets you connect devices without a password, but it’s a massive security hole that makes it way too easy for someone to brute-force their way onto your network. It’s a convenience that isn’t worth the headache later.
The short version
Put your router in the middle of the house, not in a cupboard or behind the TV; signal hates walls and metal, so give it some breathing room.
Change your admin password and SSID immediately—don’t stick with the manufacturer defaults just because it’s easier.
Before you buy a “mesh system” or a fancy new router, check if you actually need more coverage or if you just need to move your current one to a better spot.
## The truth about "better" hardware
Most people think a dead zone in the kitchen is a signal problem, but it’s usually just a placement problem. You don’t need a $400 mesh system to fix a bad connection; you just need to stop hiding your router inside a wooden cabinet or behind a stack of old magazines like it’s a shameful secret.
Saoirse Doyle
Getting it over the finish line
At the end of the day, setting up your network isn’t about finding the most expensive mesh system or the one with the most flashing lights; it’s about making sure your hardware is in a central, open spot and that your security settings aren’t the default ones from the factory. You’ve done the hard part: you’ve connected the modem, secured the admin password, and positioned the router so it isn’t tucked behind a heavy metal filing cabinet. If you can connect your phone and your laptop without the signal dropping every time you walk into the kitchen, you have successfully won the battle against your home internet. Don’t let the marketing fluff convince you that you need a monthly subscription just to keep your signal stable; if the hardware is solid and the placement is right, you’re good to go.
I know it feels like there is always another update, another new protocol, or a more “optimized” way to do things, but please don’t fall into that trap. Technology is supposed to be the background noise of your life, not a hobby you’re forced into by a manufacturer’s clever design. Once your WiFi is running, stop tinkering with it. Go back to your actual life, your work, or your sourdough starter, and let the bits and bytes do their job quietly in the corner. You don’t need a perfect network; you just need one that stays out of your way.
Frequently Asked Questions
Do I really need to pay for those "mesh" systems that promise better coverage, or can I just get a better antenna?
Look, an antenna upgrade is a band-aid for a structural problem. If you live in a small flat, a single decent router is plenty. But if you’re fighting dead zones through thick walls or across floors, a better antenna won’t help; physics won’t let that signal through. You need a mesh system. Just a warning: avoid the “subscription-based” mesh brands. If you stop paying their monthly fee, they often turn your expensive hardware into a paperweight.
If I change my WiFi name and password, what happens to all my smart plugs and lightbulbs?
The short answer: everything breaks. Your smart plugs and bulbs aren’t actually “connected” to your WiFi name; they are hardcoded to look for that specific SSID and password. When you change them, your devices will just sit there, blinking or showing as “offline” in your app.
Is it worth setting up a "Guest Network" for visitors, or is that just extra work for no real security benefit?
It’s worth the five minutes of setup. Think of your main network like your house: you wouldn’t hand a guest the keys to your bedroom and your filing cabinet just because they’re visiting. A guest network keeps your smart fridge and your private files separate from your friend’s potentially malware-ridden phone. It’s not about “extra work”; it’s about creating a digital buffer so a visitor’s device can’t accidentally poke around your personal stuff.
