
How to Find and Cancel Subscriptions You Forgot About

I spent six years on a helpdesk listening to people swear that they were being “tricked” by their bank accounts, when really, they were just trapped in a labyrinth of poorly designed user interfaces. Most productivity gurus will tell you that you need a fancy new budgeting app to track your leaks, but that’s just another monthly fee you don’t need. The truth is, learning how to cancel unwanted subscriptions isn’t about finding a magic tool; it’s about knowing exactly which buttons to click to stop the bleeding. It’s frustrating, it’s often intentionally obfuscated, and it usually feels like you’re fighting a battle against a very polite, very automated machine.

I’m not going to give you a lecture on mindfulness or suggest you download a subscription manager that costs ten dollars a month to save you five. Instead, I’m going to give you the actual exit strategy. I’ll walk you through the specific menus for the big players, tell you which companies are notorious for hiding their “cancel” button in a sub-menu three layers deep, and—most importantly—what happens to your data the moment you hit confirm. No hype, no fluff, just the steps to get your money back.

Table of Contents

Bank Statement Audit Tips for the Chronically Distracted

Bank Statement Audit Tips for the Chronically Distracted

If you’re like me, looking at a bank statement feels a bit like looking at a crime scene where you’re both the victim and the perpetrator. The trick to identifying ghost subscriptions isn’t to scan the whole list at once—that’s how you miss the $4.99 charge hiding behind a generic “Service LLC” name. Instead, grab a coffee, sit down, and filter your transaction history by “recurring” or “automatic” if your banking app allows it. If it doesn’t, you’ll have to do it the manual way: scroll through the last three months and look for anything that hits on the same date every single time.

Don’t just look for big numbers, either. The real damage usually comes from the small, “invisible” ones—the extra cloud storage, the premium weather app, or that fitness trial you forgot to kill. Once you spot a suspicious line item, don’t just assume it’s a mistake. Log into the actual service first to see what the billing cycle looks like. The goal isn’t just reducing monthly expenses, it’s making sure you actually know where your money is going before it leaves your account.

Managing Recurring Billing Without Losing Your Mind Much
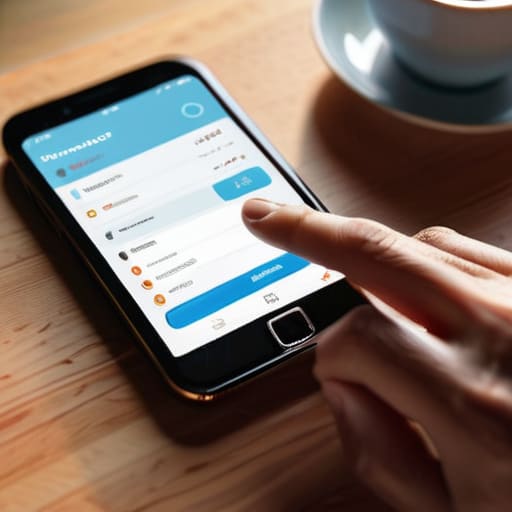
Managing Recurring Billing Without Losing Your Mind Much

Once you’ve finished your audit, the real work is preventing the next wave of charges from hitting your account. I used to tell my users that the easiest way to handle this was to wait for the email notification, but that’s a lie—most companies make those notifications intentionally vague or bury them in your spam folder. Instead, I’ve found that managing recurring billing works best when you treat it like a scheduled maintenance task. Pick one day a month—the day after payday is usually easiest—to look at your upcoming scheduled transfers.

If you’re looking for a way to automate this, you can find various subscription management tools that claim to do the heavy lifting for you. Just a word of caution from my helpdesk days: many of these tools require you to hand over your bank login credentials, which is a privacy trade-off not everyone is comfortable with. If you want to keep things simple and manual, just set a recurring calendar event for your most expensive services. It takes thirty seconds, but it’s much better than the “oops” moment when you see a $15 charge for a streaming service you haven’t opened since last Christmas.

The "Don't Get Trapped" Checklist

  • Check the “hidden” cancellation path. A lot of services make the ‘Cancel’ button look like a tiny, greyed-out link buried under three layers of ‘Manage Account’ menus. If you can’t find it within two minutes, they’re doing it on purpose.
  • Verify the data grace period. Before you hit confirm, check if you actually lose access to your files immediately or if you keep them until the end of the billing cycle. Most let you finish the month, but some cloud storage providers will lock you out of your own documents the second the payment fails.
  • Watch out for the “Pause” trap. When you click cancel, they’ll almost certainly offer to “pause” your subscription for three months instead. Don’t do it unless you actually intend to come back; a pause is just a delayed bill that’s harder to track in your bank statement later.
  • Confirm the email receipt. Never trust a “Cancellation Successful” pop-up on a screen. Always wait for the automated email. If it doesn’t show up in your inbox within ten minutes, go back and check your status—half the time, the session just timed out and they’ve still got your money.
  • Audit your App Store vs. Direct billing. This is the one that trips everyone up. If you signed up through your iPhone, you can’t cancel it on the company’s website; you have to go through your Apple ID settings. If you try to cancel on the web and it says ‘Subscription not found,’ you’re likely paying through a third-party middleman.

The three things you actually need to remember

Check the “grace period” before you hit cancel; most services let you keep your files for 30 days, but some will lock you out of your data the second the billing cycle ends.

Don’t just delete the app from your phone to stop a subscription—that’s a classic mistake that leaves the recurring charge running in the background.

Keep a simple list of what each service actually costs per year, because seeing that a “small” £4.99 monthly charge is actually £60 is usually the only thing that makes the cancellation feel worth the effort.

The subscription trap

Most companies don’t design their cancellation buttons to be easy to find; they design them to be a psychological hurdle you’ll eventually give up on. Cancelling isn’t about being organized—it’s about deciding that a service isn’t worth the mental tax of remembering it exists.

Saoirse Doyle

The Final Cleanup

Completing The Final Cleanup of digital subscriptions.

At the end of the day, cleaning up your digital life isn’t about finding some magical new budgeting app or a complex spreadsheet. It’s about the manual, slightly annoying work of looking at your bank statement, finding that one $9.99 charge you forgot about, and actually clicking the cancel button. Remember to check what happens to your data after you leave; most services give you a grace period, but some will wipe your files the second your access expires. If you’ve done the audit and mapped out your recurring bills, you’ve already done the hardest part of the job.

Don’t feel guilty about the money you’ve already spent on services you didn’t use. That’s just a “sunk cost,” and dwelling on it won’t put the cash back in your account. The goal here isn’t perfection; it’s just making sure your current setup stops getting in your way. Once you’ve trimmed the fat, you’ll likely find that you have a bit more breathing room—both in your bank account and in your head. Now, go close those extra tabs and get back to something real.

Frequently Asked Questions

What actually happens to my files or photos the second I hit cancel?

The short answer is: usually nothing happens immediately. Most services let you keep your files until the end of the current billing cycle. Think of it like a gym membership; you’ve paid for the month, so you can still use the equipment. However, once that period ends, you often drop into a “read-only” mode. You can see your photos, but you can’t add new ones, and eventually, they’ll start deleting things to save server space. Always download your stuff first.

If I find a charge I don't recognize, how do I fight it without getting stuck in a loop with customer support?

First, don’t call the bank yet; they’ll just freeze your card and make your life harder. Instead, find the specific transaction in your app and look for a “Contact Merchant” link. If you have to use a chat bot, type “Agent” or “Human” repeatedly—it’s a cliché because it actually works. Once you reach a person, skip the backstory. State the date, the amount, and say, “I did not authorize this charge. Please confirm the cancellation and refund.”

How do I track down those subscriptions that aren't in my email inbox but are still hitting my bank account?

This is the part where the “I thought I cancelled that” realization actually hurts. If it’s not in your inbox, it’s likely a “ghost” subscription—often billed through a third party like Apple, Google, or Amazon rather than the service itself. Open your phone’s subscription settings immediately; that’s where most of these hide. If it’s still not there, you’ll have to play detective with your banking app, looking for weird merchant names that don’t match your emails.


How to Track Spending Without Logging Every Coffee

I spent six years on a helpdesk watching people lose their minds over software that was supposed to “simplify” their lives, only to end up spending more time troubleshooting the tool than actually doing the work. Most of the advice you see online about how to track spending is just a thinly veiled sales pitch for a $12-a-month subscription that promises to automate your soul away. They tell you that you need a beautiful dashboard, a complex AI categorization engine, and a complete lifestyle overhaul. Honestly? Most of that is just noise designed to make you feel like your current method is broken so you’ll buy their fix.

I’m not here to sell you a shiny new ecosystem or a lifestyle makeover. My goal is to show you how to find a way to track spending that actually stays out of your way. I’ll walk you through the different ways to do it—from the “low-tech” spreadsheet methods that never crash to the automated apps that might lock your data behind a paywall—and I’ll tell you exactly what happens to your history if you decide to cancel the service. We’re going to focus on what to click, what it costs, and how to make sure the system actually works for you.

Table of Contents

Personal Finance Apps What to Click and What It Costs

Personal Finance Apps What to Click and What It Costs

If you’re looking into personal finance apps, you’ll quickly realize most of them are designed to make you feel like you’re failing a test you never signed up for. Most people start with the “big” names—the ones with the sleek interfaces and the automated bank syncing. They’re great for monthly expense management because they do the heavy lifting of categorizing your coffee runs and utility bills for you. But here is the catch: that automation is a double-edged sword. If the sync breaks—and it will, usually right when you’re trying to reconcile a weird transaction—you’re left staring at a broken dashboard.

Before you commit, check the “exit strategy.” Many of these tools operate on a subscription model, and I need to be clear: if you stop paying, you often lose access to the very data you spent months collecting. You aren’t just losing a tool; you’re losing your history. If you want to try budgeting methods for beginners without the high stakes, look for apps that allow for a full CSV export. You want to own your data, not rent it from a company that might change its pricing tier next Tuesday.

Monthly Expense Management for People Who Hate Systems

Monthly Expense Management for People Who Hate Systems

If you’re anything like me, the idea of “monthly expense management” sounds like a chore designed by someone who enjoys spreadsheets more than sunlight. Most people fail at this because they try to build a fortress of rules on day one. You don’t need a complex architecture; you just need to know where the leaks are. I usually suggest starting with a simple “look back” rather than a strict “look forward.” Instead of trying to predict every cent, just spend one month observing where the money actually goes. It’s less about intense financial goal setting and more about not being surprised when your balance is lower than you thought it should be on the 20th.

When it comes to budgeting methods for beginners, the most effective one is usually the one that requires the least amount of manual data entry. If you have to log every single coffee purchase by hand, you will stop doing it by Tuesday. The goal is reducing impulse spending by creating a tiny bit of friction. If you can see a running total of your “fun money” for the month, you’ll naturally pause before that third unnecessary Amazon order. Keep it low-effort, or it won’t stick.

Five things that actually matter when you’re looking at your bank statement

  • Stop looking for the “perfect” app. I spent years watching people cycle through five different budgeting tools in six months because they were looking for a magic fix. Pick one that lets you export your data to a spreadsheet, because if you ever decide to cancel the subscription, you’ll want those numbers in a format that isn’t locked behind a paywall.
  • Automate the data entry, but audit the results. Most apps use “plaid” or similar services to pull your transactions automatically, which is great until it mislabels your local pub as “General Merchandise.” Set aside ten minutes on a Sunday to scan for these errors; if you don’t, your end-of-month report will be useless.
  • Watch out for the “subscription creep” in your own tracking. Many finance apps charge a monthly fee to tell you how much money you’re spending. If you’re paying £8 a month for an app to save you £5 a month in impulse buys, the math isn’t working. Use a simple, free spreadsheet if your spending habits aren’t actually that complex.
  • Categorize by “Needs” vs “Wants” rather than “Groceries” vs “Entertainment.” Knowing you spent £400 on food is fine, but knowing £150 of that was takeout because you were too tired to cook is the information that actually helps you change anything.
  • Don’t track every single cent. If you try to account for a 50p chocolate bar, you’ll burn out by Tuesday and stop looking at your accounts entirely. Group small, miscellaneous spends into a single “buffer” category and focus your energy on the big hitters like rent, utilities, and subscriptions.

The Bottom Line

Understanding your finances: The Bottom Line.

Don’t let the “perfect” setup become a second job; if an app takes more than ten minutes a week to maintain, it’s not a tool, it’s a chore.

Always check the export function before you subscribe, because the moment you want to leave, you’ll need that data in a CSV or you’ll be locked out of your own history.

A simple spreadsheet that you actually use is infinitely better than a high-tech dashboard that you stop checking after the first month.

The truth about tracking

Stop looking for the app that makes you feel organized; you’re just looking for a way to ignore the math. Pick a tool that actually lets you export your data, learn where the ‘cancel subscription’ button is before you sign up, and then just start typing in the numbers.

Saoirse Doyle

The Bottom Line

If you’ve read this far, you probably already know that there isn’t a magic app waiting to solve your money problems. You either pick a dedicated tool, commit to a manual spreadsheet, or just start looking at your bank statements once a week like a normal person. The goal isn’t to build a perfect, automated dashboard that looks like a Bloomberg terminal; the goal is to actually know where the money went before the month ends. Whether you choose a subscription-based app or a dusty notebook, just make sure you understand the exit strategy—know exactly how to get your data out if that company decides to hike their prices or shut down their servers next year.

At the end of the day, tracking your spending is just another form of maintenance, much like cleaning out your inbox or updating your router’s firmware. It’s not particularly glamorous, and it won’t make you feel like a productivity guru, but it does stop the constant, low-grade anxiety of wondering if you can afford that specific grocery run. Don’t wait for the “perfect system” to arrive, because it won’t. Just pick a method that doesn’t annoy you and start there. Once the system stops getting in your way, you can finally stop thinking about your budget and start actually living your life.

Frequently Asked Questions

If I stop paying for my budgeting app, do I actually lose access to my historical spending data or can I export it first?

This is the exact question I wish more people asked before hitting “subscribe.” The answer is: it depends, but usually, it’s a bit of a headache. Most apps will let you log in to view your data, but they’ll lock the “export” button behind a paywall. My rule is simple: if you’re thinking about cancelling, export your data to a CSV file first. Don’t trust a company to let you leave with your own history.

Is it worth the time to manually enter every single coffee purchase, or will that just make me want to quit the system in three weeks?

If you try to log every latte, you’ll quit by week three. I spent six years watching people abandon perfectly good systems because they turned a task into a second job. Manual entry is for when you need to verify a weird transaction, not for daily coffee. Pick an app that pulls from your bank automatically. If you can’t trust the automation, your system is too high-maintenance to actually work.

How much of my bank account data am I actually sharing when I link my accounts to these third-party apps?

When you link an account, you aren’t handing over your keys; you’re giving them a very specific, read-only view of your transaction history. Most apps use services like Plaid to pull data, which means they see what you spent and when, but they can’t actually move your money or change your password. The real risk isn’t a thief draining your account, but the app itself selling your spending habits to advertisers. Always check if the “data sharing” toggle is buried in the settings.

Emergency Funds: How Much, and Where to Keep It

I spent six years on a helpdesk watching people panic because their entire digital lives were tethered to a single point of failure. It wasn’t always a server crash, either; sometimes it was just a broken water heater or a sudden car repair that turned a Tuesday into a catastrophe. Most financial gurus will try to sell you a complex, multi-tiered wealth management strategy, but when people ask me what is an emergency fund, they aren’t looking for a lecture on compound interest. They are looking for a way to stop the constant, low-grade dread that comes with living one unexpected invoice away from a crisis.

I’m not here to give you a roadmap to early retirement or a list of high-risk investment vehicles. My goal is much more boring than that: I want to help you build a simple, sturdy buffer that actually works when things go sideways. I’ll walk you through exactly how much you need to set aside, where to keep it so you don’t accidentally spend it on takeout, and—most importantly—how to keep it accessible without losing your mind to bank fees. No hype, no fluff, just the practical steps to making sure your life doesn’t break when your tech (or your plumbing) does.

Table of Contents

Your Financial Safety Net What It Actually Covers

Your Financial Safety Net What It Actually Covers

Think of this as your personal buffer against the inevitable “everything is going wrong” Tuesday. It isn’t for a planned vacation or a new laptop you’ve been eyeing; it is specifically for unexpected expenses coverage when life decides to throw a wrench in your gears. I’m talking about the transmission failing on your way to work, a sudden dental bill that requires an immediate appointment, or a sudden gap in your paycheck. It is the difference between a bad week and a total life crisis.

To make this work, you need to know exactly what you are protecting. This starts with a basic monthly living expenses calculation—not including your fun money, but the boring stuff like rent, utilities, and groceries. Once you know that number, you can figure out how much of a cushion you actually need. I usually suggest keeping these funds in a high yield savings account for emergencies so the money is sitting there, ready to be grabbed, but still earning a tiny bit of interest while it waits for something to break.

The Monthly Living Expenses Calculation You Cant Ignore

The Monthly Living Expenses Calculation You Cant Ignore

Most people start this process by looking at their salary, which is a mistake. Your salary is what you bring in, but it has nothing to do with what it actually costs to keep your life running. To get a real number, you need a honest monthly living expenses calculation. This isn’t about your “fun money” or that fancy coffee habit; it’s about the non-negotiables. Rent or mortgage, utilities, groceries, insurance, and the minimum payments on your debt. If you don’t include the boring stuff, your safety net will be full of holes before you even realize you’re leaking cash.

I used to see people try to budget by rounding up, but in a crisis, those small gaps add up. I suggest sitting down with your bank statements from the last three months and finding your true baseline. Once you know that number—let’s say it’s £2,000—you can actually do the math. Multiply that by three or six months. That is your target. It’s much easier to aim for a specific goal when you aren’t just guessing based on a “feeling” of how much you spend.

Five ways to stop your savings from being a headache

  • Keep it in a boring, separate account. Don’t keep your emergency fund in your main checking account where it’s easy to accidentally spend it on a nice dinner or a new gadget. Use a high-yield savings account so it earns a little something, but more importantly, keep it far enough away from your daily spending that you have to actually think before you move it.
  • Don’t aim for “perfect” right away. People get paralyzed trying to figure out if they need exactly 3.5 or 6 months of expenses. Just start with a small, manageable goal—like $1,000 or one month of rent. It’s better to have a tiny safety net that actually exists than a massive, theoretical one that you haven’t started building yet.
  • Define what an “emergency” actually is before it happens. An emergency is a broken water heater or a sudden job loss; it is not a flash sale on a laptop you’ve wanted for months. If you don’t set these boundaries while you’re calm, you’ll find yourself “borrowing” from the fund when things are actually fine.
  • Automate the boring stuff. If you wait until the end of the month to see what’s left over to save, the answer will almost always be “nothing.” Set up a recurring transfer from your paycheck to your savings account. If you never see the money in your main account, you won’t miss it.
  • Know the exit strategy. Decide now how you will replenish the fund once you’ve used it. If you drain the account to fix your car, your new “job” for the next few months is to refill that specific bucket before you go back to any other financial goals.

The short version: what to remember

An emergency fund isn’t a savings goal for a holiday or a new car; it is a specific pile of cash meant only for when life hits you with something expensive and unplanned.

Don’t guess your number. Use your actual monthly survival costs—rent, food, utilities, and insurance—rather than a vague “three months of salary” estimate that usually misses the mark.

The goal is peace of mind, not perfection. It is better to have a small, slightly inadequate fund than to have nothing at all while you work toward a bigger one.

The real purpose of the pile

An emergency fund isn’t some grand, strategic wealth-building milestone; it’s just a pile of cash sitting there so that when your car makes that specific dying sound or your water heater decides to quit on a Tuesday, you aren’t scrambling to figure out which credit card has the lowest interest rate.

Saoirse Doyle

Getting started without the headache

Getting started without the headache: emergency funds.

At the end of the day, building an emergency fund isn’t about mastering complex investment strategies or predicting the stock market. It’s about knowing your actual monthly survival number—the cost of the rent, the groceries, and the electricity—and making sure you have a pile of cash that covers it when life inevitably gets messy. You don’t need a perfect spreadsheet or a high-yield savings account that promises the moon; you just need a dedicated space where that money stays untouched until a real crisis hits. Whether you start with fifty dollars or five thousand, the goal is to move from a state of constant, low-level anxiety to a place where a broken water heater is just an inconvenience rather than a total catastrophe.

I know that looking at your bank balance and realizing how much you actually need to save can feel incredibly heavy. It’s tempting to wait until you feel “financially stable” to start, but that’s a trap. Stability isn’t something you find; it’s something you build, one small, boring transfer at a time. Don’t let the sheer scale of the goal stop you from taking the first step. Once you have even a small buffer, you’ll notice that the world feels a little less volatile. You aren’t just saving money; you are buying yourself breathing room, and that is the best investment you will ever make.

Frequently Asked Questions

Where am I actually supposed to keep this money so I don't spend it?

You want this money somewhere it’s easy to grab when the boiler dies, but hard to touch when you’re bored on a Tuesday. I recommend a High-Yield Savings Account (HYSA) at a separate bank from your daily checking. If it’s in the same app you use to buy coffee, you’ll spend it. Just remember: once you pick a bank, check their fees. If they charge a monthly maintenance fee, walk away.

Should I use my existing savings or start a completely separate account?

Open a separate account. I know, it feels like extra admin, but keeping your emergency fund in your main checking account is a mistake. If it’s sitting next to your grocery money, you’ll spend it on something that isn’t actually an emergency—like a slightly better coffee machine. Move it to a high-yield savings account at a different bank if you can. It creates a “friction barrier” that stops you from dipping in for non-emergencies.

How much is "enough"—is there a specific number I should aim for?

The “magic number” is a myth, and anyone selling you a specific figure is probably trying to sell you a course. For most people, I suggest aiming for three to six months of those essential living expenses we just calculated. If you’re a freelancer or your job feels a bit precarious, aim for six. If you’re stable and have low overhead, three is fine. Just get the pile of cash built before the crisis hits.

How to Make a Budget You Will Still Be Using in March

I spent six years on a helpdesk listening to people explain why their “perfect” productivity systems failed, and I can tell you that budgeting is no different. Most of the advice you see online about how to make a budget is designed to sell you a subscription to a shiny new app that promises to “automate your wealth” while actually just adding another monthly line item to your expenses. You don’t need a complex algorithm or a premium dashboard with neon charts to understand your own money; you just need to know where the leaks are before they sink the ship.

I’m not here to sell you a lifestyle or a complicated software suite. My goal is to show you the boring, functional version of financial tracking: what tools actually work, what they cost per month, and—most importantly—how to get your data out if you decide to cancel the service. We’re going to skip the hype and focus on a setup that stays out of your way, so you can spend less time staring at spreadsheets and more time actually living your life.

Table of Contents

The Real Cost of Personal Finance Management Tools

The Real Cost of Personal Finance Management Tools.

Most people start their journey into personal finance management by downloading the trendiest app on the App Store, thinking a shiny interface will magically fix their spending habits. Here is the reality: most of these tools operate on a subscription model that can quietly bleed you dry. Before you commit to a yearly plan, ask yourself if the automated features actually save you time or if they just make you feel better about spending money. If you are just starting with budgeting for beginners, you don’t need a $12-a-month premium tier to see where your coffee money is going.

The biggest trap is the “subscription cliff.” I’ve seen too many people sign up for fancy financial planning tools, only to realize six months later that they can’t export their transaction history if they decide to cancel. If you stop paying, you shouldn’t lose your entire history of tracking monthly expenses. Always check the fine print for a “data portability” clause. If a tool locks your data behind a paywall, it isn’t a helper; it’s a hostage situation. Stick to something that lets you own your numbers, even if the UI looks like it was designed in 2005.

Tracking Monthly Expenses Before Your Spreadsheet Breaks

Tracking Monthly Expenses Before Your Spreadsheet Breaks

Most people start tracking monthly expenses by trying to categorize every single cent, usually with a level of enthusiasm that lasts about four days. You’ll download a fancy app, link your bank accounts, and feel like you’ve mastered personal finance management. Then, a week of busy work happens, you miss three transactions, the categories get messy, and you eventually stop looking at it altogether because the friction is too high.

The trick isn’t finding a more complex system; it’s finding a way to keep the data entry from becoming a second job. If you’re budgeting for beginners, start with the “big buckets” approach. Don’t worry about whether that coffee was a ‘treat’ or ‘groceries’ yet. Just track the big, unavoidable outflows: rent, utilities, and subscriptions. Once those are stable, you can look at the variable stuff.

If you choose to use a manual spreadsheet, keep it simple so it doesn’t become a chore. The goal is visibility, not perfection. If you spend twenty minutes a day fighting with cells and formulas, you’ve already lost the battle. Pick a method that takes less than five minutes a week, or you’ll find yourself abandoning it just when the data actually starts to get useful.

Five ways to actually stick to a budget without losing your mind

  • Pick one method and stay there for at least three months. Whether it’s a notebook, a spreadsheet, or an app, the biggest mistake I see is people “system hopping” every time they have a bad spending week. You don’t need a new tool; you just need to see where the money went.
  • Automate the boring stuff immediately. Set up your savings transfer to happen the day after payday. If you wait until the end of the month to see what’s “left over,” the answer will almost always be zero.
  • Build in a “sanity buffer.” I call it the miscellaneous tax. Life is messy—your car will make a weird noise or your sourdough starter will die and need new flour. If your budget is tuned to the penny with no wiggle room, you’ll abandon it the second something unexpected happens.
  • Check the “subscription trap” before you commit to a budgeting app. If you’re going to pay £5 a month for a tool to tell you that you’re spending too much money, make sure you can export your data to a CSV file. You don’t want your entire financial history held hostage by a company if you decide to cancel.
  • Categorize by “needs” vs. “wants,” but keep the categories broad. Don’t waste twenty minutes a week deciding if a specific coffee is a “social expense” or a “treat.” Just call it “discretionary” and move on. The more granular you make it, the more likely you are to stop doing it entirely.

The Three Things You Actually Need to Remember

Don’t let the tools become the project; if you spend more time categorizing your coffee purchases than actually looking at your bank balance, the system has failed you.

Always check the “export” button before you sign up for a fancy budgeting app, because you don’t want your entire financial history held hostage if you decide to cancel the subscription.

A budget isn’t a math problem to be solved once; it’s just a way to make sure your money goes where you actually want it to go instead of disappearing into a dozen small, invisible leaks.

The Budgeting Myth

A budget isn’t some sacred, unbreakable architecture you build once and admire; it’s just a way to make sure your money doesn’t vanish into a black hole of subscriptions and small, mindless spends before the end of the month. If the system is too complicated to update while you’re waiting for your toast to pop, you’ll stop using it, and then you’re just back to guessing.

Saoirse Doyle

The End of the Setup Phase

The End of the Setup Phase.

At this point, you should have a rough idea of where your money is actually going and, more importantly, which tools are actually worth the monthly headache. Remember that a budget isn’t a rigid cage; it’s just a way to make sure your money doesn’t disappear into a black hole of subscriptions you forgot you had. Whether you’re using a complex app or just a painfully simple spreadsheet, the goal is the same: visibility. Don’t get bogged down in trying to categorize every single cup of coffee to the cent. If you can track the big stuff and ensure you can export your data if a service hikes its prices, you’ve already done more than most people.

My advice is to stop looking for the “perfect” system. I spent years watching people try to build these elaborate digital fortresses only to abandon them two weeks later because they were too much work to maintain. A budget only works if it stays out of your way. Pick the method that feels the least like a second job, set it up, and then actually go live your life. You aren’t managing money just for the sake of the math; you’re doing it so you can stop worrying about the math and start focusing on the things that actually matter.

Frequently Asked Questions

What happens to my historical data if I decide to stop paying for a budgeting app?

This is the part most people skip until they see that “Subscription Renewing” notification and panic. It depends on the app, but usually, you’ll fall into one of two camps: “Read-Only” or “The Blackout.” Most decent tools let you log in and see your history, but you can’t add new transactions. The bad ones might lock you out entirely. Before you commit, check if they have a “CSV Export” button. If you can’t get your data out in a spreadsheet, don’t sign up.

Is it actually worth the time to categorize every single coffee purchase, or can I just group them?

Look, if you spend twenty minutes a week debating whether a latte is “Dining Out” or “Groceries,” you’re wasting the very time you’re trying to save. Don’t do it. Just group them under “Coffee” or “Small Treats.” The goal is to see where the leaks are, not to build a forensic audit of your caffeine addiction. If the total number at the end of the month makes you wince, that’s all the data you actually need.

How do I handle irregular expenses, like car repairs or annual insurance, without ruining my monthly math?

The trick is to stop treating these as “surprises” and start treating them like monthly bills that just happen to be due later. Figure out what the annual cost is—say, £600 for car insurance—and divide it by twelve. That’s £50. Move that £50 into a separate “sinking fund” savings account every single month. When the bill actually arrives, you aren’t scrambling; you’re just spending money you already set aside.