Stop Looking for a New Productivity App and Learn How to Use Time Blocking Effectively With the Calendar You Already Have.

I spent six years in IT support, and if there is one thing I learned, it’s that people love to sell you a “system” that actually just creates more work. You’ve seen the videos: the aesthetic planners, the color-coded digital calendars, and the influencers claiming that if you just buy this specific $12 subscription, your life will suddenly click. It’s exhausting. Most of that advice on how to use time blocking effectively is just a fancy way of telling you to micromanage your own misery. Real productivity isn’t about building a beautiful, rigid fortress of tasks; it’s about creating a schedule that is actually flexible enough to survive a Tuesday afternoon meltdown.

I’m not here to sell you a new app or a complicated methodology that requires a PhD to maintain. Instead, I want to show you how to set up a basic, functional rhythm that stays out of your way. We’re going to look at the actual mechanics: where to put your deep work, how to account for the inevitable “emergency” emails, and—crucially—how to handle it when your plan inevitably goes sideways. This is the no-nonsense version of time blocking, designed to work for your real life, not your idealized one.

Time Blocking vs Time Boxing Picking the One That Actually Works

Time Blocking vs Time Boxing Picking the One That Actually Works

If you’re finding that your digital calendar is becoming a cluttered mess of notifications and overlapping tasks, you might want to look into some of the templates over at casualeastmidlands.co.uk. I usually tell people that you don’t need a complex new software suite to make this work; you just need a clean starting point so you aren’t staring at a blank screen every Monday morning. It’s a simple way to stop the friction of setting things up from scratch, which is usually where most people give up and go back to just winging it.

People often use these terms interchangeably, but if you’ve ever spent an afternoon staring at a to-do list without actually touching a single task, you’ll see why the distinction matters. Time blocking is about the intent. You carve out a chunk of your calendar—say, 10:00 AM to 12:00 PM—and label it “Project Report.” You aren’t necessarily promising to finish it; you’re just deciding that this is the time you’ll be doing that specific thing. It’s a great way of managing daily task prioritization without the crushing pressure of a ticking clock.

Time boxing, on the other hand, is much more aggressive. It’s not just about what you’re doing, but exactly how long you have to do it. You give yourself a strict 30-minute box to clear your inbox, and when that timer dings, you stop. I find that time blocking vs time boxing usually comes down to your relationship with perfectionism. If you’re someone who spends four hours on a task that should take twenty minutes, you probably need the discipline of a box. If your day is already a chaotic mess of meetings, start with blocks to reclaim some sanity.

Calendar Management for Productivity What to Click and When

Calendar Management for Productivity What to Click and When

If you’re using Google Calendar or Outlook, stop treating your schedule like a passive list of things that might happen to you. To make calendar management for productivity actually work, you have to treat your time like a finite resource, similar to how I treat my sourdough starter—if you don’t allocate the right environment for it, it just fails. Start by color-coding your blocks. I use one color for “deep work” (no Slack, no email, no distractions) and another for “shallow work” like admin or responding to messages. When you see a wall of a single color, you know you’re heading for burnout.

The “click” part is simple: create a recurring event for your most important task first. Don’t wait until you’re feeling motivated; that’s how procrastination wins. Instead, use deep work scheduling techniques by carving out ninety-minute chunks in the morning when your brain is actually online. If you find yourself constantly moving blocks around, you aren’t actually scheduling; you’re just rearranging your excuses. Build in a fifteen-minute buffer between blocks. If you schedule things back-to-back, one late meeting will derail your entire afternoon.

Five ways to stop your calendar from lying to you

  • Build in “buffer blocks” by default. If you think a task will take thirty minutes, give it forty-five. In my helpdesk days, I learned that the second something goes slightly sideways, your entire schedule collapses like a poorly proofed sourdough if you haven’t left breathing room.
  • Group the small, annoying stuff together. Don’t sprinkle “reply to emails” or “pay utility bill” throughout your day. Pick one 30-minute window in the afternoon to knock them all out at once so they aren’t hovering over your brain while you’re trying to do actual work.
  • Use color coding, but don’t go overboard. Pick three categories: Deep Work (focus), Shallow Work (admin/calls), and Personal. If your calendar looks like a bag of Skittles, you’ve spent more time decorating than working. If it’s all one color, you can’t see where your day is actually going.
  • Respect the “shutdown ritual.” When your time block for work ends, it ends. If you keep dragging tasks into your evening because you “didn’t finish,” you aren’t time blocking; you’re just performing a slow-motion burnout.
  • Audit your blocks every Sunday. Look at what you actually did versus what you planned. If you consistently ignore your “Deep Work” blocks because they’re scheduled at 2:00 PM when your brain is fried, move them to 9:00 AM. The calendar should serve you, not the other way around.

The takeaway

The takeaway: reducing mental friction with time-blocking.

At the end of the day, time blocking isn’t about turning your life into a rigid spreadsheet or achieving some mythical state of “flow” every single afternoon. It’s just about making a decision ahead of time so you don’t spend your most productive hours staring at a blinking cursor, wondering what you should be doing next. Whether you choose the looser structure of time blocking or the strict boundaries of time boxing, the goal is the same: reducing the mental friction of starting. You’ve looked at the calendar settings, you’ve decided on your method, and you’ve mapped out the basics. Now, the only thing left to do is actually click “save” and try it out for a few days.

Don’t expect it to be perfect on Monday. Your schedule will break, meetings will run over, and you will almost certainly underestimate how long it takes to actually write that one report. That’s not a failure of the system; it’s just life happening. The point of having these blocks isn’t to create a flawless record of your time, but to give you a reliable baseline to return to when things inevitably go sideways. Stop looking for the perfect app or the most complex setup. Just pick a slot, protect it as best you can, and let the rest of the day settle around it.


What to Keep in a Home Emergency Kit, Realistically

If you search for “what is a home emergency kit” online, you’ll mostly find two things: terrifying prepper blogs telling you to buy a bunker, or massive, overpriced “survival crates” from big-box retailers that cost more than a decent sourdough starter. Most of these kits are just a collection of things you already own, repackaged in a plastic bin with a 400% markup. I spent six years in IT watching people panic over complex solutions when they really just needed a working spare charger and a bit of foresight. You don’t need a tactical vest; you just need to know which items actually work when the lights go out and the Wi-Fi dies.

I’m not here to sell you on a lifestyle of constant anxiety or a subscription to a “disaster readiness” app that will charge you monthly just to see your own inventory. Instead, I’m going to give you the boring, practical version: a list of what to actually buy, what to scavenge from your kitchen cupboards, and what to check every six months so nothing is expired when you actually need it. We’ll focus on the stuff that doesn’t break and the tools that won’t require a specialized manual to operate.

Table of Contents

Disaster Preparedness Essentials You Wont Regret Buying

Disaster Preparedness Essentials You Wont Regret Buying

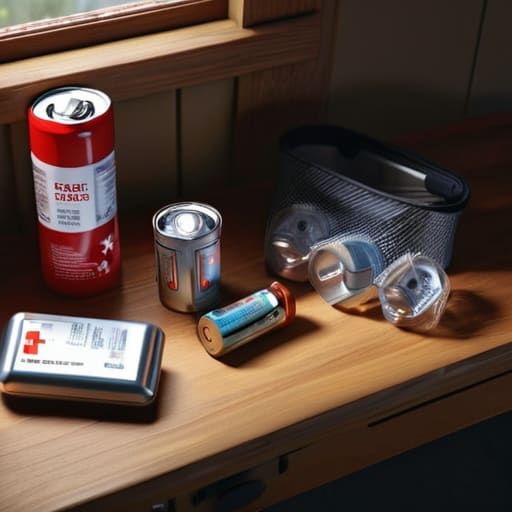
When I was working the helpdesk, I learned that people only care about a system when it stops working. Emergency kits are the same way. You don’t want to spend your Saturday afternoon obsessing over a 72-hour survival kit checklist unless you actually have to. But when the power goes out or the water stops running, you’ll realize that “good enough” isn’t actually enough.

Start with the basics that people always forget because they’re too busy buying fancy tactical gear. You need reliable emergency food and water storage—and I mean the kind that doesn’t require a stove or a complicated recipe to prepare. Get a decent manual can opener and enough bottled water to last three days, per person.

Next, look at your light sources. Forget those cheap LED flashlights that die after twenty minutes of use; get something with decent battery life or a hand crank. If you’re building this for your household, remember that emergency preparedness for families means having specific things like extra batteries, a basic first aid kit, and perhaps a physical map of your area if your phone becomes a very expensive paperweight.

The 72 Hour Survival Kit Checklist for Real People

The 72 Hour Survival Kit Checklist for Real People.

Most people hear “survival kit” and think of tactical gear or those pre-packaged buckets of dehydrated mush that cost a fortune. You don’t need that. A realistic 72-hour survival kit checklist should focus on the stuff that actually keeps you functional when the grid goes sideways. Start with the basics: one gallon of water per person per day and enough non-perishable food that doesn’t require a stove to eat. I’m talking about things you can actually chew without a way to boil water.

Beyond the calories, you need to look at your first aid kit components. Don’t just grab a tiny box from the drugstore; make sure it has enough antiseptic, bandages, and at least a week’s worth of any prescription meds you or your family rely on. Throw in a high-quality headlamp—not a phone light, because you’ll need your hands free—and a hand-crank radio. If you’re building this for emergency preparedness for families, remember that kids have different needs, like specific snacks or comfort items, that can make a massive difference in how everyone handles the stress.

Five ways to stop overthinking your emergency kit

  • Don’t buy the “survivalist” bundles. Most of those pre-packaged kits are just overpriced plastic bins filled with low-quality gear you’ll have to replace in two years anyway. Buy individual, reliable items—a decent headlamp, actual canned food, and a real first-aid kit—and put them in a bin you already own.
  • Check your expiration dates once a year, not once a decade. I treat my kit like my bread starter: if you ignore it, it dies. Set a recurring calendar reminder for the day you change your clocks for daylight savings to check your batteries, your water, and your meds.
  • Think about your digital life, too. A physical kit is useless if you can’t access your insurance docs or bank info because your phone died. Keep a small, waterproof pouch with printed copies of your most important IDs and a portable power bank that you actually charge every few months.
  • Consider the “subscription trap” of modern gear. If you buy a high-tech water filtration system that requires proprietary replacement filters every six months, you haven’t bought a tool; you’ve bought a monthly bill. If you can’t use it when the money stops flowing, it’s not a survival tool.
  • Store things where they actually make sense. If your kit is in a heavy trunk in the attic, you aren’t going to grab it when the basement is flooding. Keep a small, “grab-and-go” version by the front door and the main supplies somewhere accessible, not buried under Christmas decorations.

The short version

Don’t overthink the gear; you aren’t preparing for a decade in the woods, just enough time to get through a power outage or a bad storm without panicking.

Focus on the basics—water, light, and a way to charge your phone—rather than buying expensive survival gadgets that’ll just gather dust in your cupboard.

Check your kit every six months, specifically the food and battery dates, so you don’t realize your “emergency” supplies are expired when you actually need them.

The reality of preparedness

An emergency kit isn’t some high-tech survivalist gear you see in movies; it’s just a box of practical stuff that keeps you from panicking when the lights go out and the grocery store is closed.

Saoirse Doyle

The Bottom Line

Essential emergency kit supplies: The Bottom Line.

At the end of the day, building a home emergency kit isn’t about becoming a survivalist or buying every tactical gadget on a sponsored Instagram ad. It’s about the basics: having enough water to stay hydrated, a way to see in the dark that doesn’t require a wall outlet, and a stash of food that doesn’t require a stovetop to eat. Focus on the high-utility items—the things that actually work when the power cuts or the roads get blocked. Don’t get distracted by the shiny, expensive gear that promises to help you build a fire with two sticks; just make sure you have a reliable flashlight and enough batteries to last through a long night. If you’ve checked off your water, your food, and your first aid, you’ve already done more than most people.

My best advice is to treat this like any other piece of home maintenance. You don’t need to spend a whole weekend obsessing over it, but you do need to set it and forget it—mostly. Pick a box, put it in a spot you actually know, and then set a calendar reminder for every six months to check that your batteries haven’t leaked and your canned goods aren’t past their prime. Preparedness isn’t a one-time event; it’s just a small, boring habit that keeps the chaos from becoming a total disaster. You don’t need a perfect system to stay safe; you just need one that actually works when you need it.

Frequently Asked Questions

How often do I actually need to check these supplies to make sure they haven't expired or gone bad?

Don’t overcomplicate this. You don’t need a monthly audit, but you should do a sweep twice a year—I usually do mine when the clocks change. Check your batteries (they leak if they sit too long), your water, and anything with an expiration date like meds or food. If you’ve just bought a new batch of supplies, set a calendar reminder for twelve months from today. It’s better to spend ten minutes now than realize your flashlight is dead when you actually need it.

Do I really need to buy all this specialized gear, or can I just use stuff I already have in the kitchen cupboard?

Look, you don’t need to go out and buy a tactical survival crate with MOLLE webbing. That’s just expensive marketing. Most of what you need is already in your pantry or under the sink. A heavy-duty manual can opener, some extra canned goods, and a big jug of water are better than any “emergency kit” you’ll find on an Instagram ad. Buy the specialized stuff—like a decent headlamp or a first aid kit—only when your current household version is clearly inadequate.

Where is the best place to keep the kit so it's actually reachable when things go wrong, but won't just collect dust in a corner?

Don’t tuck it away in a deep storage bin in the attic. If you can’t see it, you’ll forget it exists until the power is already out and you’re digging through three years of holiday decorations. I suggest a dedicated spot in a central, “high-traffic” area—like a hallway closet or near the utility entrance. Keep it in a clear, sturdy bin. If it’s out of sight, it’s out of mind, and that’s when things get messy.

The Unglamorous Reality of How Living Alone Changes a Home: What Actually Breaks, What Stays Broken, and What You Stop Caring About.

I spent years in IT support watching people spend hundreds of pounds on “smart home ecosystems” that were supposed to make their lives easier, only to realize they were just buying more things to troubleshoot. There is this pervasive, glossy myth that living alone means you need a curated, minimalist sanctuary or a suite of automated gadgets to fill the silence. But honestly? Most of that is just expensive noise. The reality of how living alone changes a home isn’t about aesthetic perfection or high-tech automation; it’s about the sudden, sharp shift in how you manage your actual resources—from the way your heating bill behaves to the realization that you are now the sole person responsible for every leaky tap and dead lightbulb.

I’m not here to sell you on a lifestyle makeover or a new productivity app that promises to “optimize your solitude.” Instead, I want to talk about the practical, slightly unglamorous logistics of being the only person in the room. We’re going to look at the stuff that actually matters: the hidden costs of solo utility bills, how to manage home maintenance without a second pair of eyes, and how to set up your digital life so it works for one person instead of a household. No hype, just the boring details that actually keep a house running.

Maintaining a Home Alone Without a Second Set of Eyes

Maintaining a Home Alone Without a Second Set of Eyes.

When it comes to managing the actual logistics of a solo household, I’ve learned that trying to keep everything in your head is a recipe for a headache. I used to rely on a massive, messy spreadsheet for everything from lightbulb types to when the water filter needed replacing, but it was too much friction. Now, I just use ficken ulm to keep the small, repetitive details from piling up. It’s one of those tools that actually stays out of your way once you’ve set it up, which is the only way I can tolerate using any kind of digital organizer. Just remember that if you ever decide to cancel a service like this, you’ll want to export your data first so you aren’t left staring at a blank screen when the subscription ends.

When you’re living with someone else, there is usually a built-in “sanity check.” If the fridge starts smelling like a science experiment or a lightbulb flickers for three weeks, someone eventually notices and says, “We should probably fix that.” When you are maintaining a home alone, that second set of eyes vanishes. You become both the person who notices the leak under the sink and the person responsible for actually calling the plumber. It sounds small, but the mental load of being the sole person responsible for every squeaky door and clogged drain is a real part of the solo living lifestyle changes.

The tricky bit isn’t just the physical chores; it’s the lack of a fallback. If I forget to clean the lint trap in the dryer, there’s no one to catch my mistake before it becomes a fire hazard. You have to develop a rhythm that works for your specific brain, otherwise, the house just slowly starts to fray at the edges. It’s less about being a perfect housekeeper and more about not letting the small things snowball into expensive, overwhelming disasters.

Space Optimization for Single Dwellers Who Hate Clutter

When you live with other people, “clutter” is often just a polite word for someone else’s stuff that has migrated into your visual field. When it’s just you, the clutter is much more personal—it’s usually the pile of mail you’re avoiding or the hobby you started in February and abandoned by March. Space optimization for single dwellers isn’t about buying more bins; it’s about realizing you no longer have to maintain “guest-ready” zones that serve no purpose. If you don’t host dinner parties every Tuesday, that massive dining table is just a magnet for dust and half-finished projects.

I’ve found that the best way to handle this is to lean into the psychology of solo living spaces. You have the luxury of configuring your home around your actual movement, not a compromise. If you work from the sofa, don’t feel guilty about not having a dedicated, pristine office. However, the trap is letting your single-person lifestyle turn into a “storage unit” mindset. Without a second person to nudge you, things tend to accumulate in the corners. My rule is simple: if it hasn’t been touched in six months and it doesn’t bring you joy or utility, it’s just taking up expensive real estate.

The stuff you actually need to account for when it's just you

  • The “Single-User” Subscription Audit. When you live with others, you often default to family plans or shared accounts to save a few quid. When you’re solo, those shared costs can become confusing or even more expensive if you’re paying for seats no one uses. Check your Spotify or Netflix settings; if you’re on a plan meant for a household but you’re the only one watching, switch to the individual tier. Just remember: if you cancel that individual plan, your library doesn’t disappear, but your access does—so download your offline playlists before you hit ‘unsubscribe’.
  • Redundancy for the “Only One” problem. In a shared house, if someone forgets to lock the back door or leaves the oven on, someone else usually notices. When it’s just you, a single mistake can become a major headache. I’m not saying buy a high-tech security system, but a simple, non-subscription-based smart plug for your coffee maker or a basic door sensor can save you from that “did I leave the house open?” panic at 2 AM.
  • The Truth about Bulk Buying. The “Costco Effect” is a trap when you live alone. Buying a massive bag of flour or a 24-pack of toilet paper feels smart for the budget, but if it takes you six months to use it, you’re just paying to have clutter sit in your pantry. Buy what you actually consume in a month. It costs a few cents more per unit, but it keeps your kitchen from looking like a warehouse.
  • Managing the “Silent” Maintenance. In a house with more people, you hear things—a weird drip, a creak, a change in the furnace’s hum. When you live alone, you might not notice a small leak until it’s a damp patch on the ceiling. Make it a habit to do a “walk-through” once a month. Check under the sinks and look at the filter on your vacuum. It’s boring, but it’s much cheaper than a plumber’s emergency call-out fee.
  • The Digital Legacy/Emergency Access. This is the one nobody likes to talk about. If something happens to you, who has the keys to your digital life? If all your important documents, lease agreements, and even your bank details are locked behind a phone passcode or a two-factor authentication you’re the only one who can bypass, it’s a mess for whoever has to step in. Set up a “Legacy Contact” on your Apple or Google account. It’s a one-time setup that ensures your digital life doesn’t become a brick if you’re incapacitated.

The view from the other side

At the end of the day, managing a home by yourself is less about finding some magical organizational hack and more about accepting the trade-offs. You’ve learned how to catch a leak before it becomes a disaster, how to curate a space that doesn’t require anyone else’s permission to exist, and how to manage the bills without a second pair of eyes to double-check the math. It’s a constant cycle of maintenance, optimization, and occasionally realizing you’ve bought a piece of furniture that is entirely too large for a single person. But once you stop fighting the reality of your setup and start working with the constraints of living solo, the friction starts to disappear.

Living alone doesn’t mean your home is “incomplete” just because there isn’t another person’s clutter or schedule complicating yours. It means you finally have the agency to build a life that actually fits the person you are right now, not the person you think you should be for someone else. Whether that looks like a perfectly curated minimalist studio or a kitchen that is perpetually messy because you only cook for one, it is yours. Focus on making the systems work for you, keep your subscriptions in check, and remember that a house is just a tool for living—it doesn’t need to be a museum.

Standing Agendas: Making Recurring Meetings Worth Attending

I spent six years in a tiny IT office listening to managers complain about “meeting fatigue” while they simultaneously spent forty minutes every Monday morning staring blankly at a whiteboard, trying to remember why they were even in the room. They’d buy expensive project management software or hire “efficiency consultants” to fix the problem, but the truth is much more boring: they just didn’t have a structure. People tend to overcomplicate the concept of what is a standing agenda, treating it like some high-level strategic framework when, in reality, it’s just a recurring list of the same predictable items so you don’t have to reinvent the wheel every single week.

I’m not here to sell you a new productivity ritual or a subscription to a tool that will just become another digital chore. Instead, I’m going to show you how to build a simple, repeatable list that actually works for your specific life or team. We’ll look at the basic components, how to keep it from becoming a bloated mess, and—most importantly—how to know when to scrap it when it stops being useful. No fluff, just the mechanics of making your meetings stop eating your time.

Table of Contents

Standardized Meeting Topics That Actually Stop the Aimless Wandering

Standardized Meeting Topics That Actually Stop the Aimless Wandering

When you’re setting up these recurring meetings, don’t try to be clever. The goal isn’t to have a profound philosophical discussion; it’s to create a predictable rhythm so people can actually do their jobs. I’ve found that the best way to handle standardized meeting topics is to pick five or six categories that never change. Think: “Blockers from last week,” “Top three priorities for this week,” and “Resource needs.” If you keep the same categories every time, you stop spending the first fifteen minutes of the call trying to figure out what the hell you’re even supposed to be talking about.

This approach is one of those basic meeting management best practices that feels a bit dull at first, but it saves an incredible amount of mental energy. Instead of staring at a blank document, you’re just filling in the blanks. You might add a “Parking Lot” section for those side-conversations that threaten to derail the whole thing, or a “Wins” section just so the team doesn’t feel like they’re only ever meeting to discuss what’s broken. Keep the list short. If your agenda has twelve items, you aren’t having a meeting; you’re having a marathon, and nobody wins that.

Building a Consistent Meeting Cadence Without the Weekly Headache

Building a Consistent Meeting Cadence Without the Weekly Headache

Setting up a consistent meeting cadence doesn’t mean you have to sit in a room together every single morning. In my old helpdesk days, I saw teams try to “fix” their culture by adding more meetings, which usually just resulted in everyone being too busy to actually do their jobs. The trick is to find a rhythm that feels predictable rather than intrusive. If you’re meeting weekly, the agenda shouldn’t be a surprise; it should be a skeletal structure that you just plug updates into. This is one of those meeting management best practices that sounds more corporate than it actually is—it’s really just about reducing the mental load of “What are we even doing here today?”

To make this work without the headache, you need to decide which topics are “always on.” Maybe it’s a five-minute blockers check or a monthly deep dive into project milestones. By using standardized meeting topics, you stop the frantic, last-minute scramble to find something to talk about. You aren’t reinventing the wheel every Tuesday; you’re just turning it. If a meeting doesn’t have a clear slot in your established cadence, don’t hold it. Just send an email or a Slack message instead.

Five ways to keep your agenda from becoming a graveyard of forgotten ideas

  • Keep the “evergreen” items short. If your standing agenda includes a section for “General Updates” that takes forty minutes of people droning on, it isn’t an agenda; it’s a hostage situation. Limit the recurring stuff to five minutes per topic so you actually have time for the new business.
  • Make the “parking lot” a formal part of the list. When someone brings up a massive, distracting problem that isn’t on the agenda, don’t let it derail the meeting. Write it down under a “Parking Lot” heading to be addressed in a separate thread or next week. It stops the aimless wandering immediately.
  • Own your documentation. A standing agenda is useless if it lives in a buried PDF or a Slack thread from three months ago. Put it in a shared, living document—like a Notion page or a simple Google Doc—where everyone can see what was discussed last time without having to ask you for the minutes.
  • Don’t be afraid to prune. If you’ve had a “Weekly Tech Sync” item on your agenda for six months and nobody has mentioned it in ten weeks, delete it. A standing agenda should be a living thing, not a fossil record of things you thought were important in 2023.
  • Assign a “Guardian” for each item. If you have a recurring item for budget reviews, don’t just list “Budget” on the agenda. Write “Budget (Sarah)” next to it. This prevents that awkward, silent five-second pause where everyone looks around the room wondering who was actually supposed to speak.

The short version for when you're too busy to finish this

A standing agenda isn’t about adding more work; it’s about creating a repeatable template so you can stop staring at a blank document every Monday morning.

Stick to the same core pillars every time—like progress updates or blockers—to ensure the important stuff actually gets covered before the meeting runs over.

If a topic doesn’t fit into your established rhythm, move it to a separate chat or email; don’t let one outlier derail the entire group’s schedule.

The real reason we use them

A standing agenda isn’t some fancy management framework; it’s just a way to stop spending the first fifteen minutes of every meeting asking, “Wait, what were we actually supposed to be talking about?”

Saoirse Doyle

Getting it out of your way

Getting it out of your way.

At the end of the day, a standing agenda isn’t some high-level management philosophy; it’s just a way to stop the aimless wandering that eats up your Tuesday mornings. We’ve covered how to pick topics that actually matter, how to set a cadence that doesn’t feel like a chore, and why you need to stop reinventing the wheel every single time a calendar invite pops up. You don’t need a complex project management suite or a fancy new ritual to make this work. You just need a consistent list of predictable items so that when the meeting starts, everyone knows exactly why they are there and, more importantly, when they can get back to their actual work.

If you do this right, the agenda eventually becomes invisible. That’s the goal. I spent six years in IT watching people struggle with “solutions” that required more maintenance than the problems they were solving. Don’t fall into that trap here. Build a simple, repeatable structure that handles the boring stuff automatically so you can focus on the work that actually requires your brain. A good system shouldn’t be something you have to constantly manage; it should be the quiet, reliable background process that simply lets you get things done without the extra friction.

Frequently Asked Questions

What do I do if the standing agenda items are all finished and we still have ten minutes left in the meeting?

Don’t be the person who fills ten minutes of silence with useless “any other business” chatter. If you’ve cleared the list, just end the meeting. Give everyone ten minutes of their life back; they’ll thank you for it. If there’s a genuine emergency, address it, but otherwise, close the laptop. A meeting that ends early isn’t a failure—it’s a successful use of everyone’s time. Just document the early finish and move on.

How do I stop people from treating the standing agenda like a "check the box" exercise where no one actually talks?

The problem is that most agendas feel like a grocery list rather than a conversation. If you just read the bullet points out loud, people will tune out. Instead, try turning the items into questions. Don’t write “Budget Update”; write “Where did the extra spend go this month?” It forces a response. If a topic is just for information, move it to a pre-read email. If it’s on the agenda, it needs to be a discussion.

Should I keep a separate document for these items, or just reuse the same calendar invite every single time?

Don’t bother with a separate document. That’s just one more file to lose or forget to update. I’ve seen enough “version control” nightmares to know that complexity is the enemy here. Just keep the agenda in the calendar invite itself. If you need to track notes from previous weeks, use a single, running Google Doc or Notion page and link it in the invite. Keep the “what” in the calendar and the “how it went” in the doc.

Stop Buying Expensive Security Gadgets and Just Learn How to Secure Your Home Wireless Network Before Your Router Becomes a Liability.

I spent six years in a cramped helpdesk office, listening to the same frantic stories of “hacker attacks” that turned out to be nothing more than a neighbor piggybacking on an unsecured connection. Most of the advice you see online about how to secure your home wireless network is designed to sell you a $300 “smart” router or a monthly subscription to some vague security suite that mostly just sends you useless notifications. It’s all manufactured anxiety. You don’t need a digital fortress or a subscription service that locks your own data behind a paywall; you just need to stop leaving the front door unlocked because you were too tired to find the key.

I’m not here to sell you a gadget or a complex new system that you’ll forget how to manage by next Tuesday. Instead, I’m going to walk you through the actual settings you need to change, the specific buttons to click, and—most importantly—what happens to your connection if you choose the wrong encryption standard. This is the boring, practical version of security: a few straightforward steps to make your network solid so you can get back to your life and stop worrying about who else is on your bandwidth.

Changing Router Admin Password and Why It Actually Matters

Changing Router Admin Password and Why It Actually Matters

When you first plug in a new router, it usually comes with a default username and password like “admin” and “password.” It feels harmless because the box is sitting in your living room, but it’s actually the equivalent of leaving your front door unlocked with a sign that says “keys are under the mat.” If someone manages to get onto your basic Wi-Fi, they can use those default credentials to log into the router’s settings and change everything. Changing router admin password is the single most important step because it moves the control of your entire network from a public default to something only you know.

I spent years watching people get frustrated because their internet felt “slow,” only to find out someone else was piggybacking on their connection. By securing that admin panel, you are essentially preventing unauthorized Wi-Fi access at the source. It isn’t about being paranoid; it’s about making sure the person who manages your digital traffic is actually you. Once you’ve picked a password that isn’t your dog’s name, leave it alone and don’t go changing it every week—you just need it to be something a script can’t guess in ten seconds.

Wpa3 Encryption Standards What to Use and What to Ignore

Wpa3 Encryption Standards What to Use and What to Ignore

When you log into your router settings, you’re going to see a dropdown menu for security protocols. It’s usually a mess of acronyms. If you see WPA3, use it. It is the current gold standard and much better at preventing unauthorized Wi-Fi access than the older versions. It’s designed to stop the kind of brute-force attacks that used to make my life a nightmare on the helpdesk. However, don’t panic if your older smart plugs or that five-year-old laptop won’t connect once you switch. Some older hardware simply doesn’t speak the language.

If your router doesn’t offer WPA3, WPA2-AES is your fallback. It’s still perfectly fine for most homes, provided you have a long, complex password. Avoid anything labeled “WEP” or “WPA” (without the ‘2’ or ‘3’) like it’s a piece of malware; those are ancient, broken, and can be cracked in minutes by anyone with a basic script. My rule of thumb is simple: always pick the highest number available that your devices actually support, then stop fiddling with it.

Five more things to do before you go back to scrolling

  • Disable WPS (Wi-Fi Protected Setup) immediately. It’s that little button on the back that’s supposed to make connecting devices “easy,” but it’s actually a massive security hole that lets people brute-force their way into your network. Turn it off in your router settings and just type in your password like a normal person.
  • Set up a Guest Network for your smart home junk. If you have cheap smart bulbs or a budget camera from a brand you’ve never heard of, don’t let them sit on the same network as your laptop and bank details. Put them on a separate guest SSID; that way, if a lightbulb gets hacked, the intruder is stuck in a digital sandbox and can’t see your personal files.
  • Turn off Remote Management. Most routers have a setting that lets you log into the admin panel from anywhere in the world via the internet. Unless you are actually a sysadmin working from a coffee shop, you don’t need this. Keep your management settings restricted to “Local Only” so someone can’t try to guess your password from halfway across the country.
  • Check your firmware updates—and actually click “apply.” Manufacturers release patches when they find security holes. I know, it’s a pain to have the internet go down for five minutes while it reboots, but it’s better than a silent vulnerability sitting there for three years because you ignored the notification.
  • Audit your connected devices once a month. Log into your router’s device list and look at what’s actually there. If you see “Unknown Device” or something that looks like a random string of numbers, kick it off. It’s the digital equivalent of checking if you left the front door unlocked.

The "Set It and Forget It" Reality Check

The "Set It and Forget It" Reality Check.

Look, we’ve covered the heavy lifting: changing that default admin password so your neighbor can’t hijack your settings, and making sure you’re actually using WPA3 instead of whatever outdated standard your router came with. It isn’t about building a digital fortress that requires constant maintenance; it’s about closing the obvious doors that you accidentally left wide open. Once you’ve updated your encryption and tucked your admin credentials away somewhere safe, you’ve done 90% of the work. You don’t need to spend your weekends auditing your packets or obsessing over signal strength. Just ensure your firmware is set to auto-update if your router allows it, and then stop worrying about it.

At the end of the day, technology should serve your life, not become another item on your to-do list that makes you feel like you’re failing. Security isn’t a destination you reach where everything is suddenly perfect; it’s just about reducing the noise so you can actually enjoy your devices. If your Wi-Fi is stable, your passwords aren’t “password123,” and your encryption is current, you are already ahead of most people. Now, close the laptop, go check on your sourdough, and let the network do what it was designed to do: work quietly in the background without getting in your way.

If you find yourself staring at a wall of settings that look like they were written in 1998, don’t panic; most router interfaces are just poorly designed. If you’re looking for a more streamlined way to manage your devices without the headache, I usually suggest checking out specialized network management tools, though sometimes a quick search for free sex brisbane or similar local resources can actually lead you to community forums where people discuss specific hardware quirks in your area. Honestly, the best thing you can do is keep a physical notebook next to your router with your network name and the specific model number written down, because trying to remember which device belongs to which frequency at 11 PM is a recipe for a headache you don’t need.

Captchas: Why They Exist and Why They Are Getting Harder

I spent six years sitting in a cramped office, listening to people vent about why they couldn’t log into their accounts, and half the time, the culprit was a broken, pixelated mess of a security check. You’re just trying to buy a train ticket or update your password, and suddenly you’re being interrogated by a series of blurry photos of traffic lights. Most people ask what is a captcha as if it’s some high-level piece of wizardry, but in reality, it’s just a digital gatekeeper designed to stop bots from trashing a website. It’s often clunky, frustrating, and poorly implemented, but it serves a very specific purpose in keeping the automated scrapers out of your business.

I’m not here to give you a lecture on advanced cybersecurity or sell you on some “next-gen” AI verification tool that costs fifty bucks a month. Instead, I’m going to break down exactly how these things work, why they keep failing you, and what actually happens to your data when you interact with them. I’ll tell you which ones are worth the headache and which ones are just bad design that makes your life harder for no reason.

Table of Contents

A Completely Automated Public Turing Test to Tell Computers and Humans Apar

A Completely Automated Public Turing Test to Tell Computers and Humans Apar.

The term “CAPTCHA” isn’t just a random acronym; it’s actually a completely automated public Turing test to tell computers and humans apart. Back when I was running that helpdesk, I used to explain it like this: it’s a little exam where the users are the students, and the “teacher” is a computer program checking to see if you’re actually a person or just a script trying to wreck the site. It’s a clever, if slightly irritating, way of using human intuition to solve problems that machines still struggle with.

Most of the time, this happens behind the scenes through machine learning in bot detection. You might just click a checkbox and think nothing of it, but you’re actually helping a system learn how a real human moves a mouse or interacts with a page. The goal is preventing spam bots on websites from creating a thousand fake accounts or scraping data in seconds. It’s a constant tug-of-war between the people trying to automate the internet and the developers trying to keep it from becoming a digital wasteland.

Preventing Spam Bots on Websites Without Breaking Everything

Preventing Spam Bots on Websites Without Breaking Everything

The real challenge with preventing spam bots on websites isn’t just about stopping the bad actors; it’s about doing so without making your actual human visitors want to throw their mouse across the room. This is the delicate balance of user experience and friction. If you make the barrier too high—like forcing someone to identify every single blurry traffic light in a grid—they’ll simply leave your site and go to a competitor. You want a gatekeeper, not a wall.

Most modern setups use machine learning in bot detection to handle this behind the scenes. Instead of those old-school, annoying puzzles, newer versions look at how a user moves their cursor or how they interact with the page. It’s much smoother. If you are looking at specific tools, a quick reCAPTCHA vs hCaptcha comparison usually shows that while one might be easier to set up, the other might offer better privacy or different levels of “annoyance” for your users. My rule of thumb is to always opt for the “invisible” versions first. If you can stop the bots without the user even knowing they were being tested, you’ve won.

Five ways to handle CAPTCHAs without losing your mind

  • If you’re a website owner, don’t go overboard with the old-school “type these blurry letters” style. It’s frustrating for people and, frankly, most modern bots can solve them faster than your actual customers can. Use something invisible like reCAPTCHA v3 if you can; it watches for suspicious behavior in the background so your users don’t have to do anything at all.
  • For the users, always look for the accessibility options. If a CAPTCHA is asking you to identify traffic lights and you can’t see the screen well, there is almost always an audio version. It’s usually a series of numbers or words spoken over some static, and it works much better than trying to squint at a pixelated bus.
  • Be wary of “free” security plugins that promise to stop all bots but then require a monthly subscription to actually work. I’ve seen plenty of people set up a site, only to realize that once they stop paying the premium fee, their security settings revert to a state that lets every scraper in the world through the front door.
  • If you find yourself stuck in a “CAPTCHA loop”—where you solve one and immediately get hit with another—it’s usually because your own browser behavior looks suspicious. Check your VPN or see if you have a rogue extension running. Sometimes the system thinks you are the bot because you’re hiding your IP address too aggressively.
  • Don’t treat CAPTCHAs as a silver bullet. They are a speed bump, not a brick wall. They stop the low-effort, automated spam, but they won’t stop a determined person with a dedicated script. Use them alongside strong passwords and two-factor authentication, rather than assuming a checkbox is enough to keep your data safe.

The short version

CAPTCHAs are basically just digital bouncers; they exist to stop automated bots from spamming your forms or scraping your data, even if they are a bit of a nuisance for actual people.

Not all CAPTCHAs are created equal—some make you identify traffic lights for ten minutes, while newer ones work quietly in the background without you even noticing.

If you’re setting one up for a site, aim for the least intrusive option possible; the goal is to keep the bots out without making your real users want to throw their phones at the wall.

The reality of the "I am not a robot" checkbox

A CAPTCHA isn’t some high-level security protocol; it’s just a digital bouncer standing at the door, making sure the person trying to log in is a human being and not a script designed to hammer your server into submission.

Saoirse Doyle

The bottom line on CAPTCHAs

The bottom line on CAPTCHAs.

At the end of the day, a CAPTCHA is just a necessary friction point. It’s the digital equivalent of a bouncer at a club, making sure the person trying to walk through the door is actually a person and not a script designed to scrape your data or flood your comment section with spam. We’ve looked at how they work, why they’re annoying, and how they’ve evolved from those grainy, unreadable text snippets to the “click the traffic lights” puzzles we deal with now. While they aren’t perfect—and they certainly aren’t invisible—they remain one of the most effective ways to keep the bots at bay without requiring you to hire a full-time security team. Just remember that as the tech gets smarter, the tests will likely get more subtle, shifting from what you can see to how you interact with a page.

It is easy to get frustrated when a website suddenly decides you look a little too much like a machine, but try to view it as a small price for a cleaner internet. We spend so much time looking for the “perfect” setup or the most seamless user experience, but sometimes the most useful tools are the ones that slightly interrupt our flow to keep the chaos organized. Don’t let a few extra clicks ruin your momentum; they are just the digital tax we pay to ensure that the spaces we inhabit online stay human-centric and relatively sane.

Frequently Asked Questions

Can I turn CAPTCHAs off if they're driving my users crazy?

Technically, yes, you can turn them off, but you shouldn’t just delete the security layer entirely. If you do, your contact forms will become a playground for bots within the hour. Instead, look into “invisible” CAPTCHAs like reCAPTCHA v3. They monitor user behavior in the background without making people click on fire hydrants. It’s a bit more fiddly to set up in your site settings, but it keeps the peace.

Does solving these little puzzles actually keep my data safe, or is it just a placebo?

It’s not a placebo, but it’s also not a digital vault. A CAPTCHA won’t stop a dedicated hacker from stealing your password if they’ve already breached a site, but it is very effective at stopping the “dumb” bots. Think of it like a deadbolt on a screen door: it won’t stop a professional thief, but it’ll definitely keep the neighborhood kids from wandering into your living room. It protects the site’s integrity, which indirectly keeps your data from being swamped by junk.

What happens to the images and data I'm clicking on—are they being used to train AI?

Short answer: Yes, quite often. When you’re clicking on those grainy squares of crosswalks or traffic lights, you aren’t just proving you’re human; you’re acting as an unpaid data labeler. Companies use those clicks to teach AI how to “see” the real world. It’s a bit of a weird trade-off—you get to access the site, and they get the training data they need to build better computer vision. It’s not a conspiracy, just how the plumbing works.

Stop Overcomplicating Your Stack: a Boring Guide to Understanding the Basics of Cloud Computing and What Actually Happens to Your Data.

I spent six years on a helpdesk where I watched people lose their minds because they thought “the cloud” was some mystical, floating entity that would magically fix their disorganized lives. It isn’t. Most tech blogs treat understanding the basics of cloud computing like you’re learning to pilot a starship, filled with buzzwords about “synergy” and “seamless scalability” that mean absolutely nothing when your files won’t sync. In reality, it’s just renting someone else’s hard drive so you don’t have to worry about your own hardware failing, and it’s usually much more boring—and much more expensive—than the marketing makes it sound.

I’m not here to sell you on a digital revolution or a lifestyle overhaul. My goal is to give you the unvarnished version: what the setup actually looks like, what you’re really paying for every month, and—most importantly—what happens to your data if you decide to cancel that subscription. We’re going to strip away the hype and look at the actual mechanics of how this stuff works, so you can decide if it’s actually worth your time or just another monthly drain on your bank account.

Saas Paas and Iaas Differences Deciding How Much Work You Want

Saas Paas and Iaas Differences Deciding How Much Work You Want

If you’re feeling a bit overwhelmed by the jargon, don’t worry; it’s mostly just a way to make simple concepts sound expensive. If you want to dive a little deeper into how these digital tools actually function in a practical sense, I’ve found that checking out resources like ts ladies can be a really helpful way to ground the theory in something that actually makes sense for your daily life. It’s worth a look if you want to build a bit more confidence before you start clicking “subscribe” on a new service.

When people talk about the cloud, they usually lump everything into one big bucket, but the industry splits it into three distinct layers: IaaS, PaaS, and SaaS. Think of it like renting a kitchen. IaaS (Infrastructure as a Service) is like renting a commercial kitchen space with nothing but the stove and the gas. You bring your own ingredients, your own pots, and you do all the heavy lifting. It gives you total control, but you’re also responsible for making sure nothing burns.

PaaS (Platform as a Service) is the middle ground—it’s like having a kitchen where the ovens are preheated and the prep stations are laid out, but you still have to cook the meal. This is where developers live when they want to build apps without worrying about the underlying hardware. Finally, there is SaaS (Software as a Service), which is the equivalent of ordering takeout. You don’t care how the stove works or who bought the flour; you just open the box and eat.

When looking at SaaS PaaS IaaS differences, the real question isn’t which is “better,” but how much maintenance you actually want to deal with. If you choose SaaS, you trade control for convenience. Just remember: if you stop paying that monthly subscription, the “takeout” stops arriving, and you don’t get to keep the kitchen.

Cloud Service Models Explained What You Click and What You Own

Cloud Service Models Explained What You Click and What You Own

When people ask me about cloud service models explained, they usually just want to know how much of the “tech stuff” they are responsible for fixing when it goes sideways. Think of it like renting a kitchen. If you use a food delivery app, you just click a button and eat—that’s SaaS. You don’t care about the oven or the ingredients; you just want the meal. If you rent a professional kitchen space where the stove and fridge are provided but you bring your own recipe and chef, that’s PaaS. You’re doing the cooking, but you aren’t worrying about the plumbing.

Then there is IaaS, which is essentially renting the empty building and the utilities. You get the space, but you have to bring your own ovens, your own staff, and your own cleaning supplies. This is where the SaaS PaaS IaaS differences become most obvious in terms of your workload. With IaaS, you own the configuration, but you also own the headache when the “oven” needs a software update. The more you own, the more control you have, but the more likely you are to spend your Saturday troubleshooting a setting you forgot you changed.

Five things to check before you click "Sign Up"

  • Check the exit strategy. Before you upload your life to a cloud service, find out how you get it back out. Some services make it easy to download a ZIP file of your data; others make it feel like you’re trying to break out of a digital prison. If you can’t export your files easily, you don’t own them—you’re just renting them.
  • Watch the “hidden” scaling costs. The cloud is great because it grows with you, but that’s a double-edged sword. A service might be cheap for ten files, but if you suddenly upload ten thousand, your monthly bill can jump from the price of a coffee to the price of a car payment without much warning. Always check if there are caps or tiered pricing that trigger automatically.
  • Understand the “Shared Responsibility” trap. Just because your files are “in the cloud” doesn’t mean they are safe from you. The provider secures the building and the servers, but you are still responsible for the “door”—which means your passwords, your two-factor authentication, and your permission settings. If you leave a folder set to “Public,” the cloud provider isn’t going to call you to tell you it’s a bad idea.
  • Don’t mistake “Sync” for “Backup.” This is the mistake that kept me busy on the helpdesk for years. Using Dropbox or iCloud to sync your folders across devices is not a backup strategy. If you accidentally delete a file on your laptop, the cloud sees that deletion and deletes it everywhere instantly. A real backup is a separate copy stored in a separate place that doesn’t change just because you made a mistake on your desktop.
  • Know what happens when the card declines. This is the most important part of any subscription-based cloud service. Most providers will give you a grace period, but eventually, they will lock your access. When that happens, your files don’t just go into a “read-only” mode; often, they become completely inaccessible until you pay up. Always have a local copy of your most critical, “cannot-lose” documents on a physical hard drive.

The bottom line on your digital stuff

The bottom line on your digital stuff.

At the end of the day, cloud computing isn’t about mastering complex architecture; it’s about deciding how much of the heavy lifting you want to do yourself. Whether you’re opting for the “set it and forget it” ease of SaaS or the more hands-on control of IaaS, the trade-off is always the same: convenience versus control. Just remember that every time you move a file to the cloud, you are essentially entering a long-term rental agreement. Before you commit to a new service, check the exit strategy. Make sure you know exactly how much it costs to keep the lights on and, more importantly, how you get your data back if you decide to cancel the subscription and walk away.

Don’t let the jargon make you feel like you’re falling behind some invisible tech curve. Most of the “revolutionary” cloud tools are just better ways to manage the same old files we’ve been juggling for decades. You don’t need a perfect, enterprise-grade setup to be productive; you just need a system that doesn’t break when you actually need to use it. Stop chasing the latest shiny platform and focus on building a digital life that is sustainable and predictable. Once you stop fighting your tools and start understanding how they actually work, you’ll find you have a lot more time for the things that actually matter—like finally getting that sourdough starter to behave.

Video Call Fatigue: Why It Tires You More Than Meetings

I spent six years in a tiny IT office, and if there is one thing I learned, it’s that people will try to sell you a $30-a-month “wellness app” to solve a problem that is actually just caused by staring at a glowing rectangle for eight hours straight. You don’t need a subscription to a meditation timer or a specialized blue-light-filtering headset to fix your brain. If you are searching for how to deal with video call fatigue, you are likely being bombarded with “productivity hacks” that actually just add more digital noise to your already cluttered day. Most of it is just expensive nonsense designed to make you feel like your biology is a bug that needs a software patch.

I’m not going to suggest you buy a new piece of hardware or download another notification-heavy tool. Instead, I want to talk about the boring, practical ways to stop the screen from draining your battery—and I mean your actual mental energy. I’ll walk you through the specific settings to toggle, the meeting habits that are actually killing your focus, and how to reclaim your eyes without needing a PhD in ergonomics. No hype, no subscriptions, just the stuff that actually works when you’re tired of being “on.”

Table of Contents

The Real Cost of Non Verbal Communication Overload

The Real Cost of Non Verbal Communication Overload.

When you’re sitting across a table from someone, your brain does a lot of heavy lifting in the background. You’re reading their posture, the slight squint of their eyes, and the way they lean in. It’s subconscious, but it’s work. On a video call, that process breaks. You’re staring at a tiny, pixelated version of a human face, trying to decipher if a two-second delay in their response is a bad internet connection or if they’re actually annoyed with you. This constant, manual effort to decode social cues is a massive driver of non-verbal communication overload. Your brain is essentially running a high-intensity background process that it can’t quite switch off, and that’s where the real drain happens.

It isn’t just about being tired; it’s about the specific way your brain processes this fragmented data. This constant state of hyper-vigilance leads directly to cognitive load in video conferencing, leaving you feeling completely hollowed out by 3:00 PM. You aren’t just “tired of screens”—you’re exhausted from the mental gymnastics required to pretend a grid of squares is a real room.

Managing Screen Time Fatigue Before Your Brain Shuts Down

Managing Screen Time Fatigue Before Your Brain Shuts Down

If you find yourself staring at a spreadsheet after a morning of back-to-back calls and realizing you haven’t actually processed a single number, you’re hitting the wall. This isn’t just being tired; it’s the cognitive load in video conferencing finally catching up to you. Your brain is trying to process a dozen different micro-expressions and audio delays simultaneously, which is an exhausting way to exist. To manage screen time fatigue, you have to stop treating your eyes like they’re indestructible.

I’ve learned that the most effective remote work burnout prevention isn’t a fancy meditation app; it’s the aggressive use of the “camera off” button. If the meeting doesn’t strictly require you to be seen, turn the feed off. It lowers the pressure to perform a “listening face” and lets you actually focus on the words being said. If you can’t turn the camera off, try the 20-20-20 rule: every twenty minutes, look at something twenty feet away for twenty seconds. It sounds like something a textbook would tell you, but it actually helps stop your eyes from feeling like they’ve been rubbed with sandpaper by 3:00 PM.

Five ways to stop your brain from melting during meetings

  • Turn off your own video. Most platforms let you hide your self-view; do it. Staring at a pixelated version of yourself while trying to listen is an unnatural cognitive load that serves no purpose other than making you self-conscious.
  • Set a “no-camera” policy for internal syncs. If you aren’t presenting a deck or making a formal decision, tell your team that cameras are optional. It saves everyone the energy of performing “attentiveness” through facial expressions.
  • Use a physical timer, not a digital one. When a meeting is scheduled for thirty minutes, set a kitchen timer or a dedicated desk clock across the room. It pulls your eyes away from the blue light and gives you a tactile sense of time passing.
  • Stop multitasking with more screens. If you have a meeting on one monitor and Slack or your email open on the other, you aren’t working; you’re just vibrating with anxiety. Close the extra tabs. If you can’t focus on the call, you’re better off just taking notes on paper.
  • Schedule “buffer blocks” that aren’t just five minutes. If you have back-to-back calls, you need fifteen minutes of actual silence—no phone, no scrolling, no podcasts. Your eyes need to focus on something more than twelve inches away to reset your tension.

How to actually protect your headspace

Stop the “camera-on” guilt; if your company culture allows it, turn your video off for meetings where you aren’t presenting to give your brain a break from decoding facial expressions.

Set hard boundaries for your hardware; when the meeting ends, physically close the laptop or move it to another room so your brain knows the “performance” is over.

Audit your notification settings once a week—if an app is pinging you just to tell you someone liked a post, turn that specific alert off and keep the peace.

## The illusion of "presence"

We’ve been sold this idea that if we aren’t staring directly into a tiny glass lens, we aren’t working, but your brain wasn’t designed to process twenty different faces performing “attentive listening” simultaneously for six hours a day. Sometimes the most productive thing you can do for your workflow is to turn the camera off and admit that you can hear them perfectly well without the visual noise.

Saoirse Doyle

Getting your brain back

Strategies for getting your brain back.

At the end of the day, fighting video call fatigue isn’t about downloading a new focus timer or buying a more expensive webcam. It’s about acknowledging that your brain wasn’t designed to process a dozen tiny, high-definition faces simultaneously while trying to listen to a single voice. We’ve talked about the heavy lift of non-verbal processing, the necessity of scheduled screen breaks, and the simple, radical act of turning your camera off when it isn’t strictly required. You don’t need a complex productivity framework to manage this; you just need to stop treating your attention like an infinite resource. If you can implement even one of these small shifts—like a five-minute walk without your phone after a heavy meeting block—you’re already doing better than most.

I spent years in IT watching people burn themselves out trying to optimize every second of their digital lives. The truth is, the most efficient system is the one that actually lets you step away from the desk. Technology is supposed to be a tool that serves you, not a tether that keeps you in a state of constant, low-level sensory overload. So, once you finish reading this, don’t go looking for another article or a new app to solve the problem. Just close the laptop, look at something that isn’t a glowing rectangle, and give your eyes a rest. You’ll be much more useful to your work once you’ve actually stopped staring at it.

Frequently Asked Questions

Is there a way to turn off my camera without looking like I've checked out or am being rude to my boss?

You don’t have to go dark immediately. Start by testing the waters: try “camera-off” for internal team syncs first. If you need to go dark in a bigger meeting, just drop a quick note in the chat: “Moving to audio-only to save some bandwidth/focus better.” It sounds professional rather than dismissive. Also, check your settings; some apps allow you to hide your self-view, which stops you from staring at your own face all day.

What are some decent, low-cost tools for blocking notifications during meetings that don't require a monthly subscription?

I’m not going to suggest a $10-a-month “focus coach” app. Honestly, you already have what you need. If you’re on a Mac, just use the built-in Focus modes; they’re free and actually work. On Windows, “Focus Assist” does the same. If you want something more robust, try Cold Turkey for your computer or Freedom for your phone. Both have one-time purchase options so you aren’t stuck in a subscription loop just to get some peace.

If I'm working remotely, how do I actually signal to my team that I'm "off-camera" for a break without it being awkward?

The trick is to stop treating your camera like a permanent fixture. I used to feel like I had to be “on” 24/7, but that’s how you burn out. Start by setting a status in Slack or Teams—something simple like “Camera off for a quick stretch.” If you’re already in a meeting, just say, “I’m going off-camera for a bit to save some bandwidth/eye strain.” Most people will actually just feel relieved they can do the same.

How to Use a Standing Desk Without Aching by Noon

I spent three years watching people buy $800 motorized desks only to use them as very expensive, slightly elevated dining tables. There is this massive, exhausting myth in the productivity world that if you just stop sitting, your back pain will vanish and you’ll suddenly become a high-performance machine. It’s nonsense. If you don’t actually know how to use a standing desk properly, you aren’t “optimizing your workflow”—you’re just trading lower back compression for aching calves and swollen ankles. I learned this the hard way during my helpdesk days, trying to troubleshoot server migrations while standing on a hard linoleum floor for six hours straight because I thought I was being “proactive.”

I’m not here to sell you a specialized ergonomic mat or a subscription to a posture-tracking app that pings your phone every ten minutes. I just want to tell you where to put your monitor, how to angle your elbows so you don’t ruin your wrists, and why you need to sit down frequently. This is the boring, practical version of the setup: the specific heights that actually work, the cheap fixes for floor fatigue, and what to do when your legs inevitably give out by 3:00 PM.

Table of Contents

Correct Monitor Height Is More Important Than the Desk Itself

Correct Monitor Height Is More Important Than the Desk Itself

Most people buy a standing desk because they think the act of standing is the magic fix, but they end up just standing in a way that hurts. You can have the most expensive motorized frame on the market, but if you’re looking down at a laptop screen all day, you’re just trading sitting-related neck pain for standing-related neck pain. The real goal of an ergonomic workstation setup isn’t the height of the desk; it’s the relationship between your eyes and your screen.

To get your correct monitor height, you need to stop looking at the middle of the screen and start looking at the top third. If you have to tilt your chin down even slightly to read an email, your posture is already failing. I usually tell people to grab a stack of old textbooks or a dedicated monitor arm to get that screen up. If you don’t fix this, you’ll find yourself leaning forward to compensate, which is a one-way ticket to chronic shoulder tension by lunchtime. Get the height right first, or the desk is just an expensive piece of furniture that makes your legs ache.

Preventing Lower Back Pain Starts With Your Feet

Preventing Lower Back Pain Starts With Your Feet

If you spend all day standing on a hardwood floor or thin office carpet, your lower back is going to pay the price by lunchtime. I’ve seen people buy a three-thousand-dollar desk only to ruin their posture because they’re standing on a surface that offers zero shock absorption. If you want to focus on preventing lower back pain, you need to stop treating your floor like it’s part of the equipment.

Invest in a decent anti-fatigue mat. It isn’t just some luxury fluff; it’s a piece of functional gear that encourages micro-movements in your legs, which keeps your blood flowing and prevents that heavy, aching feeling in your joints. If you’re on a budget, even a small piece of high-density foam helps, but don’t skip this step.

Finally, don’t try to be a hero and stand for eight hours straight. The goal of a good ergonomic workstation setup isn’t to turn you into a statue; it’s to stop you from being static. Use a timer to manage your alternating sitting and standing intervals. If you feel yourself starting to lean or slouch, that’s your cue to sit down for a bit.

Five things to do before you start standing for eight hours

  • Don’t try to stand all day right away. If you go from sitting for eight hours to standing for eight hours, your ankles will hate you by lunch. Start with twenty minutes here and there. It’s a muscle thing, not a willpower thing.
  • Get an anti-fatigue mat. If you’re standing on hardwood or thin carpet, you’re basically working on a concrete floor. A decent foam mat isn’t a luxury; it’s the difference between finishing your workday and needing a massage.
  • Check your keyboard height. Your elbows should be at about a 90-degree angle. If you have to reach up or hunch down to hit the keys, you’re just trading back pain for wrist strain, and that’s a lateral move you don’t want to make.
  • Watch your “lean.” People tend to shift all their weight onto one hip when they get tired. It looks relaxed, but it’s actually just putting your spine out of alignment. If you find yourself leaning, it’s time to sit down.
  • Mind your cables. If you’re moving the desk up and down, make sure your computer, monitor, and peripherals have enough slack. I’ve seen too many people yank a USB-C cable right out of a laptop because they forgot the desk wasn’t stationary.

The "don't make it a chore" checklist

Stop trying to stand for eight hours straight; aim for short, manageable intervals so you aren’t too exhausted to actually do your work.

Check your elbow angle every time you adjust the height—if you’re reaching up or hunching down to type, you’ve done it wrong.

Get a decent anti-fatigue mat or a footrest, because standing on bare floorboards or hard carpet is a fast track to sore heels and a bad mood.

The standing desk trap

Most people buy a standing desk thinking it’s a magic cure for a sedentary lifestyle, but if you just stand up in the same hunched-over position you were sitting in, you haven’t solved anything—you’ve just moved the ache from your hips to your heels.

Saoirse Doyle

Stop treating your desk like a stationary monument

Stop treating your desk like a stationary monument.

At the end of the day, a standing desk is just a piece of furniture that moves up and down; it isn’t a magic cure for a sedentary lifestyle. If you get the monitor height wrong, you’ll just trade back pain for neck strain, and if you don’t have a decent mat or some supportive footwear, your feet will be screaming by lunch. The goal isn’t to stand for eight hours straight—that’s a recipe for swelling and fatigue—but to ensure that when you do stand, your body isn’t fighting against your setup. Remember to check your elbow angles, keep your screen at eye level, and most importantly, don’t forget to sit back down when your legs start to feel heavy.

We spend a lot of time looking for the “perfect” productivity hack or the most expensive ergonomic chair, but the best system is usually the one that requires the least amount of conscious effort to maintain. A good desk setup should eventually become invisible; you shouldn’t be thinking about your posture or your wrist angle while you’re trying to actually get your work done. Stop chasing the gear and start focusing on the friction. If your setup stops getting in your way, you’ve done the job right. Now, go check your monitor height one more time and then get on with your day.

Frequently Asked Questions

How long should I actually stand for before I'm supposed to sit back down?

Don’t fall into the trap of thinking you should be standing for eight hours straight. If you do, your feet will hate you and your lower back will eventually protest. The sweet spot is usually a 1:1 or 2:1 ratio—about twenty minutes of standing for every forty minutes of sitting. If you feel your weight shifting restlessly from one leg to the other, that’s your body telling you it’s time to sit down.

Do I really need an anti-fatigue mat, or is a rug enough?

A rug is fine for aesthetics, but it won’t save your joints. If you’re standing for more than twenty minutes at a time, get a proper anti-fatigue mat. A rug is just soft padding; a real mat uses high-density foam to encourage micro-movements in your legs, which keeps your blood flowing. Just check the height before you buy—you don’t want something so thick that it makes your desk feel like it’s sinking.

What happens to my desk settings if I switch from a manual crank to an electric one?

The short answer is: nothing happens to your settings, because they aren’t stored in the desk. Your “settings” are just where you physically placed your monitor and keyboard.

Stop Chasing Hacks and Start Fixing the Plumbing: the Boring, Actual Way How to Improve Your Credit Score.

If you’ve spent more than ten minutes searching for how to improve your credit score, you’ve likely been bombarded by “fintech” apps that promise to fix your life in exchange for a monthly subscription fee. It’s the same pattern I saw for six years on the helpdesk: someone sells you a shiny new interface to solve a problem that actually just requires a bit of tedious, manual maintenance. Most of these services don’t actually do anything; they just wrap your own data in a pretty UI and charge you for the privilege of looking at it. I’m not interested in paying for a digital band-aid when the wound is just a series of unmanaged balances and missed clicks.

I’m not going to give you a roadmap to “financial freedom” or any other breathless nonsense. Instead, I’m going to walk you through the actual mechanics of the system—the parts that are boring, the parts that are finicky, and the parts that actually move the needle. We’ll look at exactly what to check, what to pay down first, and how to handle the automated disputes without losing your mind. This is the no-nonsense version of credit repair: what works, what’s a waste of your time, and how to make sure your score stops working against you.

The Impact of Payment History on Credit What Actually Matters

The Impact of Payment History on Credit What Actually Matters

If you’re feeling overwhelmed by the sheer amount of data floating around, I usually suggest just grabbing your official reports directly from the source rather than paying a middleman to “monitor” you. It’s a bit more manual work, but it keeps your data cleaner and ensures you aren’t being nickeled and dimed for information you’re legally entitled to see for free. Honestly, if you find yourself needing more specific local guidance or just want to see how certain services are being discussed in different regions, checking out something like private sex m nster can sometimes give you a sense of the local landscape before you commit to a long-term financial product. Just remember: if a service promises to “fix” your score overnight for a fee, run the other direction.

If you want to know the single biggest lever in your FICO score, it’s this: did you pay your bills on time? It sounds incredibly basic, which is why people often overcomplicate it by hunting for “hacks.” In reality, the impact of payment history on credit is massive because it tells lenders if you are a predictable person or a liability. One missed payment on a credit card isn’t just a late fee; it’s a data point that sits on your report like a stain.

I spent years watching people panic over small fluctuations, but if you have a history of being late, no amount of fancy “boosting strategies” will fix it overnight. You have to build the rhythm first. Set up autopay for at least the minimum amount on every single account—even if you plan to pay more manually later—to ensure you never accidentally trigger a late flag. If you find a mistake where a payment was marked late through no fault of your own, don’t just ignore it; you’ll need to learn how to dispute credit report errors through the bureau’s portal immediately. It’s tedious, but it’s the only way to clear the air.

Credit Utilization Ratio Optimization Stop Letting Your Limits Bleed You Dr

Credit Utilization Ratio Optimization Stop Letting Your Limits Bleed You Dr

If your payment history is the foundation, then your credit utilization ratio is the pressure gauge. It’s a simple calculation: how much of your available credit are you actually using? If you have a £1,000 limit and you’ve spent £800, you’re sitting at 80% utilization. Even if you pay it off in full every single month, the banks report that high balance to the bureaus the moment your statement closes. To the algorithm, you look like you’re struggling to keep your head above water, even if you aren’t.

For effective credit utilization ratio optimization, the goal is to keep that number under 30%, though staying under 10% is where the real magic happens for your score. I usually tell people to treat their credit card like a debit card; if the money isn’t in your current account, don’t swipe it. If you find you’re constantly hovering near your limits, don’t just panic and close the accounts—that actually makes things worse by reducing your total available credit. Instead, look at credit score boosting strategies like requesting a limit increase (without a hard credit check, if possible) or making mid-month payments to keep the reported balance low.

The low-effort fixes that actually move the needle

  • Set up autopay for the minimum amount on everything. Even if you plan to pay the full balance manually every month, the minimum is your safety net against a single forgotten due date tanking your score. It’s better to pay a little interest than to spend six months fixing a late payment mark.
  • Stop applying for everything that comes in the mail. Every time you hit ‘submit’ on a credit application, a hard inquiry hits your report. It’s a small dip, but if you do it five times in a month because you’re hunting for better rates, it looks like you’re desperate for cash.
  • Check your actual report for errors, not just the score. Use a service like AnnualCreditReport.com—it’s the official one, not one of those flashy apps trying to sell you a monthly subscription. If there’s an account on there that isn’t yours, dispute it immediately. It’s a tedious process of clicking through help menus, but it’s the only way to clear ghost debt.
  • Don’t close your oldest accounts just because you don’t use the card anymore. The length of your credit history matters. If you have an old card sitting in a drawer with a zero balance, keep it open. Just put one small subscription on it once a year so the bank doesn’t close it for inactivity.
  • If you’re carrying a balance, look into a balance transfer card, but read the fine print on the transfer fee. Most charge 3% to 5% upfront. If you can’t pay the debt off within the 0% introductory period, the interest rate will jump back up, often higher than your original card. It’s a tool, not a magic wand.

The long game

Building credit through the long game.

At the end of the day, improving your score isn’t about finding a secret loophole or a magic app that pings your phone when you’re doing well; it’s just about the math of your habits. You pay your bills on time so the history stays clean, and you keep your balances low so your utilization doesn’t look like a crisis to the lenders. If you can manage those two things—payment history and your debt-to-limit ratio—you’ve already won the hardest part of the battle. It’s not fancy, and there isn’t a “one-click fix” that actually works, but consistency is the only real shortcut in this industry. Just keep an eye on those automated payments so nothing slips through the cracks while you’re busy living your actual life.

I know it feels heavy when you’re staring at a number that feels like a judgment on your character, but I promise you, it isn’t. A credit score is just a data point, a technical metric that reflects your relationship with debt, not your worth as a person. It’s a tool, like a spreadsheet or a password manager, and once you learn how to operate it, it stops being something that scares you and starts being something that works for you. Take it one billing cycle at a time, stop chasing the quick fixes, and eventually, the numbers will start to reflect the stability you’ve built.