
A Home Maintenance Schedule That Prevents the Expensive Surprises

I spent six years in IT support watching people lose entire databases because they forgot one tiny, boring update, and I see the exact same pattern happening with houses. People treat a home like a static object rather than a machine that requires input, so they end up staring at a burst pipe or a dead HVAC system and asking, “what is a home maintenance schedule actually supposed to look like?**” Most of the advice you’ll find online is written by people trying to sell you a $50-a-month “smart home” subscription or a massive, color-coded planner that you’ll abandon by February. You don’t need a digital ecosystem to manage your property; you just need to know which parts are going to fail and when.

In this guide, I’m skipping the fluff and the expensive apps. I’m going to tell you exactly what needs checking, how much a professional will actually charge you when things go wrong, and—most importantly—what can be done yourself with a screwdriver and twenty minutes. My goal isn’t to help you build a perfect system, but to help you build one that doesn’t get in your way.

Table of Contents

Preventing Costly Home Repairs Without the Fluff

Preventing Costly Home Repairs Without the Fluff

Most people treat home maintenance like a surprise party they never invited themselves to. You only notice something is wrong when there’s water pooling in the hallway or the HVAC unit starts making a sound like a dying blender. My time on the helpdesk taught me that most “emergencies” are actually just neglected routines. You don’t need a complex property management maintenance plan to stay ahead; you just need a handful of seasonal home care tasks that keep the small stuff from turning into a mortgage-sized problem.

The trick isn’t to do everything at once. If you try to tackle a massive annual home inspection checklist every single weekend, you’ll burn out by February. Instead, focus on a simple monthly home upkeep routine—things like checking for leaks under the sink or swapping out air filters. It’s about catching the drip before the floor rots. I’m a big believer in the “set it and forget it” approach, so I keep my tasks low-effort and high-impact. If a task takes more than ten minutes, it probably belongs on a seasonal list, not a monthly one.

A Monthly Home Upkeep Routine That Actually Works

A Monthly Home Upkeep Routine That Actually Works

I’m not a fan of the “big annual overhaul” approach because that’s usually when people realize they’ve ignored a leak for eleven months. Instead, I prefer a monthly home upkeep routine that focuses on the stuff you can actually see and touch. Once a month, walk through your house with a flashlight. Check under the sinks for that tiny, slow drip that’s currently turning your cabinet into a petri dish, and peek behind the fridge to make sure the coils aren’t matted with a thick layer of dust. It takes fifteen minutes, but it’s much easier than dealing with a flooded kitchen.

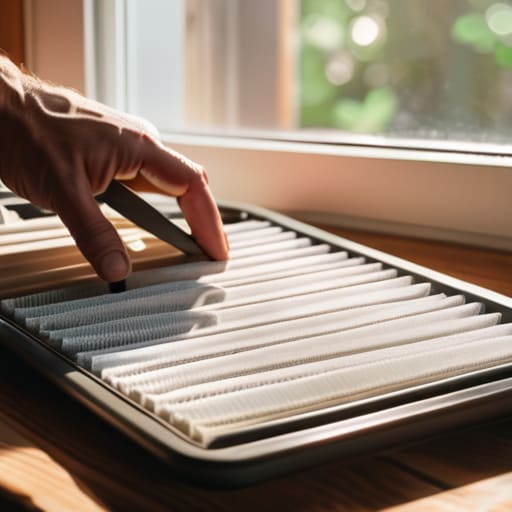
You should also make it a habit to swap out your HVAC filters. I know, it’s the most cliché piece of advice ever, but it’s the literal foundation of preventing costly home repairs on your furnace or AC unit. If you let those filters clog, you aren’t just breathing dust; you’re forcing your expensive machinery to work twice as hard for half the result. Keep a pack of the right size in the utility closet so you aren’t scrambling when the air feels heavy.

Five ways to actually stick to a schedule without losing your mind

  • Stop looking for a “perfect” system. Most people spend more time tweaking their digital planners than actually checking their HVAC filters. Pick one place—a physical notebook, a basic Google Calendar, or a single note on your phone—and stay there. If the system is too fiddly, you won’t use it when the water heater starts making that weird knocking sound.
  • Group tasks by “energy levels” rather than just months. Some jobs, like cleaning the gutters, require a full Saturday and a ladder; others, like checking smoke detector batteries, take thirty seconds. If you try to schedule five “big” tasks on the same weekend, you’ll end up doing none of them.
  • Build a “failure fund” alongside your schedule. A maintenance schedule tells you when to check things, but it doesn’t stop a pipe from bursting on a Tuesday. I always tell people to look at their seasonal tasks and estimate the cost of the parts or the pro they’ll need to call. If you aren’t setting aside a little bit of cash each month, your schedule is just a list of upcoming expenses you can’t afford.
  • Learn the “manual override.” Before you buy a smart home system to manage your maintenance, make sure you actually know how to turn off your main water valve or reset your breaker box manually. There is nothing worse than a “smart” maintenance alert telling you something is wrong when you can’t even find the physical shut-off because you relied entirely on an app.
  • Keep a “dumb” paper log of what you’ve actually done. Digital logs are great until you lose access to an account or a subscription expires and your data vanishes. A simple folder in a kitchen drawer with dated receipts and a handwritten note saying “replaced water softener salt on Oct 12” is worth more than any premium subscription service when it comes time to sell the house.

The Bottom Line on Keeping Your House Running

Don’t overcomplicate it with expensive software; a simple recurring calendar invite or a physical notebook is enough to track when you last changed your HVAC filters or cleared your gutters.

Focus on the “preventative” stuff that actually costs money when ignored, like checking for slow leaks under sinks or testing your sump pump before the rainy season hits.

Always keep a digital folder of your receipts and manual PDFs, because the moment something breaks, you’ll be scrambling to find out if it’s still under warranty or what part you actually need to order.

The Reality of Maintenance

A home maintenance schedule isn’t some aspirational lifestyle ritual or a way to win ‘House of the Year’; it’s just a list of the small, boring things you do now so you aren’t staring at a flooded basement and a massive repair bill six months from today.

Saoirse Doyle

The Bottom Line
The Bottom Line: simple home maintenance.

At the end of the day, a home maintenance schedule isn’t about achieving some impossible standard of perfection or buying a dozen smart sensors that will just beep at you until you disable them. It’s about the basics: swapping the filters, checking the seals, and knowing exactly where your main water shut-off is located before a pipe decides to give up. If you can manage to do the monthly tasks and keep a simple list of when you last touched the gutters or the HVAC, you’ve already done more than most. You aren’t trying to build a museum; you are just trying to prevent a crisis that ends with a frantic, expensive call to an emergency plumber on a Sunday night.

Don’t let the sheer scale of everything that can go wrong in a house paralyze you. You don’t need a complex, paid subscription service to track your home’s health; a simple notebook or a basic calendar invite is usually more than enough to keep things running. The goal is to make your home work for you, rather than you spending your entire weekend chasing after it. Start small, stay consistent, and remember that the best maintenance is the kind you do so quietly that you almost forget it’s even happening.

Frequently Asked Questions

Do I really need a digital app for this, or is a physical notebook enough to keep me from forgetting?

Honestly? If you can remember where you put the notebook, use the notebook. I spent six years watching people lose passwords and get locked out of “smart” ecosystems just because they wanted a shiny dashboard. A physical list doesn’t require a subscription, it won’t suffer from a server outage, and your data isn’t sitting on a startup’s cloud. If you do go digital, just make sure you can export your data to a CSV before you cancel the sub.

How much money should I actually be setting aside each month for these inevitable repairs?

The standard advice is to set aside 1% of your home’s value every year, but that’s a math problem, not a reality. If you live in an old Victorian, 1% won’t even cover a leaky pipe. I prefer a more practical approach: track your big expenses for a year, then aim to save roughly 1.5% to 2% monthly. It sounds like a lot, but it beats a sudden, panicked credit card charge when the water heater dies.

What happens if I miss a month—does the whole schedule fall apart, or can I just catch up later?

It doesn’t fall apart. Life happens, and usually, it’s because something more urgent than a furnace filter decided to show up. If you miss a month, don’t try to do a massive “catch-up” weekend; that’s how you burn out and stop doing it altogether. Just look at what’s most critical for the current season, do that, and move on. The goal is steady maintenance, not a perfect streak.

How to Spot a Scam Text in Five Seconds

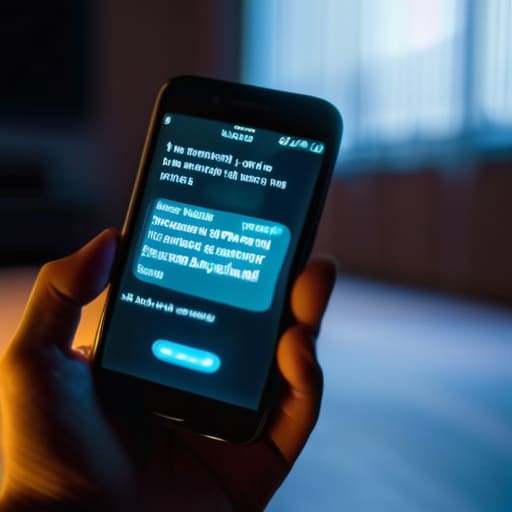
I spent six years on a helpdesk where I watched people lose their cool—and sometimes their savings—because they thought they needed a complex cybersecurity degree just to manage their inbox. You don’t need a fancy, subscription-based “identity protection” suite that pings you every ten minutes to tell you something you already know. Most of the advice out there makes you feel like you’re one wrong tap away from total ruin, which is just a way to sell you more anxiety. Learning how to spot a scam text isn’t about mastering high-level encryption; it’s about recognizing the predictable patterns of a person trying to rush you into making a mistake.

I’m not going to give you a lecture on digital hygiene or suggest you buy a new piece of software. Instead, I’m going to tell you exactly what those messages look like, why they use certain words to trip you up, and what to do if you’ve already clicked the link. This is the boring, practical version: the red flags to look for, the steps to take to secure your accounts, and how to tell the difference between a legitimate bank alert and a thief.

Table of Contents

Common Sms Fraud Tactics They Use to Trick You

Common Sms Fraud Tactics They Use to Trick You

Most of these messages rely on a very specific kind of psychological pressure. They won’t just ask for your password; they’ll tell you that something is already wrong. You’ll get a text claiming there’s an unpaid toll, a missed delivery, or a suspicious login on your bank account. The goal is to make you panic so you don’t stop to think. When you’re rushed, you’re much more likely to overlook common SMS fraud tactics like a slightly misspelled URL or a sender ID that looks like a random string of digits instead of a legitimate company name.

Another tactic is the “wrong number” approach, which feels a bit more social. They might text you asking if you’re “Sarah” or if you’re available for a quick chat. It feels harmless, but it’s actually a way to see if your number is active and if you’re willing to engage with strangers. Once you reply, you’re marked as a “live” target for more sophisticated scams. If you see these patterns, don’t feel bad for being suspicious; just treat every unsolicited request for action as a red flag until proven otherwise.

Identifying Suspicious Sender Ids Before You Panic

Identifying Suspicious Sender Ids Before You Panic

Before you even read the message, look at who sent it. Legitimate companies—your bank, your delivery service, or even your doctor—usually use “short codes,” which are five or six-digit numbers. If you get an urgent alert about a failed payment but the sender is a standard, long-form mobile number, that is a massive red flag. Scammers love using these regular-looking numbers because they bypass some of the automated filters that catch more obvious spam.

Another thing to watch for is the “Alphanumeric Sender ID.” In some regions, scammers can actually set the sender name to something like “Netflix” or “PayPal” instead of a number. This is one of the most common signs of smishing attacks I saw back when I was running the helpdesk. Even if the name looks correct, don’t let it lower your guard. If the name looks official but the tone feels “off,” treat it as a fake. When identifying suspicious sender IDs, always remember that a name on a screen is just a label, and it is incredibly easy for a fraudster to spoof it.

Five ways to tell a scam from a real message

  • Check the link before you tap. If the text says your package is waiting but the URL looks like a jumble of random letters or ends in something weird like “.xyz” or “.top” instead of the official company site, it’s a fake.
  • Look for the “false urgency” trap. Scammers love to say your account will be deleted in 24 hours or your payment failed just now. Real companies might notify you of an issue, but they rarely use panic as a primary communication tool.
  • Watch out for the “wrong” greeting. A real bank or service provider usually knows your name or at least your account details. If a message starts with “Dear Customer” or just “Valued Member,” treat it with suspicion.
  • Remember that big companies won’t ask for secrets via text. No legitimate bank, government agency, or delivery service is ever going to text you asking for your password, your PIN, or your full social security number.
  • Use the “side door” method. If a text makes you nervous, don’t interact with it at all. Close the message, go to your browser, and type the website address in yourself, or open the actual app on your phone to check your notifications there.

The Quick Version

If the text creates a sense of “do this now or lose access,” it’s almost certainly a scam; real companies don’t panic you via SMS.

Never click the link in the message, even if it looks official—always close the text and go directly to the company’s website or app yourself.

If you’ve already clicked or entered details, don’t wait for a “fix”—contact your bank immediately and change your passwords from a different device.

The Golden Rule of Digital Panic

If a text message creates a sense of urgent panic—telling you your account is locked, a package is stuck, or you owe money—that’s not a notification; it’s a psychological trigger designed to make you stop thinking and start clicking.

Saoirse Doyle

The Bottom Line

Avoiding scams is The Bottom Line.

At the end of the day, spotting a scam text isn’t about being a tech genius; it’s about slowing down. If a message creates a sense of immediate panic—telling you your bank account is frozen, a delivery failed, or a package is waiting for a fee—that is your biggest red flag. Check the sender ID, look for those weird, slightly misspelled links, and remember that no legitimate company is going to ask you to verify your password via a text link. If you aren’t sure, close the message and go directly to the official website or app yourself. It takes an extra thirty seconds, but it beats the headache of trying to claw back your identity from a fraudster.

I spent years on a helpdesk watching people beat themselves up over clicking the wrong thing, but the truth is that these scams are designed to exploit how we work. They rely on us being busy, distracted, and rushed. You don’t need a complex security suite or a new digital lifestyle to stay safe; you just need to trust your gut when something feels slightly off. Technology is supposed to make our lives easier, not more stressful, so don’t let a random text message dictate your peace of mind. Stay skeptical, take your time, and remember that a legitimate company will always be there when you log in through the front door.

Frequently Asked Questions

What do I actually do if I've already clicked the link or entered my details?

If you’ve already clicked or, worse, handed over your login, don’t panic—just move fast. First, go to the real website or app (not through the link) and change your password immediately. If you use that same password elsewhere, change those too. If they got your banking details, call your bank’s fraud line right now. It’s a massive pain, but it’s much easier to freeze a card than to recover stolen funds.

Can I block these numbers so they stop coming, or will they just use a new one tomorrow?

You can block them, but don’t expect it to be a permanent fix. Blocking a number is like closing a door while someone is still standing on the porch; they’ll just walk around to the side window. They use automated systems to cycle through thousands of new numbers every day. Block the current one to clear your notifications, but don’t waste your energy trying to win a war against a machine.

How do I tell the difference between a real text from my bank and a fake one?

The simplest way to tell is to look at the link. A real bank will almost never send you a random, shortened URL (like bit.ly or something gibberish) and ask you to “verify” your details. If you’re unsure, don’t use the link in the text. Close the message, open your actual banking app, or type the bank’s web address directly into your browser. If there’s a real problem, the notification will be waiting for you there.

How to Set Deadlines You Can Actually Hit

I spent six years sitting in a cramped IT office, listening to people explain why a “simple” server migration was going to take two hours, only to watch them spend three days in a state of pure, unadulterated panic. Most productivity gurus will tell you that you need a complex, color-coded Gantt chart or a $20-a-month subscription to a task manager that sends you aggressive notifications just to learn how to set realistic deadlines. They want you to believe the problem is your lack of a “system,” but usually, the problem is just that you’re lying to yourself about how long things actually take.

I’m not going to sell you on a new app or a complicated framework that requires a PhD to maintain. Instead, I want to give you the boring, practical truth about why your estimates fail and how to fix them using nothing more than a bit of honesty and some basic math. We’re going to look at how to account for the inevitable glitches, how to stop the “just one more thing” habit, and how to build a schedule that actually works for you rather than one that just makes you feel guilty every time you miss a milestone.

Table of Contents

Accurate Task Duration Forecasting Over Wishful Thinking

Accurate Task Duration Forecasting Over Wishful Thinking

The biggest mistake I see isn’t a lack of ambition; it’s the “optimism bias” that makes us think we’re superhuman. We look at a task and estimate how long it takes when everything goes perfectly—the internet is fast, the coffee is hot, and nobody interrupts us. But perfection is a myth. To get closer to accurate task duration forecasting, you have to stop planning for your best day and start planning for your average Tuesday. If you think a report will take two hours, it will likely take three once you account for the inevitable software update or the sudden urge to check your email.

I used to try and squeeze every minute out of my calendar, but that’s a recipe for burnout. Instead, I’ve started using project management time buffers as a standard rule rather than an afterthought. This means adding a 20% “sanity tax” to every estimate. It’s not about being lazy; it’s about managing stakeholder expectations so you aren’t the one apologizing when a “quick fix” turns into a three-hour deep dive into a broken database. Give yourself the space to breathe, or you’ll just end up working through dinner again.

Using Project Management Time Buffers for When Things Break

Using Project Management Time Buffers for When Things Break

In my helpdesk days, I learned that “it should only take ten minutes” is the biggest lie we tell ourselves. It’s rarely about the task itself; it’s about the fact that your internet will flicker, a colleague will interrupt you with a “quick question,” or the software will decide to run a mandatory update right when you hit ‘export.’ This is why I’m a huge advocate for project management time buffers. I don’t mean adding a random hour at the end of the day; I mean adding a 20% margin to every individual task. If you think a report will take two hours, tell yourself it’s two and a half.

This isn’t about being lazy or overcoming procrastination in planning; it’s about managing stakeholder expectations with actual data rather than hope. When you build these buffers in, you aren’t just protecting your own sanity—you’re creating a shock absorber for the entire project. If everything goes perfectly, you look like a hero for finishing early. If things break, as they inevitably do, you’re still on schedule. It turns a potential crisis into just another Tuesday.

Five ways to stop lying to yourself about when things will actually be done

  • Stop counting the hours you’re actually working. If you have a block of time from 9:00 to 5:00, you aren’t working for eight hours; you’re working for maybe five once you factor in the inevitable “quick” emails, the coffee run, and the fact that your brain needs to reset after a meeting. Plan for the five, not the eight.
  • The “One More Thing” trap. We’ve all done it—you’re finishing a task and think, “I’ll just polish this one bit real quick.” That “quick bit” is usually where the deadline dies. If a task is on your list, it stays as is. If you want to polish it, schedule a separate task for “polishing” tomorrow.
  • Check your history before you guess. Don’t look at how long you think a task should take; look at how long it actually took the last time you did something similar. If your last three reports took four days despite you promising two, your new baseline is four days. The data doesn’t care about your optimism.
  • Identify the “dependency bottleneck” early. I spent years watching people miss deadlines because they were waiting on a password reset or a file from a colleague. If your task requires someone else to click a button before you can start, your deadline isn’t when you finish; it’s when they finish. Account for their lag.
  • Build in a “sanity check” day. I don’t call it a buffer—I call it a day where nothing new is allowed to be scheduled. It’s a placeholder for the inevitable software update that hangs for an hour or the sudden crisis that pulls you away. If you finish everything on time, great, you’ve earned a quiet day. If you don’t, you’re still on schedule.

The short version

Stop planning for your best day; plan for the day the Wi-Fi goes down or your kid gets sick, because that day is always coming.

If a task feels like it’ll take an hour, give yourself ninety minutes—the extra thirty isn’t “wasted” time, it’s the cost of not panicking when things get fiddly.

Always check if your deadline is actually a hard stop or just a suggestion you’ve made to yourself; if it’s the latter, stop treating it like a life-or-death emergency.

The truth about the "buffer"

A deadline isn’t a target you hit by working faster; it’s a calculation of how much chaos you can actually survive before the whole thing falls apart.

Saoirse Doyle

The reality of the finish line

The reality of the finish line.

At the end of the day, setting a deadline isn’t about being a psychic; it’s about being a realist. You need to stop estimating based on your best-case scenario and start looking at the messy, interrupted reality of your actual workday. This means being honest about how long a task takes when you aren’t in a flow state, adding those essential buffers for when the software inevitably decides to update itself mid-task, and—most importantly—refusing to overpromise just to make a client or a boss feel better in the moment. If you account for the friction, the timeline actually starts to mean something.

I spent years in IT watching people burn out because they tried to outrun a schedule that was mathematically impossible from the start. You cannot optimize your way out of a bad plan. Once you start building your schedule around how things actually work instead of how you wish they worked, you’ll find that your stress levels drop significantly. A deadline shouldn’t be a looming threat that keeps you up at night; it should be a reliable marker that tells you exactly where you stand. Build a system that works for you, not one that requires you to be a superhero just to stay on track.

Frequently Asked Questions

How do I handle a boss or client who refuses to accept my buffer time and demands the original, unrealistic date?

This is where the “helpdesk” part of my brain kicks in. When they push back, stop arguing about how hard you’re working and start talking about risk. Don’t say “I need a buffer”; say “If we skip the testing phase to hit Tuesday, we’re essentially betting the project’s success on the software not glitching.” If they still insist, get it in writing. Once you’ve flagged the specific risk, the responsibility for the fallout shifts from your desk to theirs.

Is there a way to track how long things actually take without it feeling like a second full-time job?

Don’t bother with complex time-tracking software; if you have to spend twenty minutes logging a ten-minute task, the system is broken. Just keep a simple notepad or a single digital doc open. When you finish something, jot down the start and end times. At the end of the week, look at the gaps. It’s not fancy, but it stops the “where did the afternoon go?” panic without turning you into a data entry clerk.

What happens to my existing schedule if a "small" task I thought would take an hour ends up breaking my entire week?

It’s the domino effect, and it’s usually because we treat our schedules like a solid block of granite instead of something flexible. When that one-hour task turns into a four-hour troubleshooting nightmare, it doesn’t just eat your afternoon; it pushes every subsequent meeting and deep-work session into the evening. If you haven’t built in “breathing room” between tasks, one glitchy software update or a stubborn spreadsheet error effectively cancels your entire week’s plan.

How to Find Storage in a Flat That Has None

I spent three years living in a studio apartment where “living space” was a polite euphemism for “the three feet between my bed and my toaster.” I used to spend my Sunday evenings staring at a pile of half-unpacked boxes, feeling like I was failing at adulthood because I couldn’t figure out how to plan storage in a small flat without turning my home into a warehouse. Most of the advice you see online is rubbish—it’s all about buying these aesthetic, modular nesting bins that look great on Instagram but cost a fortune and end up being completely useless the moment you try to actually fit a vacuum cleaner inside them.

I’m not here to sell you on a lifestyle overhaul or a suite of expensive, subscription-based organizational apps. I’m going to tell you how to look at your actual floor plan, identify the dead space you’re currently ignoring, and pick furniture that does more than just sit there looking pretty. We’re going to focus on practicality over aesthetics, looking at what things actually cost, how much they weigh, and—most importantly—whether they’ll actually make your daily life easier or just add to the clutter.

Table of Contents

Maximizing Square Footage Without Losing Your Mind

Maximizing Square Footage Without Losing Your Mind

The biggest mistake I see people make when they move into a smaller place is trying to fit their old life into it. You cannot simply shrink your belongings; you have to change how they sit in the room. If you’re serious about maximizing square footage, you need to stop looking at the floor and start looking at the walls. I’m a huge advocate for wall mounted organizers—think heavy-duty floating shelves or pegboards in the kitchen—because if it isn’t taking up floor space, it isn’t making the room feel like a hallway.

Once you’ve cleared the walls, look at your furniture. If a piece of furniture only does one thing, it’s probably costing you too much in mental energy. I lean heavily on multipurpose furniture ideas that actually work, like an ottoman with a lid or a bed frame with built-in drawers. Just a warning: avoid those cheap, flimsy “space-saver” gadgets you see in targeted ads. They usually break within six months, and then you’re just left with more junk to deal with. Buy the sturdy stuff once, and you won’t have to fix it later.

Hidden Storage Solutions That Actually Stay Hidden

Hidden Storage Solutions That Actually Stay Hidden

The problem with most “space-saving” advice is that it ends up looking like a cluttered showroom. If every surface is covered in baskets and bins, you haven’t actually solved the problem; you’ve just redistributed the mess. To really make a difference when organizing tiny living spaces, you need to look at the gaps you usually ignore. I’m talking about the dead space under your bed or that awkward six-inch gap between your wardrobe and the wall. Get some slim, rolling bins for those spots. They aren’t glamorous, but they keep the visual noise down, which is half the battle.

If you’re looking at multipurpose furniture ideas, be careful. I’ve seen too many people buy a coffee table that doubles as a storage chest, only to realize they can’t actually sit on it or reach what’s inside without a struggle. If you go this route, make sure the mechanism is sturdy. If it feels like it’s going to snap the first time you open it, don’t buy it. The goal is to have things tucked away where they don’t demand your attention every time you walk through the room.

Five ways to stop the clutter from winning

  • Measure your actual walking paths, not just your floor space. There is nothing worse than buying a “space-saving” sideboard only to realize you can’t actually open your front door or walk past it without doing a side-shuffle. Use a piece of masking tape on the floor to mark out the footprint of any new furniture before you click ‘buy’.
  • Go vertical, but don’t buy the expensive designer stuff. Most people forget that the six inches of space between the top of their wardrobe and the ceiling is a goldmine for things they only use once a year, like the heavy winter duvet or the extra guest towels. Get some sturdy, uniform plastic bins—not the cheap ones that crack under pressure—and stack them up there.
  • Audit your “just in case” items. I spent years in IT watching people hoard cables for devices that haven’t existed since 2012. If you haven’t touched a gadget or a specific piece of gear in two years, it’s not “storage,” it’s just expensive clutter. If you can’t find a place for it that doesn’t feel like a struggle, you probably don’t need it.
  • Use the “one in, one out” rule for everything that isn’t a tool. If you buy a new jumper, an old one has to go. It sounds tedious, but in a small flat, your inventory is a zero-sum game. If you keep adding without subtracting, you aren’t “organizing,” you’re just rearranging a mess.
  • Invest in furniture that actually does a job. A coffee table that is just a slab of wood is a wasted opportunity. Get the one with drawers or a lift-top. It’s better to have one piece of furniture that performs two functions than two pieces that make your living room feel like a Tetris game gone wrong.

The three things you'll actually remember

Stop buying “aesthetic” storage that doesn’t fit your actual stuff; if you have to fight with a drawer to close it, the system has already failed.

Prioritise vertical space and things that move—if a piece of furniture doesn’t have wheels or a shelf above it, it’s wasting the most valuable real estate in your flat.

Always check the “exit strategy” for smart storage gadgets; if a fancy automated organizer requires a monthly subscription to keep your bins synced, just buy a plastic tub and save your money.

The truth about "smart" furniture

Most people think they need a modular, multi-functional sofa with built-in drawers to solve their space problems, but usually, you just need to stop buying things that are too big for your hallways and start using the vertical space you’re already paying rent for.

Saoirse Doyle

Don't let the clutter win

Don't let the clutter win; organize.

At the end of the day, planning storage isn’t about finding a magical, hidden compartment for every single thing you own. It’s about being honest with yourself about what you actually use versus what you’re just holding onto because you feel guilty about the price tag. We’ve talked about using vertical space, picking furniture that pulls double duty, and finding those quiet corners behind doors where the visual noise disappears. If you do even half of this, you’ll notice that your flat starts feeling less like a Tetris game you’re losing and more like a place where you can actually breathe. Just remember: if a storage solution requires you to move five different boxes just to reach your favorite mug, it isn’t a solution, it’s just a different kind of mess.

My advice? Stop waiting for a bigger place to finally feel organized. You don’t need a sprawling house or a custom-built walk-in wardrobe to have a functional life; you just need a system that doesn’t require a manual to operate. Start with one corner, one shelf, or even just one drawer. Get that one part working so it stays out of your way, and then move on to the next. The goal isn’t to have a showroom-perfect apartment that looks like nobody lives there; the goal is to make your home work for you instead of the other way around.

Frequently Asked Questions

How do I decide what to keep and what to actually get rid of without feeling like I'm throwing away my life?

Stop treating your belongings like a museum of your former selves. If you haven’t touched that hobby kit since 2019, it’s not an “investment,” it’s just clutter. I use a simple rule: if I had to buy it again today, would I? If the answer is “probably not,” it goes. Don’t do a “big purge”—that’s how you end up crying on the floor. Just do one drawer at a time.

Should I invest in expensive modular furniture now, or just buy cheap stuff and see what works?

Don’t drop three months’ rent on a modular system before you’ve lived in the space for a full season. Most people buy expensive “flexible” furniture only to realize the modular pieces don’t actually fit their specific quirks—like that one awkward corner by the radiator. Buy the cheap stuff first. Use it to figure out your actual movement patterns. Once you know where the clutter actually lands, then you can invest in the heavy-duty stuff.

What's the best way to organize things I only use once a year so they don't take up my daily living space?

If you only touch it once a year, it shouldn’t be in your line of sight. Get some uniform, clear plastic bins—not the cheap flimsy ones that crack under pressure—and label them clearly. Stick them under the bed or on the highest shelf in your closet. If you’re renting and don’t have high shelves, a vacuum-seal bag is your best friend for bulky stuff like winter coats or guest bedding. Just remember: if you can’t see it, you’ll forget you own it.

How to Build Movement Into a Day You Spend Sitting

I spent six years in IT support watching people buy $1,500 standing desks only to use them as expensive platforms for their coffee mugs. There is this massive, exhausting industry built around “optimizing” your body with expensive gadgets and biohacking subscriptions that promise to fix your posture if you just buy one more piece of hardware. But here is the truth: you don’t need a smart desk that pings your phone like an annoying coworker. If you actually want to learn how to build movement into a desk day, you don’t need a new setup; you just need to stop treating your chair like a permanent fixture.

I’m not going to sell you on a complicated routine that requires more willpower than you have left by 2:00 PM. Instead, I want to talk about the small, slightly boring things that actually work—the kind of stuff that doesn’t require a monthly fee or a gym membership. I’ll show you how to weave tiny bits of motion into your existing workflow so your back doesn’t feel like it’s made of glass by Friday. No hype, no fancy gear, just practical ways to move without breaking your focus.

Table of Contents

Micro Movements for Office Workers That Actually Work

Micro Movements for Office Workers That Actually Work

Most of the advice you see online about “desk yoga” involves twisting yourself into a pretzel while your boss watches. That isn’t happening. Instead, I focus on micro-movements for office workers that don’t require a change of clothes or a yoga mat. The goal is to break the static hold your muscles get into when you’ve been staring at a spreadsheet for three hours. Start with simple shoulder rolls and neck tilts. It sounds basic, but if you’re constantly hunching toward your monitor, these tiny resets are what keep your neck from feeling like it’s made of rusted iron by 4:00 PM.

Another thing that works—and requires zero extra time—is focusing on improving posture at work through small, intentional shifts. Every time you finish a task or hit “send” on a long email, use that as a trigger to squeeze your shoulder blades together or do a seated calf raise. These are low-impact office exercises that don’t disrupt your flow. You aren’t trying to run a marathon; you’re just trying to convince your body that it isn’t actually a permanent fixture of your ergonomic workstation setup.

Combatting Sedentary Lifestyle Without Buying Fancy Gear

Combatting Sedentary Lifestyle Without Buying Fancy Gear

You do not need a $1,000 standing desk or a subscription to a wellness app that pings you every twenty minutes to remind you that you’re sitting down. Most of that gear is just expensive clutter that ends up becoming a very high-end place to hang your coat. Combatting sedentary lifestyle is less about the equipment you own and more about the friction you remove from your existing environment. If your printer is in the next room, walk there. If you can take a call on your mobile, do it while pacing the hallway.

I spent years watching people try to fix their physical discomfort by buying more things, but usually, the issue was just a lack of variety in how they held their bodies. Instead of a complex ergonomic workstation setup, try simply moving your water glass to the far side of the desk so you have to reach for it, or standing up every time you hit “send” on a long email. These tiny, low-effort adjustments prevent that specific kind of stiffness that makes you feel twenty years older than you actually are.

Five ways to move without making a scene

  • Use the ‘water bottle rule.’ Instead of a massive 2-litre jug that sits on your desk all day, use a smaller glass. It forces you to walk to the kitchen or the water cooler more often. It’s a low-tech way to get steps in without needing a smartwatch to nag you.
  • Stop using the ‘shortcut’ for everything. If you need to print a document or grab a stapler, don’t use the one right next to your keyboard. Walk to the communal printer or the supply cupboard. It sounds silly, but those thirty-second trips add up by 5:00 PM.
  • Set a ‘stand-up’ trigger for your meetings. If you’re on a call where you don’t actually need to share your screen or type, stand up. You can pace the room or just shift your weight. It keeps you from sinking into that chair-shaped dent in your spine.
  • Use your phone as a timer, not just a distraction. Set a gentle alarm for every hour. When it goes off, don’t look at your notifications; just do three slow neck rolls and a standing stretch. It takes ten seconds and keeps your shoulders from creeping up toward your ears.
  • Change your scenery for deep work. If you have a laptop, move from your desk to a kitchen table or even a different chair for twenty minutes. The physical act of relocating helps break the mental fog that comes from staring at the same four walls all day.

The short version

You don’t need a standing desk or a $300 ergonomic chair to stop feeling stiff; you just need to move your joints every hour so they don’t seize up.

Forget the complicated “biohacking” routines; if you can walk to the kitchen for a glass of water or stretch your calves while a file downloads, you’re doing enough.

Movement is about consistency, not intensity. It’s better to do thirty seconds of movement ten times a day than to attempt a grueling hour-long workout once a week and spend the rest of the time glued to your seat.

On the myth of the perfect setup

You don’t need a three-thousand-euro standing desk or a subscription to a guided stretching app that pings you every twenty minutes; you just need to remember that your body wasn’t designed to be a permanent fixture of your office chair.

Saoirse Doyle

The takeaway

The takeaway for simple workspace movement habits.

At the end of the day, you don’t need a $1,500 standing desk or a subscription to a guided stretching app that will just end up as another monthly charge on your bank statement. We’ve looked at how small, unremarkable shifts—like standing up while you wait for a file to upload or doing a few calf raises during a meeting where you aren’t the one talking—can stop your body from feeling like a rusted hinge by 5:00 PM. The goal isn’t to turn your home office into a gym; it’s just to ensure that your workspace doesn’t become a place where your physical health goes to die. Stick to the low-friction habits we discussed, because if a movement routine is too complicated to do when you’re tired, you simply won’t do it.

I spent years watching people try to “optimize” their lives with complex setups that they eventually abandoned because they were too much work to maintain. My advice is to keep it boring and keep it simple. If you can manage to walk to the kitchen for a glass of water instead of just reaching for the bottle on your desk, you’ve already won. Productivity isn’t about squeezing every last drop of efficiency out of your brain; it’s about making sure your physical self is still functional enough to enjoy your life once you finally close the laptop. Just move a little, more often, and don’t overthink it.

Frequently Asked Questions

How do I actually remember to do these movements when I'm deep in a flow state or a back-to-back meeting schedule?

The truth is, you won’t. If you’re actually in flow, you’ll ignore every notification you set. Don’t fight your brain; work around it. Use “anchor habits” instead. If a meeting ends, that’s your cue to stand up before the next one joins. If you finish a task, walk to the kitchen for water. It’s not about a fancy app; it’s about tying movement to things you’re already doing.

Will these little movement breaks actually mess with my focus or make me feel more scattered during work?

Honestly, it’s usually the opposite. If you’re staring at a spreadsheet until your eyes glaze over, you aren’t actually “focusing”—you’re just stuck. I used to see people burn out because they thought sitting still was the same as working. A quick stretch or a walk to the kettle acts like a hard reset for your brain. The trick is to keep it short; if you start scrolling through news feeds, that’s when the focus dies.

What happens if I work in a cramped office or a shared space where I can't exactly start stretching out?

If you’re stuck in a cubicle or a shared office, the last thing you want is to be the person doing yoga next to the water cooler. It’s awkward and, frankly, a bit much. Instead, focus on “invisible” movement. Roll your ankles under the desk, squeeze your shoulder blades together while reading an email, or do seated calf raises. It looks like you’re just thinking, but you’re actually preventing your legs from turning into lead.

What to Do the Day You Learn You Were in a Data Breach

I remember sitting in a cramped, windowless office during my third year on the helpdesk, staring at a screen full of red error logs while a frantic manager paced behind me. It wasn’t some cinematic, high-stakes heist with scrolling green code; it was just a quiet, messy realization that a stranger had been snooping through our private files for weeks. Most people think a security incident is this massive, world-ending event, but when you’re actually dealing with the fallout, you realize what is a data breach is much more mundane and much more annoying. It’s usually just someone finding a digital unlocked door and walking off with your most boring, personal details—the stuff you actually need to keep private.

I’m not here to sell you on a $50-a-month “cyber-shield” subscription that promises to make you invisible. Instead, I want to give you the unvarnished truth about how these things actually happen and what you can do to stop them without needing a computer science degree. We’re going to skip the jargon and look at the actual mechanics of how your information gets leaked, how much it might cost you, and—most importantly—how to clean up the mess if it happens.

Table of Contents

How Personal Identifiable Information Theft Actually Ruins Your Week

How Personal Identifiable Information Theft Actually Ruins Your Week

People often think a data breach is just a headline about some massive corporation losing millions of records. In reality, for you, it’s a slow, grinding headache. When personal identifiable information theft actually hits your doorstep, it doesn’t look like a movie hacker; it looks like three different banks calling you at once because someone is trying to open a line of credit in your name. It’s the sudden, frantic hour you spend on hold with a customer service rep, trying to prove you are actually you.

It’s not just the immediate theft, either. It’s the lingering anxiety of knowing your digital identity is out there in a spreadsheet somewhere. You start checking your bank statements twice a week. You find yourself constantly identifying compromised credentials because you’re getting hit with “unusual login” alerts from every service you own. It turns your phone into a source of dread rather than a tool. It’s a massive drain on your mental bandwidth that most people don’t account for when they talk about digital security.

Identifying Compromised Credentials Before the Bills Start Arriving

Identifying Compromised Credentials Before the Bills Start Arriving

You don’t usually find out about a breach through a dramatic cinematic alert. Instead, you find out when you’re staring at a “suspicious login” email from a service you haven’t used since 2019, or when your bank calls to ask why you just tried to buy a jet ski in a different time zone. Identifying compromised credentials is mostly about looking for these small, annoying digital breadcrumbs before they turn into a full-blown crisis. If you see a login notification from a device you don’t own, don’t just delete it because you’re busy; that’s usually the first sign that someone has your password.

I always tell people to treat their email inbox like a security log. Most of the time, the best way of protecting your digital identity isn’t some expensive software suite, but simply checking if your accounts have been part of a known leak. You can use tools like Have I Been Pwned to see if your email address is sitting in a public database. It’s a simple bit of housekeeping. If you do find a match, don’t panic, but do change that password immediately—and for heaven’s sake, don’t use the same one for your bank that you use for your old forum account.

Five things to do before your digital life gets messy

  • Use a password manager that actually works, but here is the catch: if you stop paying the subscription, make sure you have a local export of your vault. I’ve seen too many people lose access to their entire digital existence because they couldn’t settle a monthly bill.
  • Turn on multi-factor authentication (MFA) on everything that matters—especially your email. If a hacker gets your password but can’t get that secondary code, they’re stuck outside. It’s a minor annoyance to click a button, but it’s much less annoying than replacing a stolen identity.
  • Check your “Have I Been Pwned” status once a month. It’s a free service that tells you if your email address showed up in a recent leak. It’s not a magic shield, but it’s a good way to know if you need to go on a password-changing spree.
  • Set up transaction alerts on your bank accounts and credit cards. Most banking apps let you toggle a notification for any spend over a certain amount. If a breach happens and someone tries to buy a jet ski on your dime, you’ll know within seconds rather than waiting for the monthly statement.
  • Audit your “Sign in with Google” or “Sign in with Apple” permissions. We all click “Allow” just to get to a recipe or a news article, but those apps often keep a digital key to your house long after you’ve stopped using them. Go into your account settings and revoke anything you haven’t touched in three months.

The stuff you actually need to remember

A breach isn’t just a headline; it’s a practical headache that usually starts with someone trying to pretend they’re you to get into your bank or your email.

Don’t wait for a notification from your bank to act; if you see weird login attempts or your passwords aren’t working, assume the worst and start changing things immediately.

Use a password manager and turn on MFA (multi-factor authentication) on everything—it’s a bit of a chore to set up, but it’s the only way to stop a single leaked password from ruining your entire digital life.

The reality of the digital lock-pick

A data breach isn’t some high-tech movie heist with glowing green code; it’s usually just someone finding a loose floorboard in your digital life and quietly making off with the stuff you didn’t realize was worth stealing.

Saoirse Doyle

The reality of staying safe

The reality of staying safe with passwords.

At the end of the day, a data breach isn’t some cinematic event with scrolling green code; it’s just a messy, administrative headache that shows up in your inbox or your bank statement. We’ve looked at how your PII gets tossed around like loose change and why catching a compromised password early is the only way to stop a small leak from becoming a flood. You don’t need to become a cybersecurity expert or buy a dozen different monthly subscriptions to manage this. You just need to stop reusing the same password for everything and keep a close, skeptical eye on your financial statements. It’s about building a few small, boring habits that make it much harder for someone to ruin your week.

I know the whole “digital security” conversation can feel exhausting, like you’re constantly playing a game of whack-a-mole that you’re destined to lose. But here is the truth: you don’t need a perfect system, you just need one that doesn’t get in your way. If you use a password manager and turn on two-factor authentication, you are already doing better than about 80% of the people I used to help on the helpdesk. Don’t let the fear of what might happen keep you from using your tech. Just set up your defenses, stay observant, and then get back to your actual life.

Frequently Asked Questions

If my email was part of a breach but I haven't seen any weird activity, am I actually safe?

Short answer: No, you aren’t “safe,” you’re just in the waiting room.

How do I know if the "security alert" I just got in my inbox is a real warning or just another scam?

First, take a breath and don’t click anything. If an email says your account is locked or your password was leaked, don’t use the links in that message. Instead, open a fresh browser tab, type the website address in yourself, and log in there. If there’s actually a problem, you’ll see a notification in your real dashboard. If the website says everything is fine, that email was just a very loud, very fake piece of junk.

What is the actual, step-by-step process for cleaning up my digital life once I know a site I use has been compromised?

First, change that password. If you reuse it anywhere—and let’s be honest, we all do—change those too, starting with your email. Next, check your bank statements for any “test” transactions, usually just a few cents. Then, pull your credit report to ensure no one’s opened a line in your name. If you used a password manager, rotate the weak ones. Finally, if you used a subscription, check the cancellation terms so you aren’t billed for a hijacked account.

Why You Should Set Up a Guest Wifi Network Today

I remember sitting in a cramped office three years ago, watching a frantic manager try to explain to a visiting consultant why he couldn’t access the printer without also seeing the company’s private payroll folder. It’s a classic mistake: giving out your main password because you think it’s the only way to get someone online. Most people think learning how to set up guest wifi is some complex networking feat reserved for IT professionals, but it’s actually just a basic bit of digital hygiene. You don’t need a new router or a degree in computer science; you just need to stop treating your primary network like a public lounge.

In this guide, I’m going to show you the actual steps for how to set up guest wifi without the technical jargon that makes your eyes glaze over. I’ll walk you through what to look for in your router settings, how to keep your smart fridge from talking to your laptop, and most importantly, how to ensure your guests stay completely isolated from your private files. No fluff, no expensive hardware recommendations you don’t need—just the straightforward sequence of clicks to get it done right the first time.

Table of Contents

Guide Overview

Total Time: 15-30 minutes
Estimated Cost: $0
Difficulty: Beginner

Tools & Supplies

  • Router Admin Interface (Web browser or mobile app to access settings)
  • Smartphone or Computer (To configure and test the connection)
  • Existing Wi-Fi Router (1 unit)
  • Internet Service Provider Connection (1 active service)

Step-by-Step Instructions

  • 1. First, you need to get into your router’s brain. Grab a laptop or phone connected to your current network and type your router’s IP address into a web browser. If you don’t know it, check the sticker on the bottom of the actual hardware; it’s usually something like 192.168.1.1 or 192.168.0.1. You’ll need the admin username and password, which is also almost certainly on that same sticker.
  • 2. Once you’re logged in, look for a tab or menu labeled something like “Wireless,” “Wi-Fi Settings,” or “Advanced.” Most modern routers have a specific sub-menu called “Guest Network.” If you see it, click it. If you don’t, look for “VLAN” or “Network Isolation” settings, but don’t panic if you can’t find the specific “Guest” button immediately—it’s usually tucked away in the wireless management section.
  • 3. Now, give the guest network its own name (the SSID). I suggest something obvious like “The Guest House” or “Visitor Wi-Fi” so you don’t accidentally try to connect your own printer to it later. Avoid using your main network name for this; the whole point of a guest network is that it acts like a separate, walled-off lane on a highway.
  • 4. Set a password. I know it’s a chore, but don’t leave it as an “Open” network. If you do, anyone sitting in a car outside your house can use your bandwidth to download movies. Use a different password than your main home network. If your friends complain about typing in a long string of characters, tell them it’s for their own digital safety.
  • 5. This is the most important part: look for a checkbox that says “Allow guests to see each other” or “Access local network resources” and make sure it is unchecked. In technical terms, you want “AP Isolation” or “Client Isolation” turned on. This ensures that if your cousin brings over a laptop that happens to be infected with malware, that malware can’t “see” or jump over to your personal computer, your NAS, or your smart fridge.
  • 6. Hit “Save” or “Apply.” Your router might take a minute to reboot or refresh its settings. Once it’s back up, grab your phone, disconnect from your main Wi-Fi, and try connecting to the new guest one. If you can get online but cannot access your home printer or your file server, you’ve actually done it correctly.
  • 7. Finally, write that guest password down on a small card or a chalkboard in the hallway. There is nothing quite as unhelpful as a guest standing in your kitchen for ten minutes while you scramble to find the router’s admin panel just to give them the internet.

Creating a Separate Ssid to Stop Lateral Movement

Creating a Separate Ssid to Stop Lateral Movement

When I worked the helpdesk, the most common “security breach” wasn’t a hacker in a hoodie; it was a friend’s malware-infected laptop joining the main office network and immediately scanning every connected printer and file server. This is exactly what we’re trying to avoid at home by preventing lateral movement in networks. If you just give out your main Wi-Fi password, you aren’t just sharing your internet; you’re giving them a digital key to every smart bulb, NAS drive, and private laptop in the house.

To do this properly, you need to ensure you have a separate SSID for guests. Think of it like a physical guest room in a house—they have their own space, their own door, and they can’t wander into your bedroom or the home office just because they’re under the same roof. When you’re digging through your router security settings, look for a toggle that says “Allow guests to access local network resources” and make sure it is turned off. If that box is checked, you’ve essentially built a guest network that doesn’t actually protect anything.

Router Security Settings What to Click and What to Ignore

Router Security Settings What to Click and What to Ignore

Once you’ve toggled that guest network switch, you need to look at the actual router security settings to make sure the wall between your devices is actually solid. Most modern routers have a checkbox that says something like “Allow guests to access local network resources.” Make sure this is unchecked. If it’s enabled, your guest network is basically just a polite suggestion rather than a real barrier, and you’re not actually preventing lateral movement in networks. You want your cousin’s malware-laden laptop to stay in its own lane, far away from your NAS or your printer.

I also suggest looking at your guest network password best practices. Don’t use the same password for the guest side as you do for your main home network. It sounds obvious, but I’ve seen people do it, and it defeats the entire purpose of having a separate SSID for guests. Set a dedicated, reasonably strong password for the guest side—something you don’t mind typing in or writing on a small card in the hallway. It keeps the “keys to the kingdom” separate from the people just passing through.

Five things I wish people asked before they hit 'Save'

  • Check for the ‘AP Isolation’ toggle. Most routers have it, and you want it turned on. It basically tells the guest devices they can talk to the internet, but they aren’t allowed to talk to each other or your printer. It’s the difference between a guest using your Wi-Fi and a guest poking around your network.
  • Don’t use your main Wi-Fi password for the guest network. I know, it’s one more thing to remember, but if you give everyone the same key, you haven’t actually built a separate room; you’ve just opened the front door wider.
  • Set a schedule if your router allows it. If you’re tired of your neighbor’s kid leeching bandwidth at 2 AM, most modern routers let you automate the guest network to turn itself off during certain hours. It’s a “set it and forget it” win.
  • Watch your bandwidth limits. If you have a guest network, someone might decide to start a massive 4K stream or a large download. If your router has ‘Quality of Service’ (QoS) settings, you can cap how much speed the guest network gets so your own Netflix stream doesn’t start buffering.
  • Remember the password exists. It sounds silly, but I’ve seen people set up a complex guest network only to spend the next six months digging through their router settings every time a friend comes over. Write it on a small card or keep it in a dedicated note on your phone.

The Bottom Line

The Bottom Line: Secure guest network setup.

Don’t just give out your main password; setting up a guest network is about keeping your printer, your files, and your smart fridge away from whatever random device a friend just plugged into your house.

Check your router’s “AP Isolation” or “Client Isolation” setting—it’s the one button that actually stops devices on the guest network from talking to each other, which is exactly what you want.

If you’re using a mesh system or a fancy third-party router, double-check if the guest feature is included in your subscription; some brands love to lock the simplest security features behind a monthly paywall.

## Why I actually bother with this

A guest network isn’t about being a polite host; it’s about making sure that when your nephew tries to download something questionable on his phone, he isn’t accidentally poking around your tax returns or your smart fridge.

Saoirse Doyle

The Bottom Line

At the end of the day, setting up a guest network isn’t about being a tech wizard; it’s just about drawing a digital line in the sand. You’ve picked a separate name for the network, you’ve toggled that crucial isolation switch so your friends can’t accidentally see your printer or your tax files, and you’ve set a password that isn’t just “password123.” It’s a bit of upfront fiddling in your router settings, but once it’s done, it stays done. You don’t need to spend more money on fancy mesh systems or subscription-based security suites to achieve this; you just need to use the tools you already own properly.

I know that staring at a router admin page can feel like a chore, especially when you just want the internet to work so you can get on with your life. But there is a certain peace of mind that comes with knowing your home network isn’t a wide-open door. You don’t need a complicated, expensive ecosystem to keep your digital life tidy. Most of the time, the best technology is the kind that stays invisible, working quietly in the background so you can stop worrying about your settings and go back to actually enjoying your home.

Frequently Asked Questions

If I turn off the guest network, do my smart plugs and lightbulbs lose their connection too?

It depends entirely on how you set them up. If you were smart (or just following my previous advice) and put your smart plugs and bulbs on that dedicated guest network, then yes—turning it off will kill their connection immediately. They’ll show as “offline” in your apps. If you didn’t bother with a guest network and they’re all sitting on your main home Wi-Fi, they’ll be fine. Just check your device list before you start toggling switches.

Does having a guest network actually slow down my main internet speed when someone is using it?

The short answer is: yes, if they’re downloading a massive game update or streaming 4K video, they are eating into the same “pipe” of bandwidth you pay your ISP for. It’s like having two faucets connected to one water tank; if they turn theirs on full blast, your pressure drops. However, a guest network won’t slow you down just by existing. It only matters when someone is actually using it heavily.

What happens to the guest password if I change my main Wi-Fi password later on?

Nothing happens to it. Your guest network and your main network are essentially two different rooms in the same house; changing the lock on the front door doesn’t change the lock on the guest room. You can update your main Wi-Fi password as often as you like—or never—and your guest credentials will stay exactly as you set them. It’s one of the few parts of home networking that actually behaves predictably.

How to Prioritise When Everything Is Marked Urgent

I spent six years in a cramped IT office, listening to people complain about their “broken workflows” while they sat behind three different monitors running expensive, color-coded scheduling software. Most of the time, they didn’t actually have a productivity problem; they had a clutter problem. They were searching for a magic app or a complex matrix to tell them what to do, when really, they just needed to learn how to prioritise tasks without spending forty quid a month on a subscription that does half the work for them. If you feel like you’re drowning in a sea of “urgent” notifications and half-finished to-do lists, you don’t need a new system—you need to stop letting your tools dictate your day.

I’m not going to sell you on a life-changing ritual or a $15-a-month planner that promises to turn you into a machine. Instead, I’m going to show you the boring, functional way to look at your workload. We’ll talk about what actually moves the needle, how to identify the tasks that are just loud distractions, and—most importantly—how to keep your process simple enough that it doesn’t break the moment you have a busy Tuesday.

Table of Contents

The Eisenhower Matrix Application Isnt a Magic Trick

The Eisenhower Matrix Application Isnt a Magic Trick.

You’ll see a lot of people online acting like the Eisenhower Matrix application is some sort of spiritual awakening. They make it sound like once you plot your chores into four little boxes, your life will suddenly untangle itself and you’ll become a productivity god. It isn’t. It’s just a way to sort things into “do now” and “do later.” Most of the time, the struggle isn’t the sorting; it’s the fact that we use these productivity frameworks for professionals as a way to feel busy without actually doing the work.

If you spend forty minutes color-coding your quadrants, you aren’t working; you’re just procrastinating with better stationery. The goal of using these workload management strategies is to make decision making for daily tasks faster, not more decorative. I spent years watching people at the helpdesk build elaborate spreadsheets to track their tickets, only to realize the spreadsheet was the thing preventing them from actually closing the tickets. Use the matrix to decide what to ignore, then actually ignore it.

Decision Making for Daily Tasks Without the Mental Fatigue

Decision Making for Daily Tasks Without the Mental Fatigue

The problem with most productivity frameworks for professionals is that they require you to be a high-level strategist every single morning. You sit down with your coffee, look at a list of forty things, and immediately burn through your mental energy just trying to decide where to start. By the time you actually pick a task, you’re already exhausted. This is where decision making for daily tasks goes wrong; you aren’t actually working, you’re just negotiating with yourself about what work looks like.

To stop this, you need to move the heavy lifting to the night before. I used to spend my mornings staring at a blank screen, paralyzed by choice. Now, I spend five minutes before I close my laptop deciding on the three non-negotiables for tomorrow. When you wake up, you don’t “prioritise”—you just execute. You treat your morning self like a junior employee who needs clear, simple instructions. If you have to think about what matters while you’re still trying to wake up, you’ve already lost the battle.

Five ways to actually get things done without the extra paperwork

  • Stop using “urgent” as a synonym for “someone else is shouting at me.” If a task is only urgent because a person is being loud, it’s probably not actually important. Label it as a distraction and deal with it only after your real work is steady.
  • Use a “Closed List” for your day. Once you’ve written down your five or six main tasks for the morning, stop adding to it. Every time you add a “quick thing” to your list, you’re just making the original list harder to finish, which is a recipe for feeling defeated by 3 PM.
  • Group your tiny, annoying tasks into one single block of time. Don’t answer one email, then do one bit of admin, then go back to a project. You’ll spend more energy switching your brain between modes than actually doing the work. Do all the “micro-tasks” in one thirty-minute window and then close that tab for good.
  • If a task takes less than two minutes, just do it immediately. It sounds like one of those annoying productivity clichés, but from a helpdesk perspective, it’s about reducing “mental debt.” If you don’t do it now, you’ll just spend the rest of the day remembering that you have to do it, which is more exhausting than the task itself.
  • Audit your tools once a month to see if they’re actually helping or just adding more “management” work. If you’re spending more time color-coding your calendar or setting up complex automation than you are actually working, delete the app. A simple paper notebook or a basic text file is often better than a $15-a-month subscription that requires a PhD to configure.

The short version

Stop hunting for a new app to fix your procrastination; you don’t need more features, you just need to decide what actually matters before you open your inbox.

Use a simple framework like the Eisenhower Matrix to filter the noise, but don’t let the “organizing” phase become a way to avoid actually doing the work.

Keep your system low-maintenance so it doesn’t become another chore on your list—if a method takes more than five minutes to manage, it’s probably broken.

The truth about your to-do list

Most people don’t actually have a prioritization problem; they have a ‘saying yes to everything’ problem. You don’t need a more sophisticated way to rank your tasks, you just need the guts to admit that half of them don’t actually need to be done at all.

Saoirse Doyle

The takeaway

The takeaway: prioritize tasks over urgent distractions.

At the end of the day, prioritizing isn’t about finding a fancy app that color-codes your life; it’s about the unglamorous work of deciding what you are actually going to ignore. We looked at the Eisenhower Matrix, not as a holy grail, but as a way to spot those urgent distractions that don’t actually move the needle. We talked about reducing decision fatigue by making the hard calls early, so you aren’t staring at a blinking cursor at 3:00 PM wondering why you feel so tired. If you can stop treating every notification like a fire drill and start grouping your tasks by how they actually impact your goals, you’ve already won more than most people do with their expensive planners.

Please don’t go out and download a new subscription-based task manager just because you think it will fix your procrastination. A new tool is just more digital clutter if you haven’t mastered the art of saying “no” to the wrong things first. The best system is the one that stays out of your way so you can actually get your work done and get offline. Focus on the small, repeatable habits, keep your setup simple, and remember that a finished, imperfect task is always better than a perfectly prioritized one that never actually happens.

Frequently Asked Questions

What do I actually do with all the tasks that fall into the 'important but not urgent' category so they don't just sit there forever?

The “important but not urgent” pile is where productivity goes to die. If you don’t schedule them, they’ll just haunt your mental backlog until you burn out.

How do I handle it when my boss or a client drops a "priority" task on me right in the middle of my planned schedule?

This is the classic “urgent” interruption that ruins a perfectly good Tuesday. Don’t just swallow it and hope for the best; that’s how you end up working until 8 PM.

Is there a way to do this without spending more time managing a list than actually doing the work?

The short answer is yes, but you have to stop treating your to-do list like a secondary job. If you’re spending more than ten minutes a day moving digital sticky notes around, your system is broken. Pick one place—a notebook, a basic app, whatever—and stop “optimizing” it. Write down the three things that actually matter, then close the app. If you aren’t doing the work, you’re just playing office.

How to Set Up Parental Controls at the Router, Not the Device

I spent six years on a helpdesk, and if there is one thing I learned, it’s that most “parental control” software is just a glorified way to drain your bank account every month. You’ll see ads for these sleek, subscription-based apps that promise to monitor every keystroke, but half the time they just make your own internet feel sluggish and break your kids’ homework connections. Most people think they need to buy a new $300 router just to figure out how to set up parental controls on wifi, but that is a complete waste of money. You usually already have the tools you need sitting in a dusty plastic box in your hallway; you just haven’t been told where the buttons are.

I’m not here to sell you a monthly subscription or a “smart home” lifestyle upgrade. My goal is to show you how to use the settings you already own to block the bad stuff without turning your house into a digital prison. I’ll walk you through the actual menus, tell you which settings are actually worth the headache, and—most importantly—what happens to those restrictions if you ever decide to stop paying for a third-party app. No hype, just the sequence of clicks you need to get it done.

Table of Contents

Blocking Inappropriate Content Without Crashing the Whole Network

Blocking Inappropriate Content Without Crashing the Whole Network

The biggest mistake I see people make is trying to treat the router like a digital sledgehammer. You want to stop the bad stuff, but you don’t want to accidentally break the smart fridge or make the TV stop working every time someone tries to watch a movie. Instead of trying to block every single bad URL manually—which is a fool’s errand—you should look into blocking inappropriate content at the DNS level.

If you use a service like OpenDNS, you aren’t installing finicky software on every single device in the house. You just change two numbers in your router’s settings, and suddenly, the “bad” parts of the internet simply stop resolving. It’s a much cleaner way of managing internet safety for kids because it works across the board, from the iPad to the gaming console, without you having to babysit every individual piece of hardware. It’s a “set it and forget it” approach, which is the only kind worth your time. Just keep in mind that if you use a third-party filtering service, you’re relying on their servers to stay up; if they go down, your internet might feel a bit sluggish.

Router Security Settings That Actually Work for Real Families

Router Security Settings That Actually Work for Real Families

Most people think internet safety for kids starts with a complex firewall, but it usually starts with your guest network. If you haven’t tried configuring guest networks yet, this is the easiest win you’ll get. Most modern routers let you spin up a separate SSID—basically a second WiFi name—just for visitors or the kids’ devices. By putting their tablets and consoles on this secondary lane, you can apply stricter rules to that specific group without accidentally breaking your own laptop or the smart fridge while you’re trying to work.

Once you’re in that guest lane, look for the settings regarding monitoring web activity. You don’t need a fancy, expensive subscription service that promises to “protect your family” for $15 a month; most decent routers already have basic DNS filtering built in. You can often just toggle a switch to “Family Mode” or “High Security.” It’s not a magic bullet, but it’s a solid way of blocking inappropriate content at the source before it even hits their screen. If you ever stop paying for a third-party filtering app, your kids’ access won’t suddenly vanish—they’ll just be back to the open web.

Five things to do before you start clicking 'block'

  • Use your router’s built-in settings first. Most modern routers have a “Guest Network” feature that lets you isolate kids’ devices from your own main network; it’s free, it’s already there, and it keeps them from accidentally poking around your work files or your printer settings.
  • Check the “kill switch” situation. If you use a third-party app or a subscription service to manage the WiFi, find out exactly what happens to the filters when the subscription lapses. Some of them turn into expensive paperweights that leave your network wide open, while others just stop working entirely without telling you.
  • Don’t forget the DNS level. If your router’s interface is a nightmare to navigate, just change your DNS settings to something like Cloudflare for Families or OpenDNS. It’s a “set it and forget it” way to filter out the bad stuff at the source without needing to manage a dozen different device profiles.
  • Schedule the downtime on the hardware, not the device. Setting a “bedtime” on an iPad is easy for a kid to bypass by resetting the clock, but if you tell the router to stop handing out IP addresses to specific MAC addresses at 9:00 PM, the device is dead in the water regardless of what the screen says.
  • Document the “exceptions” list. You’re going to end up blocking a legitimate educational site or a gaming server by mistake. Keep a simple note on your phone of the device IDs or specific URLs you’ve whitelisted so you aren’t hunting through menus for twenty minutes every time someone complains the internet is “broken.”

The short version

Don’t buy a “smart” router just for parental controls; most of what you need is already in your existing router settings or a free DNS service like OpenDNS.

If you use a subscription-based security service, check the fine print—some will lock you out of your own network settings if you stop paying the monthly fee.

Always test the blocks on your own phone first, otherwise you’ll spend your entire evening troubleshooting why the kids’ iPad is offline when it’s actually just a setting you forgot you toggled.

The goal isn't a digital fortress

Most parental control guides make it sound like you’re building a high-security vault, but if you make the settings too rigid, your kids will just find a way to bypass them or, worse, they’ll stop using the devices you’re trying to manage. You don’t need a digital fortress; you just need a system that doesn’t break every time someone tries to stream a movie in the living room.

Saoirse Doyle

Don't let the tech win

Don't let the tech win.

At the end of the day, setting this up is just about reducing the noise. You’ve gone into your router settings, you’ve toggled the access controls, and you’ve hopefully avoided those expensive “all-in-one” subscription services that promise to manage your life but mostly just charge your credit card monthly. Remember: if you use a third-party filtering service, check the cancellation policy before you commit, because you don’t want your kids’ internet access tied to a recurring fee you forgot about. The goal isn’t to build a digital fortress that’s impossible to live in; it’s to make sure the defaults are safe so you don’t have to spend your entire evening policing every single click.

I know it feels like a lot of tinkering, especially when the settings menus look like they were designed in 1998, but it is worth the initial headache. Technology is going to keep moving faster than any of us can keep up with, and your router is the first line of defense. Once these bits are clicked into place, you can stop worrying about the technicalities and get back to the actual business of living. You aren’t trying to build a perfect, sterile environment; you are just trying to build a bit of breathing room so that the internet stays a tool rather than a constant source of stress.

Frequently Asked Questions

If I block a specific site on the router, will it also block it on my phone using mobile data?

Short answer: No. Your router only controls what happens inside your house, on your WiFi. As soon as your phone switches to 4G or 5G, it’s bypassing your router’s rules entirely and heading straight out through the mobile carrier’s gateway. If you need to block a site on a phone regardless of where it is, you’ll need to look at device-level controls—like Apple’s Screen Time or Google’s Family Link—rather than just the router.

What happens to the kids' devices if I accidentally change a setting that messes up the whole network?

Don’t panic; you haven’t bricked their iPads. Usually, if you mess up a setting, the devices will just show “Connected, no internet” or simply fail to load any pages. They aren’t broken, they’re just being blocked by your own mistake. The easiest fix is to log back into your router and hit the ‘Reset’ button—usually a tiny physical hole you poke with a paperclip. It wipes everything back to factory settings, so you’ll have to set your WiFi name and password up again from scratch.

Is there a way to set a "bedtime" for the WiFi so everything just shuts off at 9 PM without me having to manually toggle it?

You’re looking for “Access Control” or “Scheduling,” depending on how your router brands itself. Most modern routers have a dedicated section in their app or web interface where you can pick a device—like your kid’s tablet—and set a “Pause” or “Sleep” window. It’s much better than a manual toggle, but a heads-up: if they find a way to spoof their MAC address, they’ll bypass it. It’s a digital arms race, but it works for most.

How to Use a Screen at Night Without Wrecking Your Eyes

I spent six years in a tiny helpdesk office where the fluorescent lights hummed and the monitors felt like they were personally attacking my retinas. I’ve seen every “revolutionary” blue-light blocking gadget thrown at me—from $80 designer glasses that do nothing to subscription-based eye-tracking apps that just drain your battery. Most of this advice is just noise sold by people who want you to think you need a new setup when, really, you just need to fix your current one. If you’re searching for how to reduce eye strain at night, you don’t need a lifestyle overhaul or a pricey piece of hardware; you mostly just need to stop treating your screen like a flashlight in a dark room.

I’m not going to sell you on a “digital wellness journey” or any overpriced subscription service. Instead, I’m going to give you the boring, effective version: the specific toggles to flip in your OS, the cheap lighting adjustments that actually work, and the settings that won’t break your workflow when you turn them on. This is just about making your tech stop getting in the way of your sleep.

Table of Contents

Adjusting Monitor Brightness and Warm Color Temperature Settings

Adjusting Monitor Brightness and Warm Color Temperature Settings.

First, let’s talk about the easiest fix: adjusting monitor brightness. Most people leave their screens at a default setting that is far too bright for a dim room, which is basically like staring directly into a high-beam headlight. You want your monitor to match the light level of the room around you. If the screen looks like it’s glowing independently of the rest of the desk, it’s too bright. A good rule of thumb is to hold up a white piece of paper next to your screen; if the monitor looks like a light source compared to the paper, dial it down.

Next, you need to mess with your warm color temperature settings. Most operating systems have a built-in feature for this—Windows calls it “Night Light” and macOS calls it “Night Shift.” It shifts the display away from those harsh, clinical blues and toward a softer, amber hue. While people argue about the science, the practical reality is that it makes the screen feel less aggressive. This is one of the primary blue light filter benefits you’ll actually notice: it stops your eyes from feeling like they’ve been scrubbed with sandpaper by the time you finish your evening tasks.

Why Blue Light Filter Benefits Arent a Magic Fix

Why Blue Light Filter Benefits Arent a Magic Fix

Look, I’ve seen people spend way too much money on “blue light blocking” glasses that look like something a character in a low-budget sci-fi movie would wear. Here is the truth from someone who spent years troubleshooting workstation setups: those glasses aren’t a magic wand. While the blue light filter benefits are real in the sense that they shift your screen toward a warmer spectrum, they don’t solve the actual physical problem of how you are interacting with the device.

The real culprit behind most digital eye strain symptoms isn’t just the color of the light; it’s how much you’re staring without blinking and how much tension you’re holding in your neck. You can turn your screen the color of a sunset, but if you’re still squinting in a pitch-black room or staring intensely at a tiny font for three hours straight, your eyes are still going to burn. A filter might help with melatonin production and screen time by making the light less aggressive, but it won’t fix a bad habit of ignoring your body’s signals.

Five things that actually help when your eyes feel like they're full of sand

  • Use the 20-20-20 rule. Every 20 minutes, look at something 20 feet away for at least 20 seconds. It sounds like a productivity cult mantra, but it’s really just about giving your eye muscles a chance to stop being stuck in a permanent squint.
  • Fix your lighting. If you’re working in a dark room with a bright screen, you’re basically staring into a spotlight. Turn on a lamp behind your monitor or use a bias light strip; it softens the contrast so your eyes don’t have to work as hard to adjust.
  • Check your text size. I spent years watching people lean halfway into their monitors because they couldn’t read 10pt Arial. Go into your display settings and bump the scaling up to 125% or 150%. It’s free, it doesn’t cost a subscription, and it stops the “desk lean.”
  • Control the glare. If you have a window behind you or a bright overhead light reflecting off your screen, you’re fighting a losing battle. Adjust your monitor angle or get a matte screen protector if you have to; if you’re constantly squinting to see past a reflection, you’re going to get a headache.
  • Use a physical blue light filter if the software ones aren’t enough. If your “Night Shift” settings still feel too bright, you can buy amber-tinted glasses. They aren’t fashionable, and they won’t fix your sleep if you’re still scrolling through news feeds at 2 AM, but they do a decent job of cutting the harshness.

The TL;DR on saving your eyes

Don’t just rely on a blue light filter; match your monitor brightness to the actual light in your room so your screen isn’t acting like a spotlight.

Understand that software filters are a band-aid, not a cure—if your eyes still burn, you probably need to physically move your screen or take a real break.

Check your settings once, set them to repeat, and stop obsessing over new “eye-care” apps that just want a monthly subscription to do what your OS already does for free.

The reality of the "blue light" hype

We can spend all night arguing about whether blue light actually ruins your sleep or if it’s just a convenient scapegoat, but the truth is simpler: your eyes are tired because you’re staring at a high-contrast light box in a dark room. You don’t need a revolutionary new filter; you just need to stop treating your monitor like a spotlight.

Saoirse Doyle

The Bottom Line

The Bottom Line for healthy screen habits.

At the end of the day, there isn’t a single “magic” setting that will fix a lifestyle of staring at high-intensity screens in a dark room. You’ve adjusted your brightness so it doesn’t feel like a flashlight, you’ve toggled on your warm color filters, and you’ve accepted that blue light software is a tool rather than a cure-all. The goal isn’t to find the perfect app or a subscription-based eye-tracking gadget; it’s about removing the friction between you and your screen. If you do these small, boring things—dimming the monitor, using warm tones, and actually taking a break—you’re already doing more than most people. It’s about making your tech work for you, instead of letting it grind your eyes down by 10:00 PM.

I know it feels like there is always another “revolutionary” eye-care product or a new productivity hack to buy, but most of that is just noise designed to make you feel like your current setup is broken. Your eyes aren’t broken; they’re just tired. Don’t overcomplicate this by chasing the next expensive gadget. Just set your settings, dim the lights, and walk away when the work is done. Your eyes—and your sleep schedule—will thank you for it.

Frequently Asked Questions

Do I actually need to buy those amber-tinted glasses everyone is selling, or is the software enough?

Honestly? For most people, no. If you’ve already tweaked your software settings to warm up the screen, those amber glasses are mostly just an expensive placebo. They work by physically blocking light, but your OS can do that digitally for free. Unless you’re sitting in a room with intense, unregulatable ambient light or you find the software shifts too distracting, save your money. Stick to the settings and spend that cash on better bread flour.

Will turning on night mode make my screen so yellow that I can't actually see what I'm working on?

It can, if you leave the slider on max. Most operating systems let you adjust the intensity of the “warmth.” If you crank it to the limit, you’ll feel like you’re staring at a piece of old parchment. Don’t do that. Slide it just far enough that the harsh white glare softens, but you can still tell the difference between a white background and a light grey one. It’s about balance, not a total color overhaul.

If I'm using a phone instead of a monitor, does the same advice apply to the mobile settings?

Yes, it’s basically the same logic, just with smaller buttons. You want to find “Night Shift” on iPhone or “Eye Comfort Shield” on Android. It does the same thing: shifts the screen toward the warmer, amber end of the spectrum. It’s free and built-in, so don’t bother downloading those “blue light blocking” apps from the app store—most of them are just subscription traps that do exactly what your phone already does for free.