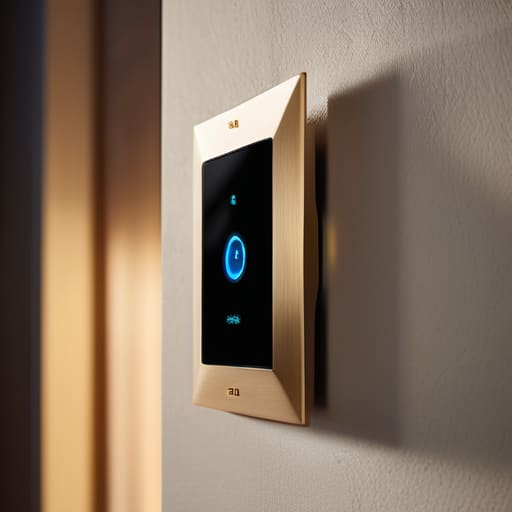
Digital Detox: What Actually Helps and What Is Theatre

I spent six years in IT support, so I’ve seen exactly how much damage a “smart” device can do to a person’s ability to just sit still. Most people think a digital detox is some expensive, spiritual retreat where you wander through a forest without a smartwatch, but that’s just marketing nonsense designed to make you feel inadequate. In reality, when people ask me what is a digital detox, they aren’t looking for a lifestyle overhaul; they’re just looking for a way to stop their phone from hijacking their brain every twelve minutes. It isn’t about moving to a cabin in the woods; it’s about reclaiming the ability to finish a single task without a phantom vibration in your pocket.

I’m not going to sell you on a new app to track your screen time—mostly because those apps just end up being another thing to manage. Instead, I’m going to give you the unvarnished version of how to actually step back. I’ll walk you through the settings you need to toggle, the specific ways to silence the noise, and what actually happens to your productivity when you stop reacting to every single ping. No fluff, no expensive retreats, just the practical steps to make your tech work for you instead of the other way around.

Table of Contents

Recognizing the Signs of Digital Burnout Before You Crash

Recognizing the Signs of Digital Burnout Before You Crash

You don’t usually realize you’re drowning until you’re actually underwater. In my helpdesk days, I saw this with people’s hardware—they’d ignore the overheating and the slowing fans until the whole system just gave up. People are the same. One of the most common signs of digital burnout isn’t a sudden meltdown; it’s that low-grade, constant irritability you feel when a webpage takes two seconds too long to load, or the way you find yourself scrolling through nothing at 11:00 PM just because your brain refuses to switch off.

It’s also about how your focus feels. If you feel like you can’t sit through a ten-minute video or read a single page of a book without reaching for your phone, you aren’t “multitasking”—you’re just overstimulated. That feeling of being constantly “on” is a massive drain on your mental health and technology usage balance. You start to realize that your devices aren’t tools anymore; they’re just interruptions you’ve grown used to. If you’re feeling twitchy every time a notification pings, your system is already redlining.

The Actual Benefits of Reducing Screen Time for Your Brain

The Actual Benefits of Reducing Screen Time for Your Brain

Most people think the main benefit of a digital detox is just “feeling calmer,” but that’s a bit vague. From what I’ve seen, the real win is reclaiming focus from smartphones that have essentially hijacked your attention span. When you aren’t constantly context-switching between a Slack notification, a news alert, and a random Instagram reel, your brain actually gets a chance to settle into a single task. You stop that frantic, low-level feeling of being perpetually “on,” which is one of the primary ways you improve your overall mental health and technology usage.

It’s less about reaching some state of Zen and more about lowering your baseline cortisol. When you stop the infinite scroll, you stop the constant micro-comparisons and the dopamine loops that keep you wired at 11 PM. The most tangible benefits of reducing screen time show up in your sleep and your ability to actually finish a book or a conversation without checking your pocket. It’s about removing the friction between you and your actual life, rather than adding more “wellness” tasks to your to-do list.

Five ways to actually disconnect without losing your mind

  • Kill the red dots. Those little notification badges are designed by people who get paid to make you feel anxious. Go into your settings and turn off everything that isn’t a direct message from a real person. If it’s an app telling you about a sale or a “suggested post,” you don’t need to see it in real-time.
  • Set a “phone bed” time. I don’t care if it’s 8 PM or 10 PM, but pick a time where the device goes into a drawer or a different room. If it’s on your nightstand, you’re going to reach for it when you can’t sleep, and that’s how you end up scrolling through a stranger’s vacation photos at 2 AM.
  • Use grayscale mode. This is a bit of a technical trick, but if you turn your phone’s display to black and white in the accessibility settings, Instagram and TikTok suddenly become a lot less addictive. It turns your phone from a slot machine into a tool. It’s much harder to get lost in a feed when everything looks like a dusty newspaper.
  • Audit your “just in case” apps. We all have them—the ones we keep because we might need them once a year. If you haven’t opened it in three months, delete it. If you actually need it later, you can download it again. Clearing the clutter makes the device feel less like a chaotic workspace and more like a controlled environment.
  • Build a “low-tech” fallback. If you use your phone as your alarm, your music player, and your kitchen timer, you’ve effectively ensured you can never put it down. Buy a cheap $10 alarm clock and a dedicated radio or speaker. It sounds old-fashioned, but it creates physical boundaries between “using technology” and “just living.”

The short version

A digital detox isn’t about throwing your smartphone in a lake; it’s about setting boundaries so your tech works for you instead of you working for your notifications.

You don’t need a week in a silent retreat to see results; small, repeatable habits like a phone-free hour before bed are more effective than a massive, unsustainable overhaul.

Focus on what you’re gaining—like actual attention spans and less mental clutter—rather than just counting the minutes you aren’t looking at a screen.

The reality of the "detox"

A digital detox isn’t about moving to a cabin in the woods or deleting every account you own; it’s just about reclaiming the ability to finish a single thought without a piece of glass in your pocket telling you that you’re missing something.

Saoirse Doyle

Making it stick without the drama

Making it stick without the drama.

Look, a digital detox isn’t about throwing your smartphone into a lake or deleting every single account you own—that’s just a recipe for a different kind of stress when you inevitably have to log back in. It’s really just about reclaiming the tiny pockets of time that your devices have been slowly nickeling and diming away from you. We’ve talked about spotting the burnout, understanding why your brain actually needs the quiet, and realizing that most of those “urgent” notifications are just noise. The goal isn’t to live in a cave; it’s to ensure that your tools are actually serving you, rather than you spending your entire evening managing a never-ending stream of digital clutter.

If you’re feeling overwhelmed, start small. Pick one hour after dinner where the phone stays in the kitchen, or turn off every single non-human notification on your lock screen. You don’t need a complicated, expensive productivity system to fix this; you just need to set some boundaries that actually hold. At the end of the day, the most important thing you can own is your own attention and focus. Once you stop letting your devices dictate your rhythm, you’ll realize that the world keeps spinning just fine without you being constantly plugged in.

Frequently Asked Questions

Does a digital detox mean I have to throw my phone in a lake or go off-grid entirely?

No, and please don’t. Throwing your phone in a lake is a dramatic way to ensure you miss important calls and end up more stressed than when you started. A digital detox isn’t about living in a cave; it’s just about setting boundaries. It’s deciding that after 8:00 PM, your phone stays in the kitchen, or that you don’t check work emails while you’re eating lunch. It’s about control, not isolation.

How do I actually manage my work responsibilities if I'm trying to reduce screen time?

This is where everyone panics, thinking a detox means quitting your job. It doesn’t. It means moving your work from “reactive” to “intentional.”

Is there a way to do this without it feeling like a massive, stressful chore?

The short answer is yes, but you have to stop treating it like a lifestyle overhaul. If you try to go “off-grid” on a Tuesday, you’ll just end up stressed and checking your phone under the table. Instead, start with friction. Move your social apps off your home screen or set your phone to grayscale. It’s not about willpower; it’s about making the device slightly more boring to look at.

The Two Minute Rule and Where It Stops Working

I spent six years on a helpdesk watching people drown in “productivity systems” that required more maintenance than the actual work they were supposed to be doing. Most of the gurus online will try to sell you a $20-a-month subscription to a task manager just to explain what is the two minute rule, as if you need a complex digital ecosystem to remember to reply to an email. It isn’t a life-altering philosophy or a secret to corporate dominance; it’s just a way to stop those tiny, nagging tasks from cluttering your brain and your desktop until you feel paralyzed.

I’m not going to give you a lecture on “optimizing your workflow” or suggest you download a new app to track your progress. Instead, I’ll tell you exactly how I use it to keep my own life from falling apart between sourdough feedings. We’ll look at the mechanics of the rule, where it actually fails, and—most importantly—how to use it without turning your entire day into a series of distracting micro-tasks. No fluff, just the practical bits.

Table of Contents

David Allen Getting Things Done Without the Fluff

David Allen Getting Things Done Without the Fluff

The two-minute rule is essentially a stripped-back version of David Allen’s Getting Things Done (GTD) methodology. If you’ve ever looked into GTD, you probably saw a mountain of complex diagrams about “next actions” and “context folders” that looked more like a second job than a way to get work done. Allen’s core idea is that your brain is a terrible place to store a to-do list; it’s meant for processing, not storage. The two-minute rule is just the practical shortcut for that process. It’s the part of the system that keeps your inbox and your physical desk from becoming a graveyard of half-finished thoughts.

Instead of adding a tiny, nagging task to a digital planner—which usually just leads to overcoming task paralysis by making the list look even more intimidating—you just do it. If it takes less time to reply to that one email or file that single receipt than it does to write it down and remember to do it later, you just do it. It’s one of those micro-productivity habits that actually saves mental energy because you aren’t constantly deciding whether a task is “worth” the effort of scheduling.

Micro Productivity Habits That Actually Stop the Bleeding

Micro Productivity Habits That Actually Stop the Bleeding

The problem with most productivity hacks for procrastination is that they ask you to overhaul your entire life. They suggest you wake up at 5:00 AM or spend three hours color-coding a digital planner. That’s not helpful; it’s just more work. Real micro-productivity habits are about the tiny, friction-filled moments where you usually decide to just “do it later.” It’s the email that takes thirty seconds to answer, the single dish in the sink, or the file that needs renaming. If you can do it in two minutes, do it now so it stops taking up mental real estate.

When you’re dealing with task paralysis, the sheer volume of a to-do list feels like a physical weight. You aren’t lazy; you’re just overwhelmed by the scale of everything. By focusing on these tiny wins, you aren’t trying to “optimize your workflow”—you’re just clearing the debris. It’s much easier to tackle a big project when you aren’t simultaneously distracted by twenty half-finished, two-minute chores lurking in the corners of your brain. It’s not about being a machine; it’s about keeping the small stuff from becoming a mountain.

How to actually use it without turning your life into a checklist

  • If it takes longer than two minutes, put it on a list. The biggest mistake I see is people trying to “do” the two-minute rule for a task that actually requires fifteen minutes of focus. That’s not a quick win; that’s a distraction that’ll break your flow.
  • Use it for the digital clutter that accumulates like dust. That “save as” window you keep ignoring, the unread notification that requires one click to dismiss, or the single email that needs a “yes” or “no” response—do those immediately. It keeps your workspace from feeling heavy.
  • Don’t mistake “doing it now” for “doing it perfectly.” If you’re spending ten minutes agonizing over the wording of a two-minute email, you’ve failed the rule. Send the draft, hit send, and move on. Perfectionism is just a slow way of procrastinating.
  • Batch the “almost” two-minute tasks if you’re in deep work mode. If you’re mid-project and a tiny task pops up, don’t break your concentration. Write it down and save it for a five-minute window later. The rule is a tool, not a leash that forces you to stop working every time a notification pings.
  • Watch out for the “productivity trap” of cleaning instead of working. Sometimes we use tiny, easy tasks to avoid the big, scary ones. If you find yourself suddenly deciding that your desktop icons need to be perfectly aligned instead of writing that report, stop. You’re not being productive; you’re just avoiding things.

The bottom line

The bottom line of productivity efficiency.

Don’t mistake “doing things faster” for “doing things better”; the goal is to clear the mental clutter, not to turn yourself into a human machine.

If a task takes longer than two minutes, it goes on a list—putting it in your head is just a way to ensure you’ll stress about it all afternoon.

This isn’t a way to fix a broken schedule, but it is a very effective way to stop small, annoying tasks from piling up until they feel overwhelming.

The reality of the rule

The two-minute rule isn’t about finding more time; it’s about stopping the tiny, nagging tasks from becoming the mental clutter that makes you feel like you’re drowning when you’re actually just underwater with unread emails and half-finished chores.

Saoirse Doyle

The bottom line

At its core, the two-minute rule isn’t about finding more time; it’s about reducing the mental tax of a mounting to-do list. We’ve looked at how David Allen’s framework works without the productivity-guru nonsense, and we’ve touched on how small, micro-habits can stop your digital life from feeling like a constant fire drill. Whether it’s replying to a quick email, filing a single receipt, or clearing that one annoying desktop icon, the goal is to stop the accumulation of tiny stressors. You don’t need a complex new app or a $20-a-month subscription to manage these tasks. You just need to decide, in the moment, that the effort of doing it now is less than the effort of remembering to do it later.

If you’re feeling overwhelmed, don’t try to overhaul your entire life by Monday morning. That’s how people end up buying expensive planners they never use. Instead, just pick one category—maybe it’s your inbox or your physical mail—and apply the rule there. The best system is the one that actually stays out of your way so you can get on with your real life. Productivity shouldn’t feel like a second job; it should just be the quiet background process that lets you focus on what actually matters, like finally finishing that loaf of sourdough or actually closing your laptop at 5:00 PM.

Frequently Asked Questions

Does this actually work if I'm already constantly overwhelmed, or will I just end up doing more tasks than I can handle?

Honestly, if you’re already drowning, the two-minute rule can feel like just another thing on your to-do list. It’s not a magic fix for a massive backlog. The trick is to use it only for the “micro-clutter”—the tiny, nagging things like replying to a one-sentence email or filing a receipt. Don’t use it to tackle your actual work. Use it to clear the mental static so you can finally focus on the big stuff.

How do I know when a task is "two minutes" versus something that's going to turn into a thirty-minute rabbit hole?

The best way to tell is to look for “decision fatigue” or “setup time.” If the task requires you to open three different browser tabs, hunt for a lost password, or wait for a software update, it’s not a two-minute task. It’s a project. A real two-minute task is something you can finish before you even have time to get distracted by a notification. If you have to “get ready” to do it, put it on the list instead.

What happens if I use this for everything—will I just end up constantly distracted by small things instead of doing my actual work?

That’s the exact trap. If you treat every single notification like a two-minute task, you aren’t being productive; you’re just busy-working. The rule is meant to clear the clutter, not become the clutter. If a task feels like it’s pulling you away from deep work, ignore it. The goal is to stop the small things from piling up, not to let them hijack your entire afternoon. Use it for chores, not for every email.

Smart Locks: Convenience, Batteries and Actual Security

I spent six years on a helpdesk listening to people explain how their “revolutionary” new tech was actually just a fancy way to make their lives harder. Most marketing fluff will try to tell you that a smart lock is a gateway to a futuristic, seamless lifestyle, but let’s be honest: what is a smart lock actually? At its simplest, it’s just a deadbolt that lets you use your phone or a keypad instead of a physical key, provided the battery doesn’t die on you at 2 AM. I’ve seen too many people get caught up in the unnecessary complexity of high-end security ecosystems when all they really wanted was to stop fumbling for their keys while carrying three bags of groceries.

I’m not here to sell you on a lifestyle upgrade you don’t need. Instead, I want to walk you through the actual mechanics of how these things work, what they cost upfront, and—most importantly—what happens to your access if you stop paying for the subscription that runs the app. We’ll look at the different connection types, which ones are actually reliable, and exactly where the potential points of failure live.

Table of Contents

Remote Door Unlocking Technology vs Just Using a Key

Remote Door Unlocking Technology vs Just Using a Key

The main reason people look into remote door unlocking technology isn’t actually for the “cool factor”—it’s for the moments when you’re standing on the porch with two bags of groceries and realize your keys are at the bottom of your bag. Being able to tap a button on your phone to buzz a delivery person in or let a partner inside is genuinely convenient. It turns your door into a node in your home automation security features, rather than just a piece of wood and metal.

However, there is a trade-off. When you use a traditional key, the physics are simple: metal turns a tumbler, and you’re in. With a smart setup, you are introducing a layer of digital complexity. You have to consider your smart lock connectivity protocols—whether it’s Wi-Fi, Bluetooth, or Zigbee—because if your internet goes sideways, that “remote” feature becomes a paperweight. I always tell people to check if the lock has a physical key backup or a keypad. You don’t want to be the person who has to climb through a window because your phone died and the electronic deadbolt benefits suddenly feel like a massive inconvenience.

The Messy Truth About Smart Lock Installation Types

The Messy Truth About Smart Lock Installation Types

When you start looking at smart lock installation types, you’ll quickly realize they aren’t all created equal. You generally have two paths: the “replace the whole thing” method or the “tack it on” approach. Replacing your existing hardware is the cleaner option, but it usually means you’re unscrewing your current deadbolt and potentially dealing with a door that doesn’t quite align with the new hole. If you go this route, you get the full suite of electronic deadbolt benefits, like a more cohesive look, but you’re also committed to the physical labor of a proper install.

Then there are the retrofit kits. These are designed to sit on top of your existing hardware, meaning you keep your current keys and your door’s original look. It’s much easier, but it can feel a bit clunky and added-on. These kits often rely on your existing thumbturn to work, which is fine until you realize you’ve just added another layer of tech that might need a firmware update. Either way, before you buy, check your door’s clearance; if your deadbolt is recessed too deeply, most of these “easy” installs will end up being a headache.

Five things to check before you let a gadget control your front door

  • Check the physical key situation. If the smart tech fails—and it will, whether it’s a dead battery or a software glitch—you need to know if there is a physical keyway that still works. Don’t buy a “keyless” lock unless you have a backup plan that doesn’t involve calling a locksmith at midnight.
  • Look at the “subscription trap.” Some brands charge a monthly fee just to access the remote unlocking features or to save your entry logs. Before you buy, ask yourself: if I stop paying that $5 a month, does my lock become a very expensive, very dumb piece of metal?
  • Verify your door’s hardware. A smart lock isn’t a magic wand that fixes a wonky door frame. If your current deadbolt is finicky or requires you to pull the door toward you to get it to latch, a smart lock will only make that frustration digital. Fix the door first, then buy the tech.
  • Decide how you actually want to unlock it. Do you want a keypad, a fingerprint scanner, or just your phone? Fingerprint scanners are great until you’re wearing lotion or your hands are wet from gardening. Keypads are reliable, but you have to remember to wipe off the greasy fingerprints so people can actually see the numbers.
  • Consider the “bridge” or “hub” requirement. Some locks connect directly to your Wi-Fi, while others require you to buy a separate little plug-in device (a bridge) to talk to your phone when you aren’t home. Factor that extra cost and that extra plug into your budget from the start.

The things you’ll actually care about after reading

Decide if you want a “smart” deadbolt or just a smart keypad; one lets you unlock the door from your sofa, the other just means you can stop losing your keys.

Check your door hardware before buying anything, because “easy installation” usually assumes you have a very specific type of deadbolt and zero existing holes in your door.

Factor in the “hidden” costs, specifically battery replacements and whether the app you need to open your own house requires a monthly subscription.

The reality of the "smart" deadbolt

At the end of the day, a smart lock is just a regular deadbolt that’s been given a brain—and like any brain, it can occasionally get confused, run out of energy, or decide it doesn’t like the Wi-Fi, so you’d better make sure you still have a physical key tucked in a drawer somewhere.

Saoirse Doyle

The bottom line

The bottom line on smart lock security.

At the end of the day, a smart lock isn’t a magic shield that makes your house impenetrable; it’s just a different way to manage access. You have to decide if you actually want the convenience of remote unlocking and temporary codes, or if you’re just buying a gadget that adds another layer of potential failure to your front door. If you go ahead with it, remember to check if the hardware requires a monthly subscription just to keep your history or if it works locally. Most importantly, make sure you have a physical backup plan—whether that’s a hidden key or a model that still accepts a manual turn—for those inevitable moments when the batteries decide they’ve had enough.

Don’t let the marketing hype convince you that your home is “incomplete” without a dozen connected devices. Technology should serve your routine, not dictate it or force you into a constant cycle of troubleshooting and subscription renewals. If a smart lock makes your life easier by letting you stop fumbling for keys while carrying groceries, then it’s a win. But if it feels like just another thing you have to manage, it’s okay to just stick to a standard deadbolt. The best setup is always the one that stays out of your way and actually works when you need it most.

Frequently Asked Questions

Do I actually need a monthly subscription just to let my dog walker in?

The short answer is: maybe, but you shouldn’t have to. Some brands lock basic features—like sending a notification when your dog walker arrives—behind a monthly paywall. If you want to avoid the “subscription trap,” look for locks that support local Wi-Fi or use a hub that doesn’t require a cloud account for basic remote access. Just check the fine print first; otherwise, you might find yourself paying $5 a month just to see if the door actually closed.

What happens to my door if the Wi-Fi goes down or the batteries die?

If the Wi-Fi cuts out, you’re usually fine—you just won’t be able to unlock the door from your office or via voice command. Most locks use Bluetooth for local control, so they still talk to your phone when you’re standing on the porch. If the batteries die, though, that’s a different story. Check the box before buying; most have a physical key backup or a spot to jump-start them with a 9V battery so you aren’t locked out.

Can someone actually hack my lock through my home network?

Technically, yes, but it’s much harder than the movies make it look. To hack your lock, someone usually needs to get onto your Wi-Fi first. If they’re already in your network, they’re halfway there. Most modern locks use encryption that’s actually quite solid, but the weakness is often the “bridge” or the app on your phone. Keep your firmware updated and use a strong password; it’s less about the lock being “hackable” and more about your network being a sieve.

How to Split Household Bills Fairly When Incomes Differ

I spent six years at a helpdesk watching people lose their minds over things that shouldn’t have been broken in the first place, and if there is one thing I’ve learned, it’s that we tend to over-engineer our lives to avoid a little bit of awkwardness. You don’t need a bespoke, automated financial ecosystem or a high-tier subscription to a “wealth management” app just to figure out how to split bills in a household. Most of the advice out there is written by people who want to sell you a monthly recurring charge for something a basic shared note or a simple spreadsheet could do just as well. We make it complicated because we think complexity equals fairness, but usually, it just leads to more things breaking.

I’m not here to pitch you a shiny new tool that will lock your data behind a paywall the second you stop paying. Instead, I want to walk you through the boring, functional ways to get your money sorted so you can stop thinking about it. I’ll tell you exactly which methods work, which ones are a massive headache to maintain, and—most importantly—what actually happens to your shared data if you decide to walk away from an app. No hype, just the steps you need to take to make the system stop getting in your way.

Table of Contents

Finding Equitable Expense Sharing Methods That Actually Work

Finding Equitable Expense Sharing Methods That Actually Work

Most people start with the “equal split” approach because it feels fair on paper. You divide the rent and utilities by the number of people in the house, and everyone pays the same. It’s simple, it’s easy to track, and it works perfectly—until one person makes eighty thousand a year and the other is working three part-time retail jobs. That’s when the math starts to feel less like cooperation and more like a burden. If you want to avoid resentment, you have to look at calculating income-based splits as a legitimate option rather than a radical one. It isn’t about being “charitable”; it’s about ensuring the cost of living doesn’t disproportionately sink one person while the other barely notices the dent in their savings.

If the income gap isn’t massive, you might find that equitable expense sharing methods are more about the “who pays for what” rather than the “how much.” Some households find success by assigning specific categories—one person handles the internet and electricity, while the other covers groceries and household supplies. It keeps the mental load distributed. Just make sure you actually sit down and look at the monthly averages before you commit to a system, or you’ll find yourself back at the kitchen table arguing about a $40 water bill six months from now.

Splitting Rent and Utilities Without the Constant Nagging

Splitting Rent and Utilities Without the Constant Nagging

The biggest friction point in any shared living space isn’t the actual amount of money; it’s the mental load of remembering who owes what for the electricity or the Wi-Fi. If you’re still relying on a messy group chat or a “just Venmo me when you can” approach, you’re asking for resentment. I’ve seen it happen a hundred times: one person becomes the unpaid debt collector, and suddenly, a simple utility bill feels like a personal attack. To avoid this, you need a system for splitting rent and utilities that is automated enough to be boring.

I usually suggest picking one dedicated tool—something like Splitwise or even a shared Google Sheet—and making it the single source of truth. If you’re looking into managing roommate finances, don’t overcomplicate it with complex spreadsheets that require weekly maintenance. Set a rule: every bill gets logged the moment it arrives, and everyone settles up on a specific date, like the first of the month. If you use a subscription-based app to track this, just keep in mind that if you stop paying for the “premium” version, you’ll likely lose the ability to export your history, so keep a manual backup of your settled totals once a quarter.

Five ways to stop the "who owes what" math from ruining your evening

  • Pick one single source of truth. Whether it’s a shared spreadsheet or a dedicated app, stop letting bills live in WhatsApp threads or random scraps of paper. If it isn’t in the designated spot, it didn’t happen.
  • Decide on a method before the first bill arrives. Are you splitting everything 50/50, or are you doing it proportionally based on income? Don’t wait until you’re staring at a £200 heating bill to start negotiating the fairness of your arrangement.
  • Automate the “unfun” stuff. If you use an app like Splitwise, set up a recurring monthly reminder. If you’re using a joint account, set up standing orders for the big hitters like rent and internet so you aren’t manually moving money every single month.
  • Watch out for the “subscription trap.” If you’re splitting a Netflix or Spotify family plan, agree on what happens when someone moves out or stops paying. Most of these services don’t offer partial refunds, so someone always ends up subsidizing someone else’s binge-watching.
  • Build in a “buffer” for the small things. Things like cleaning supplies or lightbulbs always seem to fall through the cracks because they aren’t “major” bills. Put a small, agreed-upon amount into a communal pot each month to cover these tiny, annoying expenses.

The short version

Pick one method and stick to it; the “perfect” math matters far less than everyone agreeing on the rules before the first bill arrives.

Automate the movement of money where you can, but always keep a manual way to check the math so you aren’t flying blind.

Before you download a new shared expense app, check if it lets you export your data—because you don’t want your entire financial history held hostage if you decide to cancel the subscription.

The truth about household spreadsheets

Most people don’t actually need a more complex budget or a fancy new fintech app; they just need a way to track what’s owed that doesn’t require a weekly interrogation or a degree in accounting.

Saoirse Doyle

The bottom line

The bottom line of dividing household costs.

At the end of the day, there isn’t a single “correct” way to divide your costs, only the way that causes the least amount of friction in your living room. Whether you decide to go with a strictly proportional split based on income or just a flat fifty-fifty even if one person earns more, the goal is the same: removing the guesswork. You’ve looked at the apps, you’ve weighed the pros and cons of manual spreadsheets, and you’ve figured out how to handle those pesky utility fluctuations. Just remember that once you pick a method, stick to it for at least three months before deciding it’s a failure. Most systems don’t break because the math is wrong; they break because people stop checking the inputs.

Don’t let the pursuit of the perfect financial setup become another chore on your mounting to-do list. The point of setting this up isn’t to become an amateur accountant; it’s to make sure that when you’re sitting on the sofa on a Tuesday night, you aren’t thinking about who owes what for the internet bill. Pick a tool that doesn’t feel like a second job, set up your automation, and then let it run in the background. A good system should be like a good piece of sourdough starter: once it’s established and fed, you shouldn’t have to think about it every single day. Just get it working so you can get back to actually living in your home.

Frequently Asked Questions

What happens to our shared data or history if one of us moves out and stops paying for the subscription?

This is the part most apps gloss over. If you’re using a shared subscription like Splitwise or a household banking app, the data usually stays with the “owner” of the account. If your roommate leaves and cancels their part, the history typically remains intact for the remaining members, but the person who leaves loses their view. If the whole account lapses, that data is often gone or locked behind a paywall. Always export your history to a CSV first.

How do we handle those annoying one-off costs, like a broken toaster or a shared grocery run, without it becoming a whole thing?

The “one-off” stuff is what actually kills the vibe. You don’t need a new system for a toaster; you just need a shared digital bucket. I use a shared note or a simple app like Splitwise. You snap a photo of the receipt, log it, and walk away. If you’re using an app, just remember: if you stop paying the premium version, you’ll still see your history, but you won’t be able to add new stuff.

Is there a way to do this that doesn't involve me manually checking bank statements every single month?

You don’t want to be playing detective with your bank statements every month; I spent enough time in IT to know that manual tracking is just a recipe for human error. The easiest way out is to set up a joint account specifically for household bills. You both contribute a set amount via standing order on payday, and all the utilities come out of that one pot. It’s boring, but it works.

How to Extend Wifi Range Without Making It Slower

I spent six years on a helpdesk listening to people describe their “internet problems” as if they were mysterious, unsolvable curses. Most of the time, they weren’t actually broken; they were just trying to solve a simple physics problem with expensive, shiny garbage. You’ll see ads everywhere promising that a $300 “signal booster” will magically pierce through your brick walls, but half of those devices are just glorified paperweights that add more latency than they solve. If you are looking for how to extend wifi range, please stop looking for a magic wand and start looking at where your router is actually sitting.

I’m not here to sell you a subscription to a “smart home optimizer” or a piece of hardware that requires a monthly fee just to stay online. My goal is to give you the boring, functional truth: what to plug in, where to move your existing gear, and which mesh systems are actually worth the upfront cost. I’ll tell you exactly what happens to your connection if you stop paying for those “premium” service add-ons, too. Let’s just get your signal to the bedroom so you can stop fighting your router and get back to your life.

Table of Contents

Router Placement for Better Signal Stop Hiding Your Gear

Router Placement for Better Signal Stop Hiding Your Gear

Most people treat their router like a piece of dirty laundry—they tuck it behind the TV, shove it in a cabinet, or hide it in a corner behind a stack of books. If you’re doing this, you’re essentially asking your signal to fight its way through wood, plaster, and metal just to reach your phone. To actually start improving wireless signal coverage, you need to treat your router like a lightbulb. If you put a lamp on the floor in a closet, the room stays dark; if you put it in the center of the room on a high shelf, the whole space lights up.

Get that box out in the open. Ideally, it should be in a central location, elevated off the ground, and away from other electronics. Kitchen appliances and even microwave ovens are notorious for reducing wifi interference, so keep the router at least a few feet away from the fridge. If you’ve already tried moving it and you’re still staring at a spinning loading icon, we can talk about hardware later, but start with the free fix first: stop hiding your gear.

Reducing Wifi Interference Why Your Microwave Is Killing Your Connection

Reducing Wifi Interference Why Your Microwave Is Killing Your Connection

Most people think their internet is slow because they need more speed, but usually, it’s just because the air in your house is crowded. If you’ve ever noticed your Netflix buffering right as someone starts heating up leftovers, you’ve experienced reducing wifi interference in real-time. Most household appliances, especially microwaves and older cordless phones, operate on the 2.4GHz frequency. This is the same lane your router uses to talk to your devices, and when that microwave kicks on, it’s essentially shouting over your connection.

If you’re looking at improving wireless signal coverage, you also need to consider your neighbors. If you live in an apartment, you aren’t just fighting your own appliances; you’re fighting the thirty other routers in the building. This is where understanding dual-band vs tri-band wifi actually matters. Most modern routers offer a 5GHz band, which is much faster and less prone to this kind of “noise,” though it doesn’t travel through walls quite as well. If you can, move your heavy traffic—like gaming or streaming—to that 5GHz band to get them out of the crowded lane.

Five ways to actually get better signal (without the marketing fluff)

  • Switch to the 2.4GHz band for distance. If you’re trying to get a signal through two walls to the back garden, stop using the 5GHz band. It’s faster for gaming in the same room, but 2.4GHz is much better at actually traveling through physical obstacles. It’s slower, but it’s reliable.
  • Update your firmware. I know, it sounds like a chore, but manufacturers release patches that fix how your router handles traffic. Log into your router’s admin page once every few months and check for updates. If you don’t, you’re basically running an engine with a clogged filter.
  • Check your channel congestion. If you live in a flat, your neighbor’s WiFi is likely screaming over yours. Use a free app like WiFi Analyzer to see which channels are crowded. Most routers are set to ‘Auto,’ but sometimes manually picking a less busy channel is the only way to stop the constant dropping.
  • Buy a mesh system, not a cheap extender. Most “range extenders” you see in shops are rubbish; they just repeat a weak signal and create a second, slower network that your phone won’t switch to automatically. If you have a dead zone, get a mesh system. It’s a higher upfront cost, but it acts as one single network and actually works.
  • Consider a wired backhaul if you can. If you do go the mesh route, try to connect the nodes with an Ethernet cable if your house is wired for it. It takes the heavy lifting off the wireless signal, meaning your speeds stay high even when you’re far from the main router. It’s more work to set up, but it’s the only way to get near-perfect coverage.

The short version

Move your router out of the cupboard and away from the kitchen; physical barriers and appliances are the fastest way to kill a signal.

If moving the router doesn’t work, buy a mesh system instead of a cheap “extender”—extenders often create a separate, slower network that’s a headache to manage.

Before you buy anything, check if your current router has a firmware update; sometimes the fix is just a software patch rather than a new piece of hardware.

The truth about signal strength

Most people think they need a more expensive router or a fancy new subscription service to fix their dead zones, but usually, you just need to move the box out of the cupboard and stop letting your microwave sabotage your connection.

Saoirse Doyle

Making it stick

Making it stick with better WiFi setup.

At the end of the day, fixing your WiFi doesn’t require a degree in electrical engineering or a massive budget. Most of the time, it’s just about moving that router out of the cupboard and making sure your microwave isn’t actively sabotaging your Zoom calls. If you’ve moved your gear to a central spot and cleared out the interference, you’ve already done the heavy lifting. If things are still feeling sluggish, then—and only then—should you look into hardware like mesh systems or powerline adapters. Just remember my rule: check the subscription terms before you commit to a monthly fee for a “smart” extender that might turn into a paperweight the moment you stop paying.

Technology is supposed to serve you, not become another chore on your to-do list. I spent years watching people overcomplicate their setups because they thought they needed the latest, most expensive gadget to solve a simple problem. You don’t. Your goal isn’t to have the most sophisticated network in the neighborhood; it’s to have a connection that actually stays out of your way so you can get back to whatever you were doing. Fix the basics, stop overthinking the shiny new tools, and let your tech do its job quietly in the background.

Frequently Asked Questions

Is it actually worth buying a range extender, or am I just going to end up with a slower, more annoying connection?

Most range extenders are a headache. They create a second network name, they cut your bandwidth in half because they have to talk to both the router and your device simultaneously, and they’re prone to dropping connections. Unless you’re on a strict budget and only need signal for a single smart plug, skip them. If you can afford it, get a mesh system instead. It’s a one-time cost that actually works.

If I go the mesh route, how much am I going to be paying every month just to keep my own signal alive?

The short answer is: ideally, nothing. Most decent mesh systems—like Eero, TP-Link Deco, or ASUS—are a one-time purchase. You pay the upfront cost, plug them in, and they just work.

Will changing my WiFi channel in the settings actually do anything, or is that just a thing people say to feel productive?

It can actually help, but only if you live in a crowded apartment building. If you’re in a house alone, changing channels is just moving deck chairs on the Titanic. In a dense building, your neighbors’ routers are likely shouting over yours on the same frequency. Log into your router, find the channel settings, and pick one that isn’t congested. It’s a five-minute fix, but if it doesn’t work, don’t waste your afternoon tweaking it.

How to Fit a Working Office Into a Very Small Space

I spent six years on a helpdesk watching people try to “optimize” their lives with $500 standing desks and complex modular shelving systems that ended up being nothing more than expensive dust collectors. Most advice on how to plan a small home office feels like it was written by someone trying to sell you a lifestyle rather than a functional workspace. They want you to believe that if you just buy the right aesthetic linen desk pad or a smart light that syncs with your circadian rhythm, you’ll suddenly become a productivity god. In reality, most of that is just expensive clutter that makes your tiny room feel even smaller.

I’m not here to sell you a dream or a subscription-based task manager you’ll forget to renew in three months. Instead, I want to show you how to build a setup that actually works within the four walls you currently have. We’re going to talk about the boring, essential stuff: where to plug in your router so the Wi-Fi doesn’t drop during calls, how to choose a chair that won’t ruin your posture by age forty, and how to manage your cables so they don’t become a tripping hazard. This is the practical guide to making a small space work for you, rather than against you.

Table of Contents

Small Apartment Office Ideas That Wont Clutter Your Life

Small Apartment Office Ideas That Wont Clutter Your Life

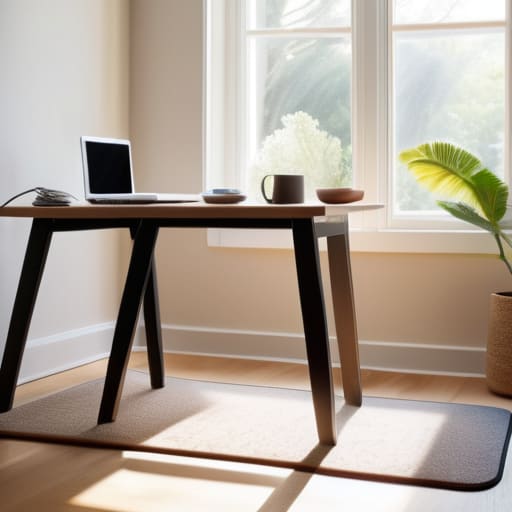
The biggest mistake I see people make in tiny apartments is trying to carve out a “room” that doesn’t exist. You don’t need a dedicated office; you just need a zone that doesn’t make you feel like you’re living inside a cubicle. If you’re working from a corner of your bedroom or a nook in the living room, look into dual purpose furniture for working from home. A sturdy console table that looks like a sideboard during the day, or a desk that folds flat against the wall when you’re done, can save your sanity. The goal is to be able to “close” the office at 5:00 PM so it doesn’t bleed into your relaxation time.

When floor space is at a premium, stop looking down and start looking up. Maximizing vertical storage is the only way to keep your tech and paperwork from migrating across every flat surface you own. Instead of a bulky filing cabinet, get a slim shelving unit or some sturdy floating shelves. It keeps your peripheral gear off the desk surface, which is essential for minimalist desk organization. If your desk is clear, your brain stays a bit clearer, too.

Maximizing Vertical Storage Without Buying Expensive Junk

Maximizing Vertical Storage Without Buying Expensive Junk

The biggest mistake I see people make when they run out of desk space is thinking they need a bigger desk. You don’t. You just need to stop treating your tabletop like a junk drawer. If you start looking up, you’ll find a lot more room. Maximizing vertical storage is basically just the art of getting everything that isn’t your keyboard and mouse off the flat surfaces. I’m talking about pegboards, floating shelves, or even those simple metal mesh organizers that clip onto the side of a desk. It’s much better to have your pens, notebooks, and cables hanging on a wall than sliding around in a pile under your elbows.

If you’re on a budget, skip the “lifestyle” organizers from those big-box home stores that cost forty Euro for a plastic tray. Go to a hardware store and get a basic pegboard. It’s cheap, it’s modular, and it actually works. Just keep in mind that as you add more stuff to the walls, it can start to feel a bit heavy visually. I prefer minimalist desk organization—only hang the things you actually touch every single day. If you haven’t reached for that specific stapler in a month, it shouldn’t be taking up prime real estate on your wall.

The Five Things That Actually Matter (And the Stuff You Can Ignore)

  • Measure your light before you move your desk. I’ve seen people spend a week setting up a beautiful corner only to realize the glare on their monitor makes them squint for eight hours straight. If the window is behind you, you’ll get reflections; if it’s in front of you, you might be blinded by the sun at 2 PM. Find the middle ground.
  • Don’t buy a “gaming” setup unless you actually play games. Most of those ergonomic chairs are overpriced plastic shells that feel great for ten minutes and then leave you sweating. Look for a second-hand office chair from a reputable brand—it’ll be built better, last longer, and won’t cost a month’s rent.
  • Check your outlet situation before you commit. There is nothing more frustrating than setting up a perfect workstation only to realize you need three different power strips and a tangle of extension cords just to plug in your laptop and lamp. Map out the plugs first; it’s much easier to move a desk than it is to rewire a room.
  • Invest in one good cable management solution. I don’t care if it’s a $5 plastic tray that screws under your desk or just some heavy-duty velcro ties. If your wires are a bird’s nest on the floor, you’ll never feel organized, and you’ll definitely trip on them when you’re trying to get up for coffee.
  • Think about the “exit strategy” for your tech. If you buy a smart desk or a specialized lighting system, make sure it isn’t tied to a proprietary app that requires a monthly fee just to keep the presets working. If the company goes bust or you decide to cancel the subscription, you should still be able to use your desk as a regular piece of furniture.

The Short Version: What to Remember

Focus on the essentials first; you don’t need a standing desk or a designer ergonomic chair to get work done, you just need a surface that doesn’t wobble and a seat that doesn’t make your lower back ache by 3 PM.

Use your walls, not your floor; if you’re short on square footage, every shelf or pegboard you put up is one less piece of clutter competing for space on your desk.

Watch the hidden costs; before you buy into a “smart” office ecosystem, make sure you aren’t signing up for three different monthly subscriptions just to keep your lighting or desk timer running.

The Trap of the 'Perfect' Setup

“Stop looking for the office that looks like a Pinterest board; you’re trying to build a workspace, not a showroom. If your setup doesn’t let you sit down without hitting your knee on a drawer or hunting for a charger every twenty minutes, it’s not a workspace—it’s just more clutter you’re paying rent for.”

Saoirse Doyle

The Bottom Line

Small office planning: The Bottom Line.

At the end of the day, planning a small office isn’t about finding that perfect, Pinterest-worthy corner that looks like a minimalist dream. It’s about making sure your setup actually works when you’re three hours into a deadline and your back starts to ache. We’ve talked about picking furniture that fits your actual footprint, using your walls so your desk isn’t a graveyard for loose papers, and keeping the clutter to a minimum so you aren’t fighting your environment just to find a pen. Remember, every piece of gear you buy should earn its keep; if it doesn’t serve a specific purpose or provide genuine comfort, it’s just expensive digital dust waiting to happen.

Don’t get caught in the trap of thinking you need a complete overhaul or a suite of expensive “productivity” gadgets to get started. Most of the time, a clear surface and a decent chair are doing ninety percent of the heavy lifting. Your workspace should be a tool that helps you get your work done and then gets out of your way so you can actually enjoy your life once the laptop closes. Start with what you have, fix the one thing that’s currently driving you mad, and build from there.

Frequently Asked Questions

What happens to my files and data if I use a subscription-based project management tool to organize my workspace?

Here’s the thing about subscription tools: you don’t actually own your workflow; you’re just renting it. If you stop paying, most platforms lock your data behind a “read-only” wall or, worse, give you a grace period before they start pruning your projects to save server space. Before you commit, check if they have a reliable CSV or JSON export function. If you can’t get your data out in a clean spreadsheet, you’re just building a digital cage.

How do I manage cable clutter in a tiny space without spending a fortune on specialized organizers?

Forget the $50 “cable management kits” you see on Instagram. Most of them are just plastic junk that ends up in a drawer. Start with heavy-duty Velcro strips—not those plastic zip ties that bite into the wires—to bundle cables together behind your desk. If you have a gap between your desk and the wall, use a cheap command hook to route the main power cord down the leg. It’s not pretty, but it stays put.

Is it actually worth investing in an ergonomic chair, or can I just make do with what I have until I have more room?

Look, I spent six years watching people develop chronic neck pain because they thought “sitting up straight” was a personality trait. If you’re sitting in a dining chair for eight hours, your body will eventually stage a protest. You don’t need a thousand-euro designer throne, but please don’t “make do” with a wooden stool. If you can’t afford a proper task chair yet, grab a decent lumbar cushion. It’s a cheap fix that beats a chiropractor later.

Inflation Explained Through Your Own Shopping

I was standing in the grocery aisle last Tuesday, staring at a bag of flour that had jumped fifty cents since my last bake, and I realized that most of the “expert” explanations for this are complete nonsense. If you search for what is inflation, you’ll mostly find economists using ten-dollar words to describe why your paycheck feels like it’s shrinking while your bills are growing. They’ll talk about “monetary aggregates” and “consumer price indices” like they’re doing you a favor, but they’re usually just obfuscating the fact that your money is losing its actual muscle. It’s not a complex mathematical mystery; it’s just the reason your life feels more expensive even when you aren’t doing anything differently.

I’m not here to give you a lecture on macroeconomics or sell you on some “inflation-proof” crypto scheme that’s actually just a way to lose your shirt. Instead, I want to strip away the jargon and look at the practical reality of how this affects your digital subscriptions, your grocery list, and your savings. I’ll explain the mechanics of it simply, tell you what to actually watch out for, and help you understand why doing nothing is often the most expensive mistake you can make.

Table of Contents

Purchasing Power Explained Why Your Tenner Feels Like a Fiver

Purchasing Power Explained Why Your Tenner Feels Like a Fiver

To understand why your tenner feels like a fiver, you have to look at purchasing power explained in the simplest terms possible: it’s the actual amount of “stuff” your money can grab before it disappears. Think of it like a digital storage limit on a cloud service. If your subscription price goes up but your storage capacity stays the same, you’re effectively getting less value for every pound you spend. Inflation works the same way. The physical note in your wallet hasn’t changed, but the volume of goods it can actually command has shrunk.

Economists track this using the consumer price index (CPI), which is essentially a giant, never-ending shopping list of things regular people buy—from milk and electricity to data plans. When that index ticks upward, it means the cost of maintaining your baseline lifestyle is climbing. It isn’t just a statistic; it’s the reason you find yourself standing in the supermarket aisle, staring at a loaf of bread, and wondering when exactly the math stopped working in your favour.

The Cpi Math How They Track Your Rising Grocery Bills

The Cpi Math How They Track Your Rising Grocery Bills

The way the government actually measures this is through something called the consumer price index (CPI). Think of it as a massive, invisible shopping basket that gets updated constantly. They don’t just look at one thing; they track thousands of items—everything from the price of a liter of milk to the cost of a haircut or a new pair of trainers. Every month, they compare the total cost of that basket to what it cost the month before. If the total goes up, that’s your inflation number.

It isn’t always a perfect reflection of your actual life, though. The math can be a bit fiddly because they use something called “weighting.” For example, if the price of avocados spikes but the price of electricity drops significantly, the index might show that prices are stable, even if you’re feeling the pinch at the checkout. It’s a statistical average, not a personal receipt. Understanding this helps you see why the official news might say inflation is cooling down while your weekly grocery shop still feels like a minor financial crisis.

How to stop inflation from eating your lunch

  • Watch your subscriptions. When inflation hits, companies don’t just raise prices; they “adjust” your monthly rate. Check your bank statements for those creeping £1 or £2 increases—they seem small, but they’re the quietest way your money disappears.
  • Avoid the “lifestyle creep” trap. As prices rise, it’s tempting to move your money around to keep up, but try to keep your fixed costs as low as possible. If you can lock in a fixed-rate utility or a long-term contract now, do it before the next price hike.
  • Don’t let your cash rot in a zero-interest current account. If your money is just sitting there while inflation is at 4%, you are effectively paying the bank to hold your money. At the very least, find a high-yield savings account that actually moves with the market.
  • Buy in bulk, but only the stuff that doesn’t expire. If you see the price of your specific brand of pasta or laundry detergent spiking, grab a few extra units now. It’s a small hedge against the next price jump, provided you don’t end up with a pantry full of stuff you won’t actually use.
  • Understand the “real” value of your raises. If your boss gives you a 3% raise but inflation is at 5%, you didn’t actually get a raise—you just got a slightly slower pay cut. Always look at the net difference between your income growth and the cost of living.

The short version: what you actually need to know

Inflation isn’t just a number on the news; it’s the literal gap between what your money used to buy and what it buys now, effectively acting like a hidden tax on your bank balance.

The way the government tracks it (the CPI) is a useful guide, but it’s an average—meaning your specific reality might feel much worse if your biggest costs are rent and energy rather than a basket of generic goods.

You can’t “fix” inflation, but you can stop it from quietly eating your savings by making sure your money is actually working somewhere other than a zero-interest checking account.

The real definition of inflation

“Inflation isn’t some abstract economic theory you need a PhD to understand; it’s just the quiet way your bank balance loses its muscle over time, making the same life you lived last year feel significantly more expensive today.”

Saoirse Doyle

The bottom line

Understanding inflation: The bottom line.

At the end of the day, inflation isn’t some mysterious force designed to ruin your weekend; it’s just the math of how much your money can actually do. We’ve looked at how your purchasing power shrinks, how the CPI attempts to track that creeping cost in your shopping trolley, and why a tenner doesn’t go nearly as far as it did when I started my first IT job. It’s easy to feel like you’re losing a game you never signed up to play, but understanding that inflation is a constant variable helps take the sting out of the surprise. You can’t stop the numbers from moving, but you can stop being blindsided when your monthly budget suddenly feels tight.

My advice is to stop waiting for things to “go back to normal,” because the economy rarely works that way. Instead, focus on the small, boring things that actually give you some ground to stand on—like keeping an eye on those creeping subscription costs or making sure your savings aren’t just sitting idle while prices climb. You don’t need a PhD in economics to navigate this; you just need to build a life that is resilient to the fluctuations. Take it one step at a time, keep your overheads low, and remember that being aware of the problem is half the battle won.

Frequently Asked Questions

If prices are going up, why does it feel like my wages aren't even keeping pace?

It’s because of a lag between the cost of living and the rhythm of paychecks. Prices for things like milk or electricity tend to jump immediately, but wages usually only move during annual reviews or when you switch jobs. If your rent goes up by 10% in January but your boss doesn’t look at your salary until December, you’ve effectively taken a massive pay cut for eleven months. It’s a gap that eats your savings alive.

Is there a way to actually protect my savings so they don't just evaporate over time?

The short answer is: you can’t “beat” it entirely, but you can stop the bleeding. Most people leave money in a standard current account, which is basically just letting it evaporate. You need to look at high-yield savings accounts or index funds—things that actually grow. Just a warning: with any investment, there’s a risk you could lose money if the market dips. If you go the subscription route for any financial app, check the exit terms first.

At what point does inflation stop being a "nuisance" and start becoming a genuine crisis?

It stops being a nuisance the moment you can no longer plan for next month. A little price creep is annoying, but a crisis hits when your “buffer”—that bit of savings you keep for a broken boiler or a car repair—is being eaten alive by the cost of milk and petrol. When you stop choosing between a better brand and a cheaper one, and start choosing between groceries and utilities, that’s when the system is actually breaking.

How to Stop Notifications Running Your Nervous System

I spent six years in a cramped helpdesk office listening to people describe the exact same feeling: that low-grade, vibrating panic every time their phone buzzed on the desk. Most productivity gurus will tell you that you need a $50-a-month “focus app” or a complete digital detox in a silent retreat to fix it, but that’s mostly nonsense. You don’t need a new ecosystem; you just need to learn how to manage notification anxiety by reclaiming the settings you already pay for. The problem isn’t your lack of willpower; it’s that your devices are designed to treat every trivial email like a house fire.

I’m not going to sell you on a lifestyle overhaul or a complicated new workflow. Instead, I’m going to show you the actual buttons to click to silence the noise without missing the things that matter. We’ll go through the specific settings for iOS and Android, look at which “Do Not Disturb” features actually work, and I’ll tell you exactly what happens to your data if you decide to go completely dark. This is the boring, practical version of finding some peace in your pocket.

Table of Contents

Breaking the Dopamine Loops and Notifications That Own You

Breaking the Dopamine Loops and Notifications That Own You

The problem isn’t just that your phone is loud; it’s that it’s designed to be addictive. Every time that little red bubble appears or your pocket vibrates, your brain gets a tiny hit of dopamine. It’s a physiological trick. These dopamine loops and notifications are engineered by people much smarter than us to ensure we keep coming back, turning a tool meant for utility into a slot machine in your pocket. When you’re constantly reacting to these micro-stimuli, you aren’t actually using your phone—it’s using you.

To start managing digital overwhelm, you have to stop treating every ping as an emergency. I spent years watching people panic over “urgent” emails that were actually just newsletters. My first rule is to go into your settings and strip away the color. Turn off those red notification badges entirely. They are visual stressors designed to create a sense of unfinished business. If you can’t see the red dot, the itch to check your phone subsides. It’s a simple way of setting smartphone boundaries that doesn’t require a complete digital detox, just a bit of intentional friction.

Setting Smartphone Boundaries That Actually Stick

Setting Smartphone Boundaries That Actually Stick.

The problem with most digital wellness strategies is that they feel like homework. You try to “mindfully engage” with your device, but then a group chat blows up and suddenly you’re forty minutes deep into a thread about a brunch spot you’ll never visit. To make setting smartphone boundaries actually work, you have to stop relying on willpower. Willpower is a finite resource, and your phone is designed to drain it.

Instead, start with the physical layout of your home screen. Move every single app that isn’t a utility—like Maps, Notes, or your Calendar—into a single folder on the second or third page. If you can’t see the colorful icon the second you unlock the screen, the urge to click it drops significantly. It’s about increasing the friction between your impulse and the action.

Finally, treat your bedroom like a dead zone. If your phone is your alarm clock, you’ve already lost the battle against managing digital overwhelm. Buy a cheap, $10 analog clock and charge your phone in the kitchen. This one change does more for reducing screen time stress than any expensive meditation app ever could.

Five ways to stop the buzzing from running your life

  • Kill the red dots. Those little badges on your app icons are designed to make you feel like you’ve missed something urgent. Go into your settings and turn off “Badge App Icon” for everything except maybe your actual text messages. You’ll find the world doesn’t end if you don’t see a little red ‘5’ sitting on your Instagram icon.
  • Audit your “Priority” list. Most phones have a “Do Not Disturb” or “Focus” mode. Don’t just turn it on when you’re sleeping; set it so that only specific people—like your partner or your kid’s school—can actually break through the silence. If it isn’t a human being needing you for something real, it can wait until you’re ready to look at it.
  • The “One-Screen” rule. If you have five different social media apps on your home screen, you are inviting a distraction every time you unlock your phone to check the weather. Move the loud apps—the ones that ping constantly—into a folder on the second or third page. Making them harder to reach gives your brain a second to ask, “Do I actually want to do this?”
  • Disable “Raise to Wake.” It sounds small, but every time you move your phone on the table, the screen lights up with a new preview of a message or an email. It’s a tiny, constant drip of information that keeps your brain in a state of low-level alertness. Keep the screen dark until you actually decide to pick it up.
  • Check the “Push” vs “Fetch” settings. For email specifically, stop letting your phone “Push” new mail to you instantly. Switch it to “Fetch” every 30 minutes or even once an hour. You aren’t a high-frequency trader; checking your inbox on a schedule rather than reacting to every incoming ping will save your sanity.

The bottom line

If a notification doesn’t require an immediate action from you, it doesn’t deserve to make your phone vibrate. Turn off the “likes” and the news alerts; they aren’t emergencies, they’re just noise.

Use “Do Not Disturb” or Focus modes as a default setting, not a punishment. It’s much easier to let people through when you actually need them than it is to constantly fight the urge to check a buzzing pocket.

Audit your apps once a month. If an app is constantly pinging you just to keep you using it, delete it. Your digital space should serve you, not the other way around.

The cost of the constant ping

We’ve been conditioned to think that being reachable at all times is a feature, but most of the time, it’s just a bug in our attention span. You aren’t actually more productive because you answered a Slack message in thirty seconds; you’re just better at being interrupted.

Saoirse Doyle

Getting your head back above water

Getting your head back above water.

At the end of the day, this isn’t about finding some magical, zen-like state of digital purity; it’s just about reclaiming a bit of your own attention. We’ve gone through the heavy lifting: stripping back the useless pings, setting up those crucial focus modes, and deciding—once and for all—that your phone is a tool you use, not a boss that manages you. If you do nothing else, just silence the non-human alerts. You don’t need a vibration to tell you a stranger liked a photo or that a sale is happening. Once you stop reacting to every little buzz, you’ll realize that the world doesn’t actually stop spinning just because you didn’t see a message within thirty seconds of it arriving.

I spent years in IT watching people burn out because they thought they had to be “always on” to be useful. They don’t. The most productive people I ever worked with weren’t the ones answering emails at midnight; they were the ones who knew exactly when to close the laptop and walk away. Don’t feel guilty if your setup isn’t perfect or if you slip up and spend twenty minutes scrolling when you meant to check the weather. Just reset, turn the red dots back off, and try again tomorrow. You aren’t broken, and your attention isn’t a resource to be mined—it’s yours to keep.

Frequently Asked Questions

What happens to my important work emails if I turn off all my notifications during the weekend?

Nothing happens to the emails. They don’t vanish; they just sit in your inbox waiting for you to look at them. Turning off notifications isn’t deleting data, it’s just closing the door so you aren’t interrupted. If you’re worried about a genuine emergency, tell your boss or clients that you’re offline and give them a way to call you if the building is actually on fire. Otherwise, the emails will be there on Monday.

Is there a way to filter out the junk without accidentally silencing my actual family or boss?

You don’t need a complex filter; you just need “Focus Modes” or “Do Not Disturb” settings. On both iPhone and Android, you can set a profile that silences everything except specific people. I tell my users to whitelist their boss and their family, and maybe their landlord. Everyone else—the news alerts, the shopping apps, the random LinkedIn pings—gets sent to the lock screen to be dealt with later when you actually have the headspace.

If I go through the effort of setting up "Do Not Disturb" schedules, will my phone just find a way to bypass them?

It won’t find a way to bypass them, but it will find a way to annoy you if you don’t configure the “exceptions” correctly. Most people set a schedule and then realize their kid or their boss can still break through. Go into your settings and look for “Allow Calls From” or “Repeated Calls.” If you don’t whitelist your inner circle, you’ll just end up turning the whole feature off out of frustration.

How to Batch Tasks and Get an Hour Back

I spent six years at a helpdesk listening to people explain why their “productivity systems” weren’t working, and 90% of the time, it was because they were trying to use a $50-a-month app to solve a problem that required five minutes of common sense. Most productivity gurus will try to sell you a complex, multi-layered ritual involving color-coded calendars and “deep work” timers just to explain how to batch similar tasks. It’s exhausting. They make it sound like a spiritual journey, but in reality, it’s just about stopping the constant, brain-melting friction of jumping from an email to a spreadsheet to a phone call every three minutes.

I’m not here to sell you a subscription or a new way of living. I’m just going to show you how to group your work so your brain actually has a chance to settle into a rhythm. We’ll go through the practical steps of what to group, how to protect those blocks of time, and—most importantly—how to do it without needing a PhD in time management. This is the uncomplicated version: just a few tweaks to your existing routine so your tools stop getting in your way.

Table of Contents

Reducing Cognitive Load by Grouping Your Messy to Do Lists

Reducing Cognitive Load by Grouping Your Messy to Do Lists

The problem with most to-do lists is that they aren’t actually lists; they’re just a chaotic dumping ground for everything from “buy milk” to “reformat the server.” When you look at a list like that, your brain tries to solve every problem simultaneously. This is exactly how you end up minimizing mental fatigue by accident—by simply giving up and staring at a wall for twenty minutes. Every time you jump from a creative task to an administrative one, you pay a “switching tax” that drains your focus.

Instead of treating your list like a chronological queue, try grouping them by the type of brainpower required. If you have five different emails to send, don’t scatter them throughout the day. Group them. By reducing cognitive load through these small clusters, you stop the constant mental whiplash of shifting gears. It’s not about being a productivity robot; it’s about making sure you aren’t wasting your limited afternoon energy on the friction of deciding what to do next rather than just doing it.

Deep Work Strategies That Actually Survive a Tuesday

Deep Work Strategies That Actually Survive a Tuesday

The problem with most “deep work” advice is that it assumes you’re working in a vacuum, free from the chaos of a Tuesday afternoon. In reality, your focus is a finite resource that gets drained every time a notification pings or a colleague asks a “quick” question. To make deep work strategies actually stick, you have to stop treating focus like a superpower and start treating it like a scheduled appointment. This means using time blocking techniques to carve out non-negotiable chunks for your hardest tasks, rather than just hoping you’ll feel “in the zone” by sheer willpower.

If you try to jump from a high-level strategy meeting straight into writing a complex report, you’re going to hit a wall. That’s where minimizing mental fatigue comes in. I’ve learned that you can’t just switch gears instantly; you need a buffer. I usually schedule a “shallow” task—like clearing my inbox or updating a spreadsheet—between heavy lifting sessions. It’s not about being busy; it’s about managing your daily workflow so you don’t end the day feeling like your brain has been through a paper shredder.

Five ways to actually make batching work without losing your mind

  • Group by tool, not just by topic. It’s much faster to handle all your “email and Slack” tasks in one go than it is to jump between your inbox and your project management software every ten minutes. If you’re already in one app, finish everything that needs to happen there before you close the tab.
  • Set a timer for the “fiddly” stuff. Small, annoying tasks like filing digital receipts or updating your budget can bleed into your whole afternoon if you let them. Give yourself twenty minutes to clear the deck, then stop. If it’s not done, it waits for the next batch.
  • Don’t batch your brain-drainers with your brain-builders. If you have a massive, difficult report to write, don’t try to batch it with your quick administrative updates. You’ll end up doing a mediocre job at both because your focus is being pulled in two different directions.
  • Prepare your batches the night before. There is nothing worse than sitting down for a “deep work” block only to realize you don’t have the login credentials or the specific files you need. Get the ingredients on the counter so you can actually start cooking when the time comes.
  • Accept that some days the batching will fail. Some Tuesdays are just chaotic, and trying to force a rigid schedule when everything is on fire is a recipe for frustration. If the system is getting in your way rather than helping, scrap the batch for the day and just deal with the fires as they come.

The short version for when you're too busy to read the whole thing

Stop treating every notification like an emergency; pick two or three specific times a day to handle emails and messages so you aren’t constantly resetting your brain’s focus.

Group your “shallow” tasks—the quick, administrative bits like paying bills or filing receipts—into a single block so they don’t bleed into the time you need for actual work.

Don’t buy a complex new productivity app to manage your batches; just use a calendar or a simple list, and remember that if a tool requires a monthly subscription just to organize your day, it’s probably more work than it’s worth.

The real reason your to-do list feels like a heavy lift

Most productivity gurus want you to find a “flow state,” but honestly? I just want to stop switching between my email, my banking, and my spreadsheet every five minutes. Batching isn’t about being a high-performer; it’s about not letting your brain feel like it’s being pulled through a hedge backwards every time you try to finish a single task.

Saoirse Doyle

The takeaway

The takeaway: task batching protects your focus.

At the end of the day, task batching isn’t about becoming a productivity machine or finding some magical way to squeeze more hours out of your afternoon. It’s just about stopping the constant mental friction that comes from jumping between a spreadsheet, an email, and a quick phone call every ten minutes. By grouping your admin, your deep work, and your small “fiddly” tasks into dedicated blocks, you give your brain a chance to actually settle into a rhythm. You don’t need a complex new software suite to make this happen; you just need to stop treating every notification like an emergency and start protecting your focus.

If you try this and it fails on Tuesday because everything went sideways, don’t worry. That’s just how life works. The goal isn’t to build a rigid, unbreakable schedule that leaves no room for error; the goal is to build a system that is easy enough to actually use when things get messy. Start small—maybe just batch your emails once in the morning and once in the afternoon—and see if it helps. Most of the time, the best system is simply the one that stops getting in your way so you can finally finish your work and go do something else.

Frequently Asked Questions

What do I do when an urgent, unplanned task pops up right in the middle of a batching block?

This is where most people abandon their whole plan and just give up for the day. Don’t do that. First, ask yourself: if I don’t do this in the next ten minutes, will something actually catch fire? If the answer is no, write it down on a physical scrap of paper and get back to your batch. If it is a genuine emergency, finish the tiny sub-task you are currently mid-way through, then pivot. Don’t just jump; close the loop first.

How do I figure out which tasks are actually "similar" enough to group together without making a mess?

Don’t try to group by “importance”—that’s a trap. Instead, group by the “mode” your brain has to be in. I look for three things: the tools you’re using, the level of focus required, and the energy it takes. If you’re opening five different browser tabs to answer emails, those are one batch. If you’re staring at a spreadsheet, that’s another. If a task requires a different tool or a different mental gear, it stays in its own lane.

Is it worth the effort to batch small, five-minute tasks, or am I just wasting time setting up the system?

Honestly? If you spend twenty minutes building a complex spreadsheet just to track five-minute tasks, you’re wasting your time. That’s just procrastination in a fancy suit. Don’t overthink it. Just grab those tiny, nagging things—the quick emails, the bill payments, the quick replies—and dump them into one single block, maybe once a day or every other morning. If it takes less than two minutes, just do it. If it’s five, batch it. Keep the system invisible.

How to Set Up a Nas and Whether You Need One

I spent three years at a helpdesk listening to people panic because their “seamless” cloud storage suddenly hit a subscription ceiling or, worse, vanished during a server outage. The big myth is that you need a degree in network engineering or a server rack in your basement to secure your data; the reality is that most people just want a reliable place to dump their photos without paying a monthly “convenience tax” forever. If you’re tired of wondering where your files actually live, learning how to set up a nas is less about high-level architecture and more about buying the right box and plugging it in correctly.

In this guide, I’m skipping the marketing fluff about “unparalleled data synergy” and getting straight to the hardware. I’ll walk you through exactly what to click during the initial configuration, which drive types won’t die on you in six months, and—most importantly—what happens to your data if you decide to stop paying for a specific manufacturer’s premium software suite. We’re going to focus on a boring, stable setup that stays out of your way so you can get back to your actual life.

Table of Contents

Guide Overview

Total Time: 3-5 hours
Estimated Cost: $200-$600
Difficulty: Intermediate

Tools & Supplies

  • Screwdriver (Phillips head for case assembly)
  • Ethernet cable (To connect to your router)
  • USB flash drive (8GB+ for OS installation)
  • Computer (To access the web management interface)
  • NAS enclosure or old PC (1 unit)
  • Hard drives or SSDs (2+ units for RAID redundancy)
  • RAM (If upgrading existing hardware)
  • Network switch (Optional, for high-speed local connectivity)

Step-by-Step Instructions

  • 1. First, you need to pick your hardware, and please don’t overcomplicate this. You have two real choices: buying a pre-built unit from a company like Synology or QNAP, or building your own using an old PC and some software like TrueNAS. If you want to actually use your weekend for something other than troubleshooting kernel panics, buy the pre-built box. It’s more expensive upfront, but it means you aren’t playing IT support for your own living room.
  • 2. Once the box arrives, you need to buy the hard drives. This is where people usually trip up and waste money. Do not just grab whatever is on sale at the big-box retailer. You need NAS-specific drives (like Western Digital Red or Seagate IronWolf). These are designed to vibrate less and run 24/7 without dying of heat exhaustion. Also, buy one more drive than you think you need; you’ll thank me when you’re setting up redundancy.
  • 3. Physically, the setup is pretty mindless. Slide the drives into the bays until they click, plug the NAS into your router using an Ethernet cable—do not try to do this over Wi-Fi—and plug in the power. If you try to configure a NAS over a wireless connection, the initial handshake often fails, and you’ll end up staring at a blinking orange light wondering if you’ve just bought a very expensive paperweight.
  • 4. Now you have to find the device on your network. Most manufacturers have a web address you can type into your browser (something like `find.synology.com`) to locate the unit. Once you’re in, it will walk you through installing the operating system. This part takes a while because it’s downloading several gigabytes of data. Just let it finish; don’t pull the plug or refresh the page halfway through, or you’ll be starting this whole process from scratch.
  • 5. Next comes the “Storage Pool” and “Volume” setup. This is the part that sounds intimidating but is really just telling the computer how to use the disks. You’ll want to select RAID configuration (usually SHR or RAID 5 for beginners). This is the magic that ensures if one of your hard drives inevitably dies in three years, your photos and documents stay safe on the remaining ones. It’s not a replacement for a backup, but it keeps you from panicking when a drive makes a clicking sound.
  • 6. Create your user accounts and shared folders. I highly recommend creating a separate “admin” account with a very long password and then making a standard user account for your daily life. If you use the admin account for everything, a single piece of malware or a stray click can have much easier access to your entire digital life. Set up a folder for “Photos,” one for “Documents,” and maybe one for “Backups.
  • 7. Finally, map the drives to your computer so they show up like a normal hard drive. On Windows, this is “Map Network Drive”; on a Mac, it’s “Connect to Server.” Once this is done, you can drag and drop files just like you would to a USB stick. Just remember: a NAS is a place to store things, not a place to keep them. If you have truly irreplaceable files, make sure they are also backed up to a separate physical location or a cloud service.

The Nas Hardware Requirements What You Actually Need to Buy

The Nas Hardware Requirements What You Actually Need to Buy

Before you start clicking through setup wizards, we need to talk about the actual physical stuff. Most people make the mistake of buying a massive, high-end unit thinking it’ll make their life easier, but for a home setup, you mostly just need something that won’t overheat in a cupboard. When looking at nas hardware requirements, don’t get distracted by shiny marketing specs for “AI acceleration” or anything else that sounds like jargon. You need a reliable processor, enough RAM to handle your file transfers, and—most importantly—a chassis that feels sturdy.

The real money, and the real headache, is in the drives. Do not, under any circumstances, use standard desktop hard drives; they aren’t built to run 24/7 and they will fail you. You need NAS-specific drives designed for constant spinning. Once you have the drives, you’ll be configuring raid arrays, which is basically just the way the box uses multiple disks to protect you if one dies. If you buy a four-bay unit, aim for at least two drives to start with. It’s better to have an empty slot for an upgrade later than to realize you’ve run out of room three months in.

A Nas Drive Installation Guide for People Who Hate Manuals

A Nas Drive Installation Guide for People Who Hate Manuals

Once you’ve got your drives and your box, you’re going to be staring at a set of plastic trays and a handful of screws. Most manuals make this sound like a delicate surgical procedure, but it’s mostly just sliding things into slots. My one rule for this nas drive installation guide is this: check your drive orientation before you push. If you force a drive in crooked, you aren’t just being “efficient,” you’re risking a bent connector that will make your entire setup a headache. If your enclosure uses tool-less trays, just make sure the drive is seated firmly against the backplane; if it feels wiggly, it isn’t in right.

After the physical part is done, you’ll hit the screen where the real work begins. This is where you’ll be configuring raid arrays, and this is the moment where most people make a mistake they regret six months later. Don’t just pick the fastest option because a forum told you to; pick the one that actually protects your data if a single drive decides to die. It’s better to lose a bit of total capacity now than to lose every single photo of your last five years because you tried to save a few gigabytes.

Five things I wish someone had told me before I hit 'format'

  • Don’t skimp on the drives, but don’t buy “enterprise” ones just because the salesperson used a big word; look for NAS-rated drives like Western Digital Reds or Seagate IronWolfs, because they’re actually designed to vibrate in a box full of other spinning disks without dying.
  • Set up your RAID configuration for redundancy, not for extra space; remember that RAID isn’t a backup, it’s just a way to keep the system running when one drive inevitably decides to quit.
  • Disable the “easy” remote access features if you can; most manufacturers have a one-click way to access your files from anywhere, but it often opens a digital back door that’s about as secure as a screen door in a thunderstorm.
  • Map your network drives immediately after setup so you actually use the thing; if you leave your files sitting in a web browser interface, you’ll eventually get frustrated and go back to saving everything to your desktop like it’s 2005.
  • Check your subscription-free status; if you’re using a brand that requires a monthly fee just to access your own hardware’s advanced features, walk away—your data belongs to you, not to their quarterly earnings report.

The TL;DR version

Don’t overspend on a shiny new setup; buy enough storage to hold your current mess plus about 30% more for when you inevitably download more things.

Redundancy isn’t a magic shield; a NAS protects you from a single drive dying, but it won’t save you if you accidentally delete a folder or if your house floods.

Check the “exit strategy” for any software you install on the box—if the manufacturer goes bust or hides your files behind a new subscription, you’re stuck.

The truth about your data

A NAS isn’t a magic vault that makes your digital life organized; it’s just a box of spinning disks that you’ve given a brain. If you don’t understand exactly how it’s storing your files and what happens to them when a drive inevitably dies, you haven’t built a backup system—you’ve just built a very expensive way to lose everything at once.

Saoirse Doyle

Don't let it sit in the box

Don't let it sit in the box.

So, there you have it. You’ve picked your hardware, slotted in the drives without losing a finger, and hopefully didn’t spend more time than necessary staring at a blinking LED that looks like it’s judging you. Just remember the golden rule of everything I’ve ever written: a NAS is only as good as your backup strategy. If you set this up and then treat it as your only copy of your wedding photos or tax returns, you haven’t actually solved a problem; you’ve just moved your data to a more expensive single point of failure. Make sure you have an off-site copy or at least a secondary drive that isn’t plugged into the same power strip, because hardware eventually fails, and it usually does so at the most inconvenient moment possible.

It feels like a lot of friction right now, I know. It’s much easier to just pay the monthly fee to a big tech company and let them worry about the servers. But there is a quiet, massive relief in knowing that your digital life is sitting on a physical box in your living room, governed by your rules and not a subscription algorithm. Once you get past the initial fiddly bits of the setup, the system should just… stay out of your way. You didn’t build this to become a sysadmin; you built it so you could stop worrying about storage and get back to actually using your devices. Now, go check on your bread starter; I think I heard the timer go off.

Frequently Asked Questions

If one of the drives fails, am I actually going to lose all my photos, or is the redundancy thing real?

The short answer is: yes, the redundancy is real, but it isn’t magic. If you’ve set up your drives in a RAID configuration (like RAID 1 or RAID 5), the system uses the extra data to rebuild what was lost on the failed drive. You won’t lose your photos immediately. However, “redundancy” is not a “backup.” If the whole box gets hit by a power surge or a coffee spill, those photos are gone.

Do I really need to plug this into my router with a cable, or can I just use the Wi-Fi like everything else?

You can, technically, but please don’t. If you try to run a NAS over Wi-Fi, you’re basically trying to drink a milkshake through a cocktail straw. It’ll work for a tiny file here and there, but the moment you try to back up a laptop or stream a movie, it’ll stutter and die. Plug it into the router with an Ethernet cable. It’s one more wire to hide, but it’s the only way to keep it reliable.

What happens if I decide I don't want to pay for the extra storage space next year—can I just move my files back to my laptop?

The short answer is yes, but it’s a bit of a chore. Your files aren’t held hostage; they’re just sitting on a physical drive in your house. If you cancel a cloud-sync subscription or stop using a managed service, you just plug the drives into your computer and drag the folders back over. It’s not a “one-click” experience, and it’ll take as long as your Wi-Fi or USB cable allows, but your data stays yours.